Skip to main content

Moving Tips

The Complete Office Moving Checklist for a Smooth Relocation

If you’ve been looking for an office moving checklist to guide you and your team through every phase of this transition, you’re in the right place. An office move is a high-stakes move where a single mistake, like a lost server cable, can lead to expensive downtime and a frustrated team. Most moving experts agree that one true and tested way to avoid situations like this is to plan your move with a comprehensive office relocation checklist.

When making your office moving checklist, you have to factor in every step of the moving process, from the initial planning to the final setup in your new office space.

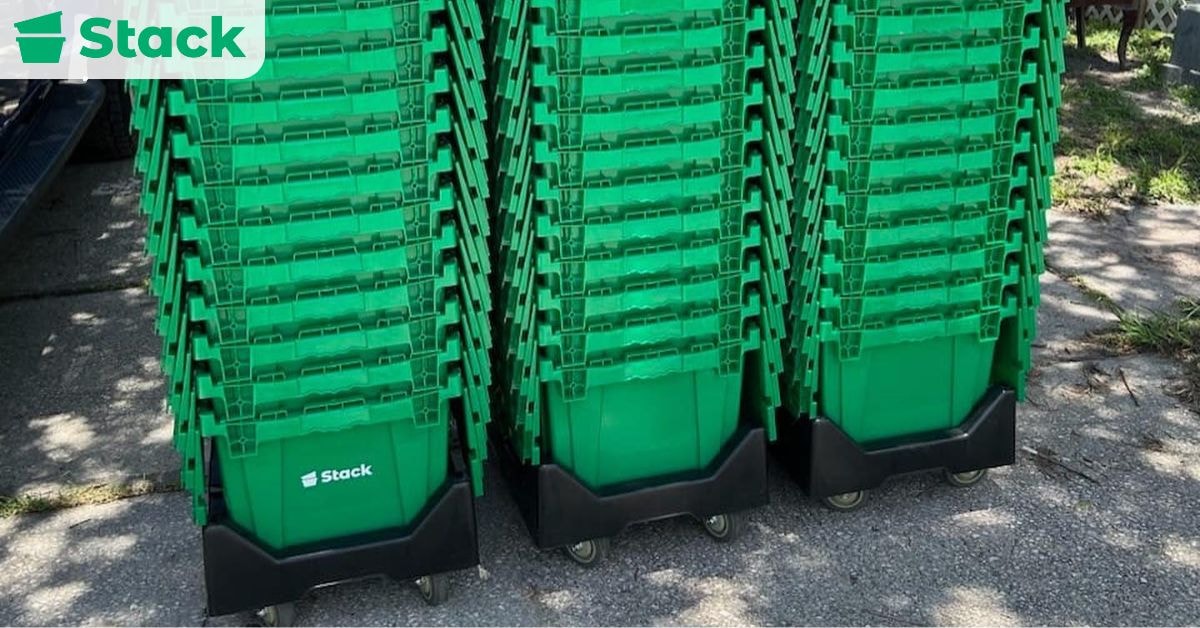
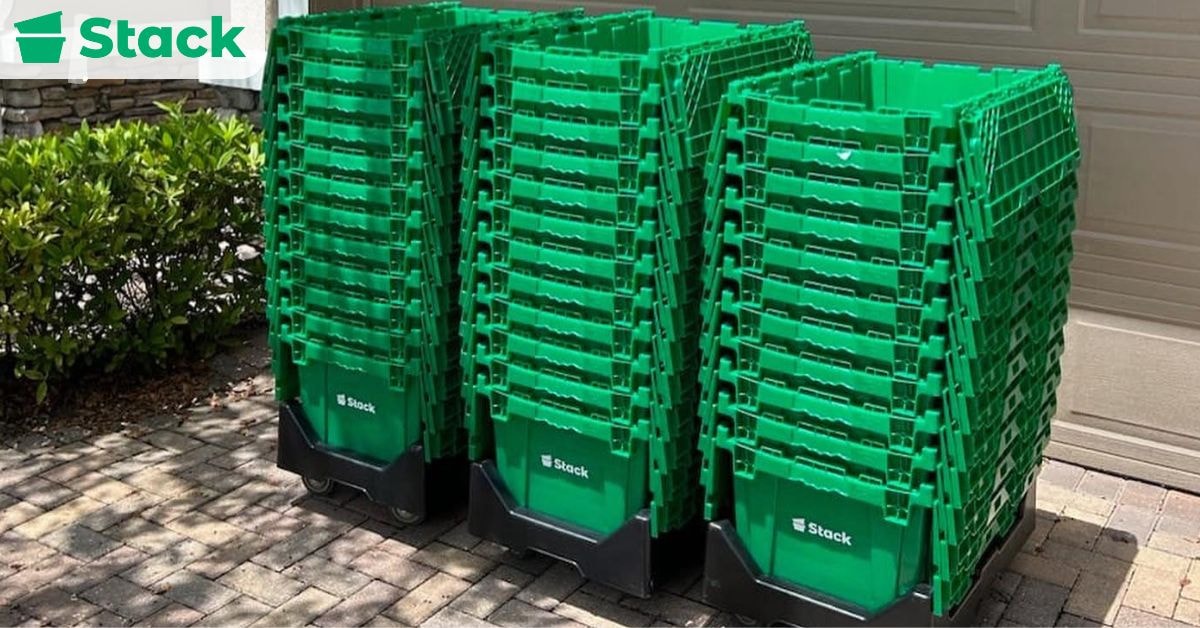
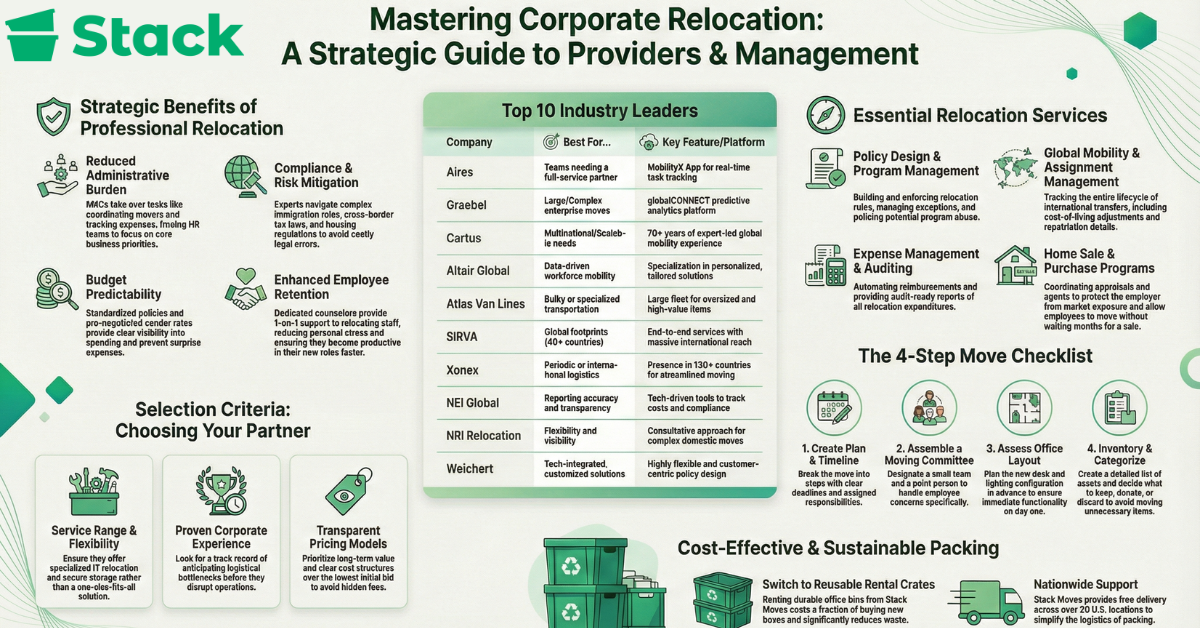
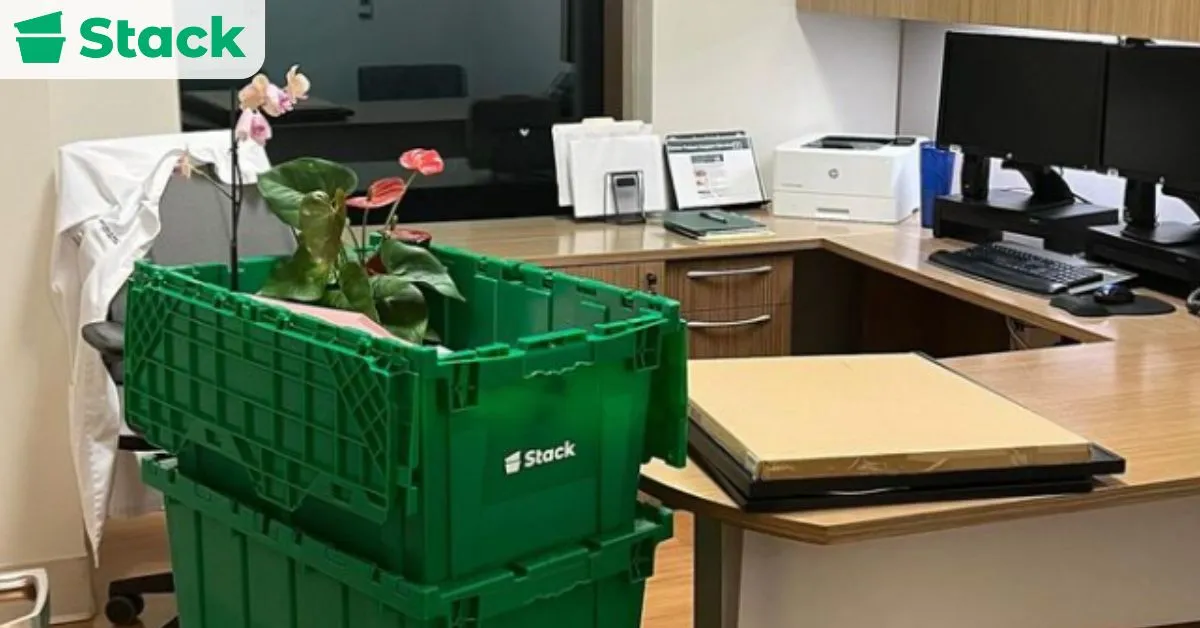
Not sure what packing solution to use for your upcoming office move? Consider renting Stack Moves office moving crates, trusted by moving professionals for their durability, stackability, and ability to keep equipment protected and organized. Request a custom quote to get started.

In this blog we will provide a step-by-step office moving checklist organized by timeline, helping you plan every stage of your relocation from start to finish. We will also share practical tips on choosing the right packing supplies and proven ways to reduce moving costs without disrupting your operations.

Comprehensive Office Moving Checklist for a Smooth Relocation

Most business moves consist of four major parts: planning and preparation, logistics and packing, move-day execution, and post-move setup. To help you understand the relocation process better, our moving experts broke them down into an office moving checklist with clear timelines. This way, you can track responsibilities, stay ahead of deadlines, and keep operations running smoothly without unnecessary downtime or last-minute surprises.

Office Moving Checklist: 6–12 Months Before Moving Day

Two professionals discussing and planning an office move while reviewing documents and timelines during the early pre-move planning stage.

At this stage your goal should be to identify potential challenges early and make informed decisions that reduce risk, cost, and downtime later in the process.

1. Assess Your Office Needs

Before committing to a move, take a good look at your current setup to determine what furniture and equipment actually deserve a spot in your new office. This is the perfect time to evaluate whether your existing pieces still meet your standards for comfort and durability or if they need to be replaced with items that will fit your new space better. Once you’ve made those decisions, coordinate with your suppliers to schedule delivery for the new items in time for everything to be installed, tested, and ready for use the moment the office officially opens.

2. Create A Moving Plan

Think of your move like a project with milestones that need to be hit on schedule to show that progress is being made. That is where a moving plan comes in. Having a clear plan early helps prevent last-minute scrambling and keeps everyone aligned. Your moving plan should clearly outline responsibilities, key milestones, and deadlines, backed by an internal moving team or a dedicated point person to lead the charge. This plan should account for every phase of the move, including packing schedules, IT shutdowns, move-day supervision, and post-move setup.

3. Research New Office Locations

Remember that when choosing a new office, what truly matters is a space that supports your daily business operations. You want to look for a layout that naturally enhances your team’s workflow while providing enough square footage to house both your staff and equipment comfortably. Additionally, your new location should be accessible not just to employees but also to clients so that it’s convenient for everyone.

4. Take Inventory of Office Assets

Before you move anything, take inventory of your office equipment and supplies by creating a moving inventory list. This will help you decide what to keep, sell, or discard, making the move easier. This audit is essential for deciding what to keep, sell, or discard, significantly lightening the load for your movers. This is also an opportune time to assess your IT systems and tech equipment to determine what should be upgraded or replaced. Determining which IT systems are outdated now allows you to plan for upgrades before you arrive, rather than dealing with obsolete equipment in a brand-new office.

5. Begin IT and Infrastructure Planning

You should begin coordinating with your IT team and service providers the moment the move is confirmed. Map out the requirements for everything from internet and phone lines to security systems and access controls in the new building. Also create a migration plan that covers data backups, equipment transport, and rigorous testing so you can head off technical glitches before they happen. Getting this infrastructure right is the fastest way to ensure your team is back to work without a hitch the day after the move.

3-6 Months to Moving Day

Business professionals reviewing floor plans and calculating costs while setting a moving budget and timeline 3–6 months before moving day.

6. Set Your Moving Budget

Your budget should cover obvious moving costs like professional moving services and packing materials as well as overlooked ones like minor renovations. Your budget should be based on actual information where possible. Look at what similar businesses have spent on office relocations, and review any costs from previous moves your company has undertaken. Also remember that unexpected costs almost always arise, so it’s wise to include a contingency buffer in your budget. A good rule of thumb is to set aside 10–15% of your total projected moving costs as a safety net.

7. Build A Moving Timeline

In the early stages of your planning, you should create a moving timeline. By assigning realistic deadlines to every task and reviewing your progress regularly, you can prevent the last-minute panic that leads to mistakes. A typical office relocation time frame looks something like this:

  • 6-12 Months Before Moving: Begin the search for a new office location, create a moving team, and start preparing your budget.
  • 3-6 Months Before Moving: Commit to hiring your vendors and communicating the specific logistics to your staff.
  • 1-3 Months Before Moving: Finalize the new office address, hire a moving company, and communicate detailed plans to employees.
  • 1 Week Before Moving: Pack non-essential items, back up data, and ensure all final preparations are complete.

8. Design the New Office Layout

This is the perfect opportunity to fix what wasn’t working in your old office. Start by designing a layout that meets your team’s needs. As you design, think about how your team actually moves throughout the day—pay attention to the placement of breakrooms, the flow of natural light, and the accessibility of storage areas. You can use design software like SmartDraw or Floorplanner to assist you. Don’t forget to factor in possible future growth when designing the office layout. Ensure your layout is flexible enough to accommodate new hires and evolving business needs so you don’t outgrow the space too quickly.

9. Hire Professional Movers

When it’s time to book your movers, look for a company that specializes in commercial relocations rather than just residential moves. We recommend getting detailed quotes from at least three different providers to compare not just the price but also the level of service offered. Ask specifically about their experience with IT setup, furniture assembly, and whether they offer comprehensive insurance for lost or damaged equipment. If you choose to manage the logistics in-house, make sure you have a dedicated coordinator to handle truck schedules, driver communication, and loading priorities to keep the day moving smoothly.

1-3 Months to Moving Day

Professional coordinating an office move while working on a laptop and making phone calls during the final 1–3 months before moving day.

10. Finalize the New Office Lease

Confirm all lease terms with your landlord or property manager to avoid last-minute issues. Take the time to double-check move-in dates and building access permissions. Also clarify who is responsible for repairs or renovations during the hand-off. If possible, try to secure early access to the space so you can measure the rooms and plan your furniture placement in person.

11. Notify Employees, Clients, and Vendors

As soon as your new location is confirmed, share the news with your employees to give them ample time to prepare. Be transparent about the moving timeline and set clear expectations regarding their individual roles, like packing their own desks or coordinating their department’s inventory. Once the internal team is briefed, notify your clients and vendors so they can update their records, ensuring there’s no lapse in service or missed deliveries during the transition.

12. Sort and Declutter Office Items

A move is the perfect excuse to purge what you don’t need. Go through every piece of equipment, furniture, and supply in your office to identify what’s essential, what can be donated or sold, and what should be discarded. Decluttering not only reduces moving costs and packing time, but it also helps your new office start fresh without unnecessary clutter. Pay special attention to sensitive or high-value items, labeling and setting them aside for extra care during the move.

13. Plan IT and Utilities Setup

Your business can’t function without power and connectivity, so treat your utility setup as a top priority. Work closely with your internal IT team and service providers to schedule disconnections, transfers, and installations so systems are ready on move-in day. Some offices choose to outsource this part of the move to companies that offer office IT relocation services to ensure everything is safely moved and reinstalled without downtime.

This is also the time to perform a final backup of all critical data and create a checklist of devices, servers, and connections that must be reinstalled or tested immediately. This early coordination is the only way to prevent data loss and ensure your team can jump back into their work without technical hitches.

1 Month to Moving Day

With just a month left, the move is entering its most hands-on phase. This is the time to start preparing your office physically, making sure every item has a place, and ensuring critical systems like IT and furniture setups are scheduled for a smooth transition.

14. Begin Packing Non-Essential Items

Start by packing items that aren’t immediately needed for daily operations, such as seasonal supplies, archived files, and rarely used equipment. Use high-quality boxes or moving crates to protect contents, and avoid overloading them to prevent damage. Clearly label each box with its contents and the department it belongs to; this will make unpacking faster and more organized at the new office.

15. Label and Organize Boxes by Department

To avoid a mountain of mystery boxes at the new office, you and your team should follow a strict labeling system. One effective way to label boxes for an office move is to assign a specific color to each department so that movers know exactly where each item belongs without needing to ask. Alternatively, you can number each box and link it to your inventory moving list. This approach minimizes confusion on moving day and allows teams to resume work quickly in the new space.

16. Coordinate Furniture and Equipment Deliveries

It’s time to touch base with your suppliers and confirm the delivery schedule for any new office furniture or tech equipment. Proper coordination here ensures that your major assets are staged and ready for use the moment the office doors open. Verify that large pieces, such as desks, conference tables, or IT servers, have access to elevators, doorways, and staging areas in both the old and new offices.

1-2 Weeks to Moving Day

Office employees packing and labeling boxes while organizing supplies during the final 1–2 weeks before moving day.

The countdown has officially begun, and the margin for error is shrinking. Now is the time to finalize assignments, lock in schedules, and make sure all systems are ready for a seamless moving day.

17. Finalize Employee Assignments

Your team should have specific people assigned to supervise the loading process, coordinate with vendors, and act as a resource for the rest of the staff. To keep things from becoming overwhelming, appoint at least one point person to serve as the primary contact for any last-minute issues or complaints. Having this clear chain of command ensures that questions are answered quickly and the process remains organized and stress-free for everyone.

18. Prepare IT Systems

This is the most critical window for your technology. Work closely with your IT team to finalize preparations for servers, computers, phones, and network equipment. Back up all critical data, document configurations, and ensure hardware is ready to be safely transported. Create a checklist for reconnecting and testing systems in the new office so your team can resume work without delays. Early IT preparation prevents technical issues that could disrupt operations immediately after the move.

19. Confirm Moving Day Arrangements

Touch base with your movers to confirm dates, times, and access to both offices. Both sites should be aware of your moving schedule so that they can grant entry or prepare parking areas as needed. Share detailed instructions and contact numbers with your internal moving team so that everyone is aligned. Also, go back to review your inventory list and make sure everything is accounted for and ready to be transported. If applicable, prepare access badges or entry codes for movers or third-party vendors.

Before Moving Day

This is the time to ensure the old office is ready for turnover, key access and documentation are in place, and your new office is prepped to receive employees and equipment. Taking these steps reduces last-minute stress and helps ensure a smooth transition on moving day.

20. Clean and Inspect the Old Office

We recommend hiring a professional cleaning service to handle the final cleanup of your old office. It’ll save you and your team precious time to focus on the new office setup. Once you’ve arrived at your new office, focus on setting up key areas, server rooms, and workstations so that the business can resume operations as soon as possible.

21. Prepare Access and Documentation

Ensure that movers, suppliers, and any third-party vendors have the access they need for both your old and new offices. This includes building entry codes, keys, parking passes, elevator reservations, or any permits required for moving large items. Gather and organize all necessary documentation, such as inventory lists, delivery schedules, and contact information for your moving team. Proper access and documentation at this stage prevent delays, miscommunications, or denied entry on moving day.

Moving Day

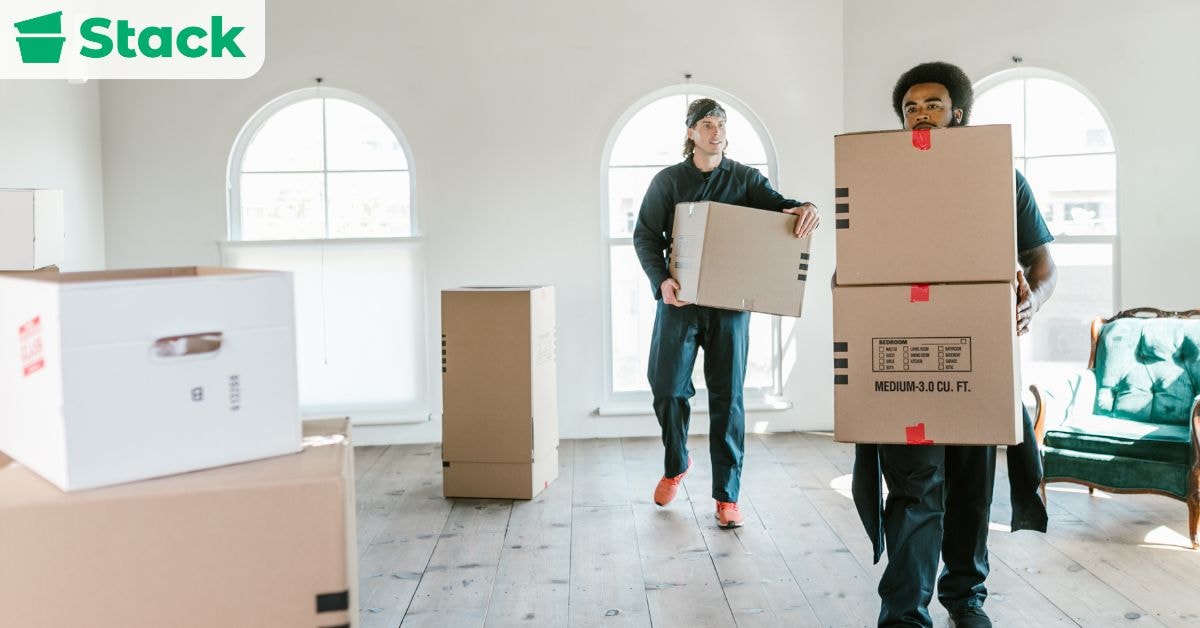
Office movers carrying labeled boxes into a new workspace on moving day as part of an organized office relocation.

Today is the day all your planning pays off. The goal for moving day is to manage the flow of people and equipment with military precision, acting as the bridge between your old office and your new beginning while keeping stress levels low for your team.

22. Conduct a Final Walkthrough

Before the movers begin loading, perform a final walkthrough of your old office. Check every room, storage area, and common space to ensure nothing is left behind. Confirm that utilities are shut off and all personal or sensitive items are accounted for. This step helps avoid forgotten equipment or supplies and ensures a clean handover of the space.

23. Supervise the Move

Have your moving team and point persons actively supervise the process. Ensure movers are following your instructions, boxes and equipment are being loaded carefully, and items are going to the correct departments at the new office. Keep communication lines open so any issues can be addressed immediately. Supervision ensures that the move is executed efficiently and that your office assets arrive safely and organized.

After Moving Day

Office employees setting up furniture and workstations in a new office space after moving day.

Even after all the heavy lifting is done, your work isn’t over. The days following a move are critical for restoring normal operations, settling your team into the new environment, and ensuring nothing was lost or damaged during transit.

24. Unpack Priority Workstations First

Rather than trying to unpack everything at once, focus on the workstations and departments that are vital to your daily operations. Get the computers, phones, and specific tools set up first so your team can resume their core tasks without missing a beat. To make this easier, provide each team with a quick access kit containing the essentials—like chargers, manuals, and basic office supplies—so they aren’t forced to hunt through dozens of boxes just to find a stapler or a power cord.

25. Test IT Systems and Utilities

The moment you arrive, perform a full sweep of your infrastructure. Test every computer, printer, and phone line, and verify that the Wi-Fi signal is strong in every corner of the office. It’s a good idea to have your IT staff on-site or on high alert for the first 48 hours to troubleshoot any connectivity issues or server glitches immediately. By prioritizing the systems that impact productivity, such as cloud access and VoIP phones, you can prevent minor technical hiccups from turning into a full day of lost work.

26. Update Business Address Everywhere

Once you’re settled, promptly update your business address across all platforms. This includes your website, Google Business profile, social media accounts, mailing lists, invoices, and vendor accounts. Also notify your clients and service providers to prevent missed deliveries, ensure continuity of service, and maintain a professional image during the transition.

27. Orient Employees to the New Office

A new office can be disorienting, so take the time to give your team a proper orientation. Walk them through the new floor plan, pointing out everything from the meeting room booking systems to the quirks of the new breakroom coffee machine. Clear up any confusion regarding new security access codes or waste disposal rules right away.

28. Celebrate the Move With Your Team

Finally, take time to recognize the effort that went into the relocation. Hosting a small celebration, whether it’s a team lunch, coffee morning, or informal office gathering, shows appreciation for everyone’s hard work. Celebrating the move also helps foster a sense of community and excitement about the new space, reinforcing a positive start in your refreshed office environment.

How Long Does it Take to Relocate an Office?

The time it takes to relocate an office can vary greatly depending on several factors, including the size of the office, the complexity of the move, and the level of planning involved. On average, an office relocation can take anywhere from several weeks to a few months.

How Much Does it Cost to Move an Office?

Relocating your business will cost anywhere from $1,500 to $30,000 or more, with the biggest factor being the size of your office. Naturally, larger offices will attract higher prices due to the number of items being moved. A great tip for saving up on office relocation expenses is to bundle services together. Bundling services not only helps you save costs but also streamlines the relocation process.

Vendors who offer bundled services usually do so at a discounted rate, which makes it more economical to engage them rather than hiring separate service providers. It also simplifies the moving process since you only have to deal with a single vendor for multiple services.

How to Pack for an Office Move

Office employees reviewing packing plans on a laptop while preparing inventory for an organized office move.

By following a structured packing process, you can transform a mountain of inventory into an organized, plug-and-play setup that allows your business to resume operations immediately.

  • Gather High-Quality Packing Supplies: Start by collecting everything you’ll need to safely pack your office: sturdy boxes in various sizes, packing tape, bubble wrap, packing paper, and labels. For added convenience and durability, consider using plastic crates, which are stackable, reusable, and protect fragile items better than cardboard.
  • Estimate Your Volume Accurately: To avoid the frustration of running out of materials mid-move, use a moving box calculator to determine the exact number of containers required based on your office’s square footage and staff count.
  • Inventory and Label as You Go: As items go into boxes, immediately document the contents and mark the box with its destination department; this ensures the moving team places every container in the right spot for an efficient unpacking process.
  • Prioritize Electronics Protection: Use bubble wrap and anti-static materials for computers and servers—ideally using original packaging if available—and remember to label every cable so your IT setup is a simple “plug-and-play” task at the new site.
  • Delegate Personal Packing: Provide each employee with a designated box for their desk décor, photos, and personal electronics, making them responsible for securing their own belongings to ensure nothing sentimental or valuable is misplaced.
  • Cushion and Flag Fragile Assets: For glassware, artwork, or sensitive lab equipment, use generous layers of packing paper and bubble wrap, then clearly mark these boxes as “Fragile” so the movers know to give them top-tier care.

Ready for a Smooth Office Move?

Fortunately, they can be far more manageable with the help of a comprehensive office moving checklist. Think of a checklist as your move’s master plan; it turns a chaotic pile of tasks into a clear, step-by-step roadmap for success. One major part of that plan is your moving supplies, especially your moving boxes. Using the right boxes not only safeguards your assets but also speeds up unpacking and setup at your new location.

However, poorly chosen boxes often lead to damaged gear or lost inventory. Instead of relying on traditional cardboard, consider renting durable, reusable plastic moving boxes that protect your belongings and make packing more efficient. At Stack Moves, our professional-grade crates are designed specifically for office moves, and we can even handle delivery and pickup for added convenience. Contact us today to rent office moving crates in time for your next office move.

Frequently Asked Questions

Even with a master plan in place, it’s natural to have lingering questions about the finer details of commercial relocation. This section addresses the most common concerns about office moves to give you the extra confidence you need.

What Is the Best Time to Start Preparing an Office Moving Checklist?

The industry standard for a smooth transition is 6 to 12 months before your move date. For smaller offices (under 2,500 sq. ft.), 6 months is usually sufficient. However, larger corporations or businesses with complex IT infrastructure should start planning a full year out. This lead time allows you to vet moving companies, secure your preferred move date, and coordinate with internet service providers, who often require 60–90 days’ notice for new installations.

How Do I Ensure It Equipment Is Safely Moved?

The golden rule here is to assume something might go wrong and back up everything to the cloud before you even touch a power cord. When you start disconnecting, don’t just throw cables in a bin; take a quick photo of the back of the computers so you know exactly where those cords go later. Wrap your hardware in anti-static bubble wrap because a tiny bit of static can fry a motherboard.

What Supplies Are Essential for Packing Office Items?

Beyond basic boxes, you should prioritize specialty file boxes that allow you to move hanging folders directly from the cabinet without disrupting their order. For high-volume moves, heavy-duty plastic bins are often the most efficient choice because they offer superior crush resistance and come with a lid for extra security.

How Can I Minimize Downtime During an Office Move?

Plan your move in stages, starting with non-essential areas and items first, so critical operations can continue until the last moment. Make sure you coordinate closely with your IT team to ensure servers, networks, and communication systems are backed up and quickly reconnected at the new office. Also try to clearly assign roles to employees and movers, so everyone knows their responsibilities and key tasks aren’t delayed.

How to Pack for Moving: A Step-by-Step Guide for a Stress-Free Move

The best way to pack for moving is to start early, use the right packing materials, and follow a clear, room-by-room process to keep everything protected and organized. Moving is stressful for many people because packing is easy to mess up, especially when it’s done at the last minute. Without the right strategy, items can get damaged, misplaced, or lost, adding unnecessary frustration and cost to your move. Similarly, the type and quality of packing materials you use matter just as much as the packing method you adopt, making it important to be intentional about what type of box you pack with.

That’s why the best way to pack before a move is to start early. Taking the time to plan, acquire necessary packing supplies, and pack your items weeks in advance will help you stay organized without feeling pressured by the amount of work involved.

Are you looking for affordable yet high-quality moving boxes for your next move? Stack Moves offers durable moving bins for rent that not only protect your belongings better than cardboard but also make packing, stacking, and transporting easier. Book now to receive your boxes in time for your upcoming move.

In this guide, we’ll walk you through our proven packing process that shows you exactly when to start packing, what supplies to use, and how to protect your belongings every step of the way.

How to Pack for Moving in 10 Simple Steps

Person organizing boxes showing the best way to pack for moving

We’ve broken down the entire packing process into 10 simple steps to help you stay organized and make sure nothing important is left behind.

1. Create a Moving Timeline

A moving timeline is a plan that maps out everything that needs to happen between today and moving day. A timeline helps you control the pace of your move and prevents last-minute packing. It also allows you to spread your physical and mental effort over several weeks rather than cramming it into a few stressful days.

To create a moving timeline, start at your intended move date and work backwards, assigning realistic deadlines for milestones such as decluttering, gathering supplies, and packing each room. Try to build in buffer days in between tasks so unexpected delays don’t throw your entire move off track. And even if you do find yourself running short on time, you can still enjoy an organized move despite the added pressure with the help of some of our packing tips for moving in a hurry.

2. Sort and Declutter Before You Pack

Moving can be expensive, and one of the most effective ways to reduce your moving expenses is to pack less stuff. When you declutter before a move, you reduce the number of packing materials you need, saving you time, money, and effort. The best way to declutter is to be realistic about what you actually use, not what you think you might use in the future. Sort your items into categories like ‘keep,’ ‘donate,’ ‘sell,’ and ‘discard.’

3. Gather the Right Packing Supplies

Packing materials arranged to show the best way to pack for moving

Combining high-quality packing materials with proper packing techniques can make all the difference in your move by ensuring all your belongings arrive at their destination safely. Some basic but essential packing supplies include:

  • Moving boxes: These are the most important packing supply because they house all your belongings. With this in mind, you should ensure that your moving boxes are of good quality and that you have an adequate amount for your move. When selecting a box for your move, be sure to factor in the nature of what you’re packing, how fragile it is, and how much weight each box can realistically handle.
  • Packing Tape: High-quality packing tape keeps your boxes sealed during the move. It’s a great source of reinforcement for heavy boxes to prevent them from tearing open or falling apart.
  • Bubble Wrap/Packing Paper: This gives extra protection to breakable items like glassware and electronics either by absorbing impact or filling up spaces to stop objects from moving around during transit.
  • Markers and Labels: Labeling helps speed up the unpacking process since you know the content of every box and where it should go.
  • Specialty Boxes: These include wardrobe boxes, dish pack boxes, and any other box specially designed to convey delicate items that require added protection.
  • Scissors/Box Cutters: Use these to cut packing tape, open boxes, or trim packing paper quickly and safely.

4. Create a Moving/Packing Checklist

When packing stretches over several weeks or even months, it’s easy to forget where you left off or assume something was already handled. You can avoid this by creating a moving checklist that will help you keep track of what’s been done, what’s in progress, and what still needs attention. You can either create one from scratch based on your timeline or download an editable moving checklist and customize it to your needs. Be sure to update it regularly so it reflects your actual progress, not just your original plan.

5. Pack Non-Essential Items First

The easiest way to guarantee yourself a stress-free moving experience is to start packing early. But it wouldn’t make sense to pack up your kitchen when the move is still weeks away. This is why we advise people to start with non-essential items like seasonal clothing, décor, and rarely used kitchenware.

You’ll avoid any disruptions in your daily life, plus you’ll also have enough time to fine-tune your packing process before you start packing up essentials. By the time moving day approaches, the bulk of the work is already done, making the final stretch far more manageable.

6. How to Pack for Moving Room-by-Room

Wrapping dishes safely as part of the best way to pack for moving

This method of packing makes it easier to track what’s been packed and reduces confusion during loading, unloading, and unpacking. It also allows you to apply the right packing techniques based on the room, since kitchens, bedrooms, and bathrooms all have different packing needs.

How to Pack a Living Room for Moving

Start with smaller items like books, decor pieces, and electronics. Heavy items like books should be kept at the bottom of your moving boxes. Wrap delicate decor pieces in soft materials like blankets to keep them safe from damage. It’s also a good idea to label the wires of each device and keep them together in a small bag. Or you can bundle and secure them using twist ties. Also, remember to remove batteries from remotes and other electronic devices to prevent battery leakages. Battery leakages can corrode important components in these devices and lead to costly repairs or replacements.

How to Pack a Bedroom for Moving

To pack your clothes, neatly fold them into a box, or better yet, roll them to maximize space. Consider using a wardrobe box to transport your hanging clothes. Alternatively, you can place them in a garbage bag and into a plastic container. Bedding like comforters and blankets should be packed last. This is the best way to pack comforters for moving because their bulky nature can take up valuable space if packed first. Disassembling furniture like bed frames and dressers makes them easier to transport and reduces the risk of damage.

How to Pack a Kitchen for Moving

Due to the number of breakable objects kept there, the kitchen is often considered the hardest room to pack. This isn’t meant to scare you but to give you a heads-up so you can prepare adequately. Start with dishes, utensils, and small appliances like a coffee maker. Use bubble wrap, packing paper, or even a towel to prevent your dishes from breaking and your utensils from scratching. Be sure to label perishables like meat properly and pack them last in a cooler filled with ice. Also, make sure you disconnect electrical appliances before you try to pack them to avoid electric shock. It’s also a good idea to ask your moving company about their policies on transporting alcohol, flammable materials, and other commonly restricted items.

How to Pack a Bathroom for Moving

The safest way to pack bathroom items for moving is to secure them in spill-proof bags and place them in water-resistant moving containers. Check that your medications are properly sealed before packing them in plastic bags to avoid leaks. Be sure to throw out any expired products to reduce the risk of contamination and lighten your load. Daily essentials like a toothbrush and medication should be packed separately so they are accessible when you get to your new home.

7. Prepare a First Night Essentials Box

Imagine arriving at your new home after a long move only to realize you can’t find your phone charger. A first-night essentials box prevents this stress by keeping everything you’ll need immediately accessible. The general rule is to pack items that let you function comfortably on your first night without digging through boxes. This typically includes toiletries, medications, chargers, a change of clothes, and basic bedding.

8. Notify Important Parties of Your Move

This step should be done well before moving day, ideally as soon as your moving date is set. The last thing anyone would want in the middle of setting up their new home is to get charged for utilities at a place that they no longer live. Failing to notify important parties of your move, like your bank, utility company, or subscription services, can result in delayed services or unexpected charges.

9. Confirm Moving Arrangements

Ever heard of someone finding out hours before their move that the truck wasn’t coming? While it’s highly unlikely that professional movers would fail to notify you of a change, mix-ups around dates, times, or services can still happen on either end. Confirming your moving arrangements in advance can help prevent these last-minute surprises.

When working with professional movers, double-check the date, arrival window, and scope of services. If you’re renting a truck or relying on friends and family, verify their availability and make sure everyone understands their responsibilities.

10. Do a Final Walkthrough

A final walkthrough is your last chance to make sure nothing is forgotten before you leave. Beyond checking for missed items, you can inspect each room for damage, note anything that needs minor fixing, and ensure the space is clean and ready to hand over. Completing a thorough walkthrough helps you leave the property in good condition and gives you confidence that you’ve wrapped up the move responsibly.

How to Choose the Right Moving Boxes

Some of the key things to consider before you decide on moving boxes are the material, size, and number you’ll need. Once you account for these factors, the right moving box for your move becomes any box that can safely support your items without bending, tearing, or collapsing during transport.

The first thing to determine is the material. Cardboard boxes have been the first choice for many movers, but a lot of people are switching to plastic. Plastic boxes are stronger, don’t get soggy if they get damp, and stack better so nothing shifts around. They’re especially good for fragile stuff or heavier items.

Next is size. There’s no perfect box size, so aim for a mix of small to extra-large boxes. Heavy things like books and tools go in smaller boxes so they’re easier to lift, while light but bulky stuff like bedding and pillows fit nicely in bigger boxes. Picking the right size keeps your stuff safe and makes carrying boxes less of a pain.

Finally, think about how many boxes you’ll need to move. The number of boxes you need for a move generally depends on the size of your home. Grab too few, and you’ll be scrambling at the last minute; grab too many, and you’re wasting money and space. Tools like our moving box calculator can help you figure out exactly how many you need.

What Are the Best Packing Tips for Moving?

These practical moving tips help you save time, protect your belongings, and avoid common mistakes that lead to stress or damage. Use them alongside the steps above to pack smarter and enjoy a hassle-free move.

  1. Use high-quality packing materials: Cheap or worn boxes can collapse under weight, putting your items at risk. Packing tape, moving boxes, and proper padding help protect your belongings throughout the move.
  2. Label boxes clearly: Clear labels help you and your movers know exactly where each box belongs. Include both the room name and a brief description of contents to speed up unloading and unpacking.
  3. Don’t overpack boxes: Overfilled boxes are more likely to tear, break, or cause injury when lifted. Keep boxes at a manageable weight by distributing heavy items across several containers. This makes carrying easier and protects both your belongings and your back.
  4. Protect fragile items: Each breakable item should be wrapped separately and cushioned with padding to absorb shock. This extra care significantly reduces the chance of cracks or breaks during transit.
  5. Keep valuable items with you: Documents, valuables like jewelry, and essentials should never be packed in the moving truck. It’s safest to store personal items in a small pouch or bag you can travel with.
  6. Pack with unpacking in mind: Think ahead to how you’ll unpack in your new space. This makes settling into your new home faster and far less frustrating. Start by grouping similar items together, for example, bathroom items, so it’s easier to keep them in their new spot without digging through multiple boxes.

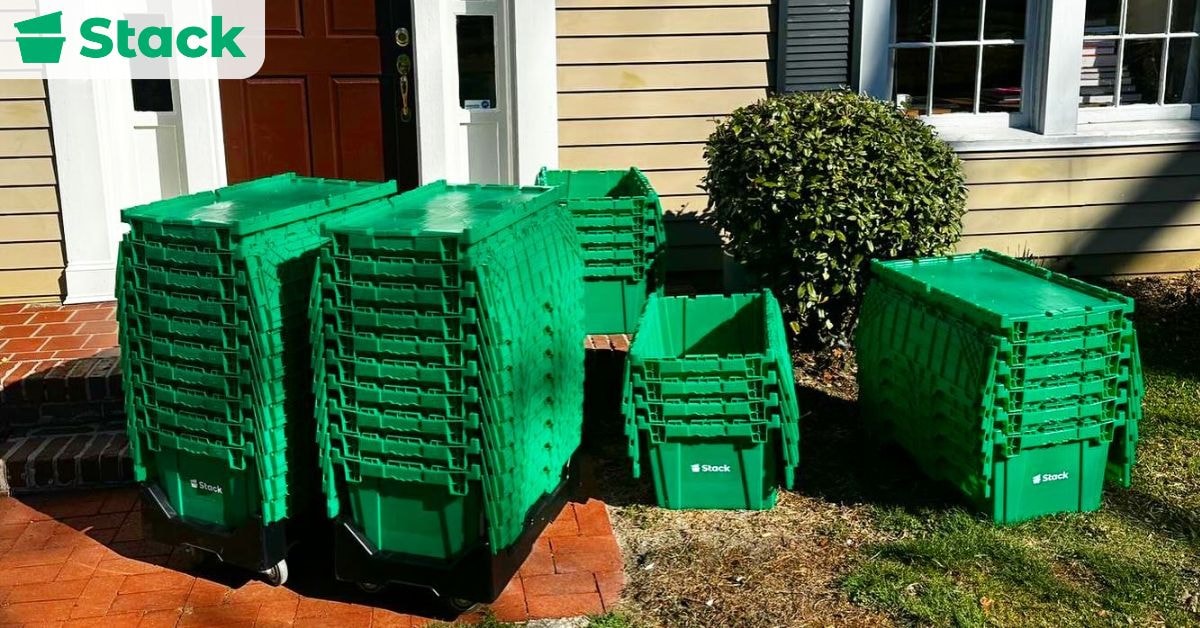
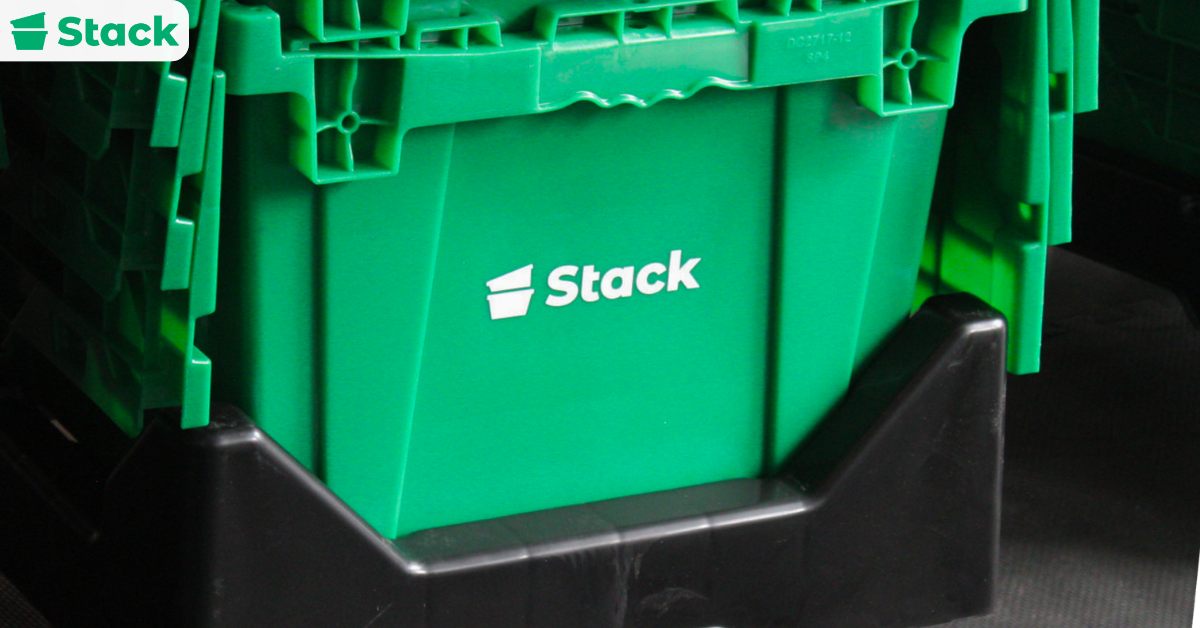
    Stack Moves reusable bins supporting the best way to pack for moving

Need Moving Boxes for Rent?

Starting early and following a clear, organized plan is the most reliable way to guarantee yourself a stress-free move. But even the best planning is useless without the right packing materials. For example, using low-quality boxes can lead to damaged or broken items, making it essential to only use high-quality packing materials for your move.

Our sturdy moving bins are designed to protect your belongings throughout the moving process. And the best part is they come with additional packing supplies, like labels and dollies that make organizing and transporting your items effortless. Schedule your box delivery today and take the first step toward a worry-free move.

Frequently Asked Question

Packing comes with a lot of specific “how-do-I-do-this?” moments, especially when it comes to everyday items you don’t want damaged. Below, we answer some of the most common packing questions to help you protect your belongings and enjoy a hassle-free move.

How Do You Pack Books for Moving?

Pack books in small, sturdy boxes to keep the weight manageable. Always place books flat or spine-down to protect their covers and bindings. You can also use packing paper to fill empty spaces to prevent them from shifting.

How Should You Pack Clothes for Moving?

Fold your clothes and place them in a sturdy moving box. For hanging clothes, it’s best to use wardrobe boxes because they offer the best protection during transport. Alternatively, you can also put a garbage bag over them and place them in a plastic moving bin to keep them safe. Roll your casual clothes instead of folding them to save space in your moving box.

What Is the Best Way to Pack Dishes for Moving?

Wrap each dish individually using packing paper or bubble wrap. You should stack plates vertically to reduce the risk of cracking. You can add padding to the bottom and sides of the box to absorb shock. You should clearly label the box as fragile.

How Do You Pack Glasses for Moving Safely?

Wrap each glass separately and use dividers if available. Place glasses upright in a sturdy box with plenty of cushioning on all sides. Avoid stacking glass items directly on top of one another without padding. Mark the box as fragile and handle with care.

How Can I Pack Pictures and Framed Artwork for Moving?

Use picture boxes or wrap frames with bubble wrap for added protection. You can also place a layer of cardboard between multiple frames to prevent scratches. Pack picture frames vertically rather than flat whenever possible to reduce pressure on the glass. And remember to label these boxes as “fragile” so that they’re handled with extra care.

How Do I Safely Pack Electronics for Moving?

If you can, pack electronics in their original boxes since they’re designed to protect delicate components during transport.

Tips For Move In Day College That Make Move-In Faster and Easier

If you’re an incoming freshman or parent looking for practical college move-in day tips that make the whole process faster and easier, this is the guide for you. College moves can be overwhelming, and having the right knowledge on what to pack, when to arrive, and how to stay organized can make a world of difference. For a smoother college move-in experience, it helps to plan ahead, label everything clearly, and use high-quality moving boxes. Remember that your moving boxes don’t just convey your belongings; they also protect them, making it important to use only high-quality packing supplies for your move.

At Stack Moves, we’ve helped hundreds of students in the U.S. enjoy a smooth and stress-free college move-in day. Drawing on our years of experience in the moving industry, we’ve designed moving boxes that make packing, loading, and unpacking easier from start to finish. Contact us today to rent your boxes and prepare for a hassle-free college move-in day.

In this guide, we’ll cover practical tips on packing smarter for college as well as what to do immediately after move-in day so you can settle in fast and start college life on the right foot.

20 Tips for College Move-In Day

20 Tips for College Move-In Day - Stack Moves

By following these tried-and-true tips, you’ll save time, stay organized, and start your freshman year on the right foot.

1. Pack Similar Items Together

Picture wanting to set up your bedroom and finding your bedsheets in one box but not being able to locate your pillowcases anywhere. One good way to pack for your move is to group items by category, room, or function because it makes it easier to unpack and place them where they should go. For example, packing all bathroom items (towels, toiletries, shower caddy) in one box allows you to set up your bathroom faster instead of hunting for the same items across multiple boxes.

2. Label Everything Clearly

Clearly labeling your boxes can save you the stress of opening multiple boxes just to figure out what’s inside while standing in a crowded dorm hallway. It’s especially important for boxes with fragile items or valuables because clear labels help prevent rough handling of the boxes and breaking something. Be sure to mark multiple sides so the label is easy to spot no matter how the box is stacked or carried. The most effective way to label boxes for moving is to write the contents along with the hall name or room number on each box.

3. Use Plastic Bins

One of the very first decisions you’ll have to make is whether you should use cardboard or plastic moving boxes for your move. Plastic boxes offer better durability and protection compared to cardboard boxes. Plus, their ergonomic handles make them easier to carry through busy campus buildings.

There are some instances where using cardboard boxes makes sense, for example, for items you plan to recycle or discard after move-in. But generally, plastic moving boxes and totes make transporting belongings faster, safer, and far less stressful.

4. Keep Clothes on Hangers to Prevent Wrinkles

Generally, people pack their clothes by folding them. For more casual clothing like T-shirts, you can roll them to save even more space in your boxes. However, when dealing with hanging clothes, the best way to pack them is to leave them on their hangers and place them in a wardrobe box. Alternatively, you can cover hanging clothes with a garbage bag and lay them flat inside a plastic moving box for added protection. Both methods not only prevent wrinkles but also make it easier to hang everything up immediately once you arrive at your dorm.

5. Pack Fragile Items Carefully

It’s possible to break fragile items before you even place them fully inside a box, which is why handling them with care is so important. Wrap each item in bubble wrap to prevent cracks and chips, and use packing paper or soft items to fill spaces in the box and prevent shifting. This reduces the risk of damage during transport and keeps your belongings safe throughout move-in day.

6. Keep Valuables in Your Backpack for Safety

Instead of packing valuables like important documents and jewelry in your moving truck, keep them in a pouch or backpack that stays with you at all times. It’s generally advised to avoid placing valuables in boxes because they can be misplaced, stacked incorrectly, or handled by multiple people during move-in day. When it’s not possible to carry everything with you, consider using a secure container with a lock and keeping the key on you for added peace of mind.

7. Remove Packaging Before Move-In to Save Time

While this may seem like a small step, you’d be surprised how much time can go into getting the packaging off your items, especially if you had to buy many new items for the move. Take some time to remove packaging at home before packing items into your boxes. This way, you can unload and start setting up your dorm room right away without having to stop and deal with piles of wrappers or cardboard on move-in day.

8. Check Your Electronics and Chargers Before Moving

The last thing you’d want is to arrive at college and realize that your charger is missing or your phone isn’t working properly. Even if it’s possible to buy a replacement, it will still take some time to find a reliable vendor. Not to mention the possibility that they may not have a replacement that meets your specification. Your safest option is to check all electronics and chargers before you leave so you can sort out any issues ahead of time and avoid unnecessary stress during move-in.

9. Bring Only Essentials and Make a List of Items to Buy Later

This not only lightens your load but can also reduce your overall moving expense, since the amount you bring is a major contributing factor to the cost of a move. If you’re planning a college move across the country, packing every single item you own may not be practical. It makes more sense to focus on dorm essentials like bedding, clothing, school supplies, and toiletries and then buy the remaining items after you arrive.

10. Coordinate With Your Roommate About Shared Items

You’ve probably heard how small dorm rooms are, and in most cases, that’s not an exaggeration; they really are that small. To avoid wasting valuable room by bringing duplicate items, it’s best to coordinate with your roommate ahead of time. This is especially helpful for larger shared items like mini fridges, which can take up a significant amount of space if more than one is brought into the room.

11. Plan Your Room Layout to Maximize Space

Planning your room’s layout helps you decide where the bed, desk, and storage should go rather than showing up and wasting valuable move-in time rearranging furniture in an already tight space. Some colleges provide information about their dorm rooms, including room dimensions and layout details. Try checking your school’s website, social media pages, or housing portal for photos or measurements so you can plan your room layout ahead of time.

12. Unpack Strategically

You typically pack your essentials last so they’re easy to access, but when unpacking, the opposite is the case. You should unpack your bed and daily essentials first, because without them it becomes difficult to rest or function comfortably after a long move-in day. Delaying the process can leave you exhausted and scrambling for something as basic as your phone charger at odd hours so it’s best to get the basics set up before moving on to anything else.

13. Wash Towels, Bedding, and Utensils Before Move-In

While you could arrive with unwashed items and plan to clean them on campus, it’s not recommended. For starters, your chances of being able to use your dorm’s laundry facilities right away on move-in day are really slim due to long lines. Moreover, your first couple of days on campus will be very uncomfortable if you don’t have any clean essentials ready to use. The bottom line is that it’s better to arrive with everything washed and ready so you can settle in immediately.

14. Bring Comfort Items for Emotional Support

First-time college students often experience a mix of excitement and nerves on move-in day. Bringing a few personal comfort items, like a favorite blanket, stuffed toy, or small keepsake, can make your new dorm feel more like home right away. These small personal touches help reduce stress, provide emotional grounding, and make it easier to settle in after the long day of moving.

15. Learn Your University’s Move-In Process and Rules

You should always review your university’s move-in rules before arrival. One of the most common reasons for delays on move-in day is not understanding the school’s move-in process ahead of time. For instance, school authority may confiscate certain items for being prohibited, or you might park in the wrong area when designated unloading zones are available. These are just a few of the issues that can arise when guidelines aren’t followed.

16. Prepare an Essentials Bag

It’s likely that you may not be able to fully unpack on your first day of arrival in college. Meaning you’d have to dig through your boxes to find a few things, which is why you should have an essentials bag ready. Think of it as your move-in survival kit that keeps the basics accessible without unpacking everything at once. This bag ensures that the first night and morning in your dorm are comfortable and stress-free.

17. Take Breaks and Ask for Help

Move-in day is physically and mentally draining, so pacing yourself is crucial. Don’t try to lift heavy boxes alone, and take short breaks to drink water, rest, or just catch your breath. Asking friends, family, or even your roommate for help makes the process safer, faster, and less stressful, while giving you a chance to bond and share the experience.

18. Pack a First-Aid Kit

Having a small first-aid kit with bandages, antiseptic wipes, pain relievers, and any personal medications can come in handy. Remember that accidents are unplanned, so having it on hand means you can handle minor injuries immediately without leaving the dorm or interrupting the move-in flow.

19. Bring Snacks

Come along with easy-to-grab snacks like trail mix, granola bars, or fruit to keep your energy levels up throughout the day. Pair them with juice boxes, energy drinks, or just water to stay hydrated, and you’ll find yourself more focused and ready to tackle the rest of the move-in process.

20. Have Fun and Make the Day Memorable

Even though move-in day can be long and tiring, for students, it still remains a big day worth enjoying. Take photos, talk to other students, and soak in the excitement of starting this new chapter. Even small moments, like decorating your new dorm or grabbing a bite with your family, can make a stressful day memorable. It also helps to maintain a positive attitude, which can help make move-in day feel more like an exciting new start.

What to Do After College Move-In Day

What to Do After College Move-In Day - Stack Moves

Once the boxes are unpacked and your dorm room is set up, there are a few important things to take care of immediately after move-in day. Start by getting to know your new roommate(s) if you haven’t already. This is also a good time to agree on shared items and discuss things like quiet hours or visitors, which helps everyone feel comfortable in the room from day one. A quick conversation about shared spaces like your bathroom and schedules can go a long way in preventing misunderstandings.

Then introduce yourself to your RA or floor staff and get familiar with dorm rules. Familiarizing yourself with who to contact for maintenance issues, safety concerns, or general questions gives you peace of mind and helps you settle in faster.

Another thing to do as soon as you’re settled is to connect your devices to the dorm’s Wi-Fi and make sure everything works properly. Next, confirm your class schedule and classroom locations. Double-check that all your courses are listed correctly, note any online components, and map out where your classes are on campus. This will help you avoid being late or lost on your first day of classes.

Finally, locate key campus facilities like the dining hall, campus infirmary, laundry room, mailroom, and library. Knowing where these essentials are ahead of time saves you stress when you actually need them.

What College Move-In Day Problems Should Every Student Be Ready For?

Students can face unexpected challenges on college move-in day, from long check-in lines to missing essentials. The good news is that being aware of these problems ahead of time can help you prepare for when things don’t go exactly as planned and handle them seamlessly.

  1. Long Lines and Move-In Delays: Many colleges start their move-in process with a check-in procedure, which often means long lines of parents and students waiting to receive keys, IDs, or parking instructions. While you can’t completely avoid waiting in line, you can get it over with faster by arriving earlier so you’re among the first to be attended to. Having your necessary paperwork ready also helps keep the whole process moving.
  2. Limited Parking or Unclear Drop-Off Zones: Most colleges have specific rules about where cars can park and where unloading is allowed. Because this is your first time on campus, you may not be familiar with these zones, which can lead to you and your family circling campus trying to figure out where to stop. To make moving your items from your car to the building easier, consider bringing a hand truck or dolly. These life savers make unloading your vehicle quick even if parking is farther away.
  3. Missing or Forgotten Essentials: Don’t feel bad if you arrive at your new dorm and realize you forgot something important; almost everyone does. When packing, label each bin with its contents and destination to reduce the chances of items going missing. If possible, create a simple inventory list and match it to your boxes so you can quickly confirm whether something was packed or left behind.
  4. Dorm Rooms Smaller Than Expected: Dorm rooms almost always feel smaller in person than they do online. They can feel even more cramped if you don’t know how to organize your belongings properly. One storage trick that never fails is using vertical space, such as under-bed storage bins and wall organizers, to keep the floor clear and maximize limited space.
  5. Prohibited Items Getting Confiscated: It shouldn’t come as a surprise that colleges have strict rules about what students can and can’t bring into dorm rooms. Items are often confiscated if they pose a fire hazard or safety risk or could make shared spaces uncomfortable for other students. If something important gets taken, it can be frustrating, especially if you weren’t aware of the rules ahead of time. The best way to avoid this issue is to review your school’s move-in guidelines early or speak with a current student or the housing office for clarification.
  6. Physical Exhaustion: Moving involves a lot of physical activity, from lifting boxes to walking long distances across campus, often in hot weather. This can quickly lead to exhaustion for both students and family members. To avoid burnout, take regular breaks, stay hydrated, and avoid rushing through the whole process at once.
  7. Emotional Overwhelm: It’s common to feel excited, nervous, and overwhelmed all at the same time on move-in day. Parents, siblings, and friends present are often experiencing similar emotions as they adjust to the change. The above scenario is especially true for first-time college students starting a new chapter. Allow yourself time to pause, take it all in, and ease into the experience without pressure.

Want to Enjoy a Hassle-Free College Move-In Day?

20 Tips for College Move-In Day - Stack Moves

Despite the nerves and uncertainty that students can experience when getting into college, it is unarguably an exciting new chapter and something to be genuinely proud of. Even if you’ve never moved before, you can still have a smooth college move-in day by following a few practical tips like the ones we shared in this guide.

In our opinion, the most important things to prepare for college move-in are planning ahead, packing efficiently, labeling clearly, and bringing only what you truly need. With these steps, you can set things in motion for a stress-free move without any added delays or expenses.

For an even more convenient experience, consider renting moving boxes. These boxes are not only durable and eco-friendly, but they also come with additional packing supplies to simplify your moving experience. Book now and schedule your box delivery ahead of move-in day.

FAQs

College move-in day comes with a lot of questions, especially for first-time students and parents. Below are answers to the most common questions to help you feel more confident and prepared before the big day arrives.

What Should I Pack for College Move-In Day?

Only pack essentials such as bedding, clothes, toiletries, school supplies, and basic cleaning supplies. In reality, a lot of items are just extras that can be bought after you’ve arrived, which could ultimately make your move less expensive. Packing only what you need also helps with limited space in a dorm room and makes unpacking much easier.

Are There Any Tips for Moving Into a College Dorm Room?

Our top three most important tips are to pack similar items together, label everything clearly, and unpack strategically. While there’s more you can do to prepare for move-in day, these three steps set the ball rolling for an organized and stress-free start. They help you find what you need faster and avoid unnecessary delays during check-in.

How Can I Effectively Budget for Move-in Day College Costs?

Start by making a list of everything you’ll need, then check what you already have at home or can get from an older sibling. This way, you’re only spending money on what’s truly necessary instead of buying everything from scratch. It’s also smart to watch for student discounts on dorm essentials and supplies.

What Are Common Mistakes to Avoid on Move-in Day at College?

Some common mistakes include overpacking, ignoring move-in instructions, and underestimating how long the process will take. These often lead to unwanted stress and delays. By applying tested moving tips for college move-in day, you can start your first day on campus feeling prepared.

Ultimate College Packing List—What to Bring (and Not to Bring)

Leaving home for college is an exciting experience, but packing for it? Not so much. You don’t want to forget something you need, but you also don’t want to overpack and clutter your dorm. This is where a college packing list can come in handy. It not only helps you stay organized, but it also makes sure all the essentials are covered without the extra weight. In this blog, we’ll help you build a packing list that covers all bases from scratch, including must-have dorm items such as bedding, toiletries, school supplies, and more.

At Stack Moves, we’ve helped hundreds of students in the U.S. enjoy a smooth and stress-free college move-in day. With years of experience in the moving industry, we offer durable plastic moving boxes that make packing, loading, and unpacking easier from start to finish. Contact us today to rent your boxes and prepare for a hassle-free college move-in day.

 In this blog post, we’re going to go over all the college essentials you’ll need and things you should leave at home. We’ll also share some smart packing tips to help you confidently move into your dorm room.

College Packing List for Freshman Year

College Packing List for Freshman Year - Stack Moves

We curated a comprehensive college packing list that has everything you’ll actually need for dorm life, from the basic items that make your room more functional to the personal ones that make campus feel like home.

Dorm Room Essentials

Dorm room essentials are the foundation of your living space. They make your room instantly feel homey by making it more functional and comfortable. Without these items, you might have a difficult time settling in and organizing your stuff.

  • Desk lamp (1)
  • Desk organizer
  • Small fan (1)
  • Rug or floor mat (1)
  • Hangers (10–20)
  • Storage bins or under-bed storage (3–5)
  • Command hooks or wall organizers (5–10)
  • Mirror (1)
  • Dry-erase board or bulletin board (1)
  • Chair cushion or seat pad (1)

Dorm room essentials, such as desk organizers, hooks, and small decorations, are best packed in medium-sized boxes. This approach keeps them organized and ensures smaller items don’t get lost during the move. For bigger items like lamps or small fans, make sure they’re positioned in a way that keeps them stable and prevents damage during transport.

Bedding and Comfort Items

Bedding and comfort items help you create a cozy environment, which can ease your transition to college life. Keeping your space comfortable will make it easier for you to get a good night’s rest and support your overall physical and mental health.

  • Bedsheets (4-5 sets)
  • Pillowcases (5)
  • Comforter or duvet (1–2)
  • Throw blankets (1–2)
  • Pillows (2–3)
  • Mattress pad/mattress cover/mattress topper (1–2)
  • Sleep mask (1)
  • Earplugs (1–2 pairs)
  • Bedside cushion or support pillow (1)

When packing bulky bedding such as comforters, pillows, and blankets, it’s best to pack them last using large boxes because of their bulky size, which can take up a lot of valuable space if packed first. Alternatively, you can also pack them in vacuum-sealed bags to help compress them and free up some space in your moving boxes.

Bathroom Items and Personal Care Items

If you neglect your personal hygiene, you may notice that interacting with others will be awkward, making it harder for you to feel comfortable in your new environment. To maintain your overall well-being and self-confidence, bring along some toiletries and personal care items like soap and deodorant.

  • Toothbrush, toothpaste, floss, mouthwash (1-2 each)
  • Shampoo and conditioner (1–2 each)
  • Body wash or soap (1–2)
  • Deodorant (1–2)
  • Razor and shaving cream (1 each)
  • Hairbrush or comb (1)
  • Face, hand, and bath towels (3–5)
  • Washcloths (3–5)
  • Nail clippers (1)
  • Small first aid kit (1)
  • Skincare basics (1 each)
  • Hand sanitizer (1)
  • Lip balm (1–2)
  • Flip flops (1–2)

The best way to pack bathroom items is to group them in a waterproof or sealable container and place it inside a small moving box to prevent spills. Keep everyday essentials like toothbrushes and deodorant on top for easy access. Smaller boxes or bins work well for first aid kits, skincare, and cosmetics.

Clothing and Laundry Supplies

This category of items includes what you’ll need to dress appropriately and manage your laundry.

  • Everyday tops (7–10)
  • Bottoms/pants/shorts/skirts (5–7)
  • Pajamas (2–3)
  • Underwear (7–10)
  • Socks (7–10 pairs)
  • Sweatshirts or hoodies (2–3)
  • Sweaters (2–3)
  • Jacket or raincoat (1–2)
  • Comfortable shoes (2–3 pairs)
  • Workout clothes (2–4 outfits)
  • Laundry detergent (1 bottle or pod pack)
  • Stain remover (1)
  • Laundry basket (1)
  • Fabric softener (1)
  • Bleach (1)

Be sure all clothes are completely dry before packing to avoid unpleasant odors, mold, or mildew. Neatly fold your clothes to keep them organized. Consider rolling your casual clothing like T-shirts to save even more space in your moving boxes. Hanging clothes are best left on their hangers and placed in wardrobe boxes to prevent wrinkles. Alternatively, you can slide a garbage bag over your hanging clothes and keep them in a plastic moving bin for easy transport.

School Supplies and Study Essentials

School Supplies and Study Essentials - Stack Moves

Your study habits are a key factor in determining your academic success during your time in school. These tools will support your learning by making it easier to keep track of deadlines and effectively take notes, amongst other things.

  • Notebooks (3–5)
  • Binders/folders (3–5)
  • Pens and pencils (5–10 each)
  • Highlighters (3–5)
  • Sticky notes (1–2 packs)
  • Planner or calendar (1)
  • Backpack or book bag (1)
  • Index cards (1 pack)
  • Desk organizer (1)
  • Calculator (1, if needed)
  • USB drives or external storage (1–2)

Group similar items so that they’re easy to find. Smaller items like pens, pencils, and highlighters are best placed in pouches or small containers to prevent them from getting lost or scattered.

Electronics and Tech Accessories

The right devices ensure you can work efficiently and communicate easily with friends, family, and professors as needed. At the bare minimum you’ll need the following:

  • Laptop and charger (1)
  • Laptop sleeve (1)
  • Phone and charger (1 each)
  • Power strip or extension cord (1)
  • Headphones or earbuds (1–2)
  • USB hub or adapters (1)
  • Portable battery pack (1)
  • Smart speaker or small Bluetooth speaker (optional, 1)
  • HDMI cable (1)
  • Surge protector (1)

Place heavier devices at the bottom of the box and lighter items on top to prevent damage. Also clearly label each box as “fragile” so whoever handles them does so with care. Keep devices in their original packaging if possible, or wrap them in bubble wrap or soft cloths to protect them during transport. Group chargers, cables, and smaller accessories in labeled pouches so they don’t get tangled or lost.

Kitchen Supplies

Even if your dorm has limited cooking space, basic kitchen items like dishes and cutlery will make cooking and eating more convenient.

  • Reusable water bottle (1–2)
  • Coffee mug or cup (1)
  • Small reusable containers (2–4)
  • Reusable utensils (1 set)
  • Snack storage bag or box (1)
  • Collapsible cooler bag (optional, 1)
  • Can opener (if needed, 1)
  • Dish soap (small bottle, 1)
  • Dish towel or sponge (1–2)
  • Small cutting board (1)
  • Measuring cup or small measuring spoons (optional, 1 set)

Wrap fragile items like dishes in towels or soft clothing to prevent breakage and stack plates or bowls to save space. Keep utensils, small tools, and spices in resealable bags to stay organized.

Cleaning Supplies

Here we covered all the tools for keeping your space tidy and orderly. With a few simple cleaning supplies, you can maintain good hygiene, prevent clutter, and keep shared areas pleasant for everyone.

  • Multi-surface wipes (1–2 packs)
  • Small broom and dustpan (1)
  • Mini vacuum (optional, 1)
  • Disinfectant spray (1)
  • Lint roller (1)
  • Trash can and liners (1–2)
  • Microfiber cloths or cleaning rags (2–3)
  • Small mop or floor wipes (1)
  • Storage bins or drawer organizers (2–4)
  • Small caddy or tote (1)

A simple tip for packing cleaning supplies is to keep liquids upright in a sturdy small box and use plastic bags or dividers to prevent spills. Group similar items together, like wipes or sprays, and label the box clearly. Smaller boxes work best for cleaning tools, while larger ones can help carry heavier items like a broom or mini vacuum.

What Not to Bring to College

What not to bring to college - Stack Moves

Knowing what not to bring is just as important as knowing what to pack. If you bring a prohibited, bulky, or unnecessary item, you risk violating dorm rules and having a frustrating first day. Always check your residence hall guidelines before moving in to ensure you’re following campus policies.

  • Candles and incensefire hazard and typically banned in dorm rooms.
  • Space heater – high risk of fire and often prohibited by safety regulations.
  • Pets – most dorms do not allow animals, except approved service animals.
  • Weapons – strictly forbidden for safety and legal reasons.
  • Drugs and alcohol – illegal or restricted substances can lead to disciplinary action.
  • Furniture – bulky items can clutter small dorm rooms and may not meet fire codes.
  • Personal printer – often discouraged due to shared campus printing resources.
  • Mini fridge – some dorms restrict size or wattage for safety; check guidelines.
  • Microwave – many dorms ban or limit microwaves to prevent fire hazards.

How to Pack for College Efficiently

Packing for college isn’t just about what you bring but also how you bring it. Your goal should be to make move-in day simple, organized, and stress-free. We highlighted some tried-and-true packing tips to help you pack smarter.

1. Start Early

Begin packing at least a few weeks before move-in day. This will give you enough time to sort, donate, or replace items you no longer need. You’ll also avoid the last-minute rush that often leads to overpacking or forgetting essentials.

2. Create a Moving Checklist

A moving checklist helps you stay organized and ensures nothing important gets left behind. Break it down into steps such as decluttering, gathering packing supplies, and booking transportation. You can check off items as you go to keep the process manageable.

3. Use High-Quality Packing Materials

Cheap materials are more likely to buckle, tear, or let spills and moisture reach fragile items, which means they could potentially cause damage or loss. Be willing to spend a little more on quality materials because it guarantees your belongings stay secure and intact throughout the move. For an even easier and more reliable option, consider renting moving boxes instead of buying them.

4. Pack Similar Items Together

Grouping similar items keeps you organized and speeds up unpacking. For example, pack all toiletries in one container and study supplies in another.

5. Label Everything Clearly

The best way to label your boxes is by clearly writing their content and destination. If possible, write your name, dorm building, and room number on every box. Doing so will prevent mix-ups, especially if multiple students are unloading at once.

6. Prepare an Essentials Bag

Keep your first-day necessities, for example, toiletries, a change of clothes, chargers, and important documents, in one easy-to-reach bag. That way, you won’t need to dig through boxes after a long move. Think of it as your survival kit for the first 24 hours.

7. Avoid Overpacking

Dorm rooms can feel smaller than expected, so be selective with what you bring. A lighter load means less clutter and a quicker setup once you move in. Only carry what you’ll truly use, and remember you can always bring extras later if necessary.

Packed Everything You’ll Need for College?

Packing for college can feel like a daunting task, especially when you have no idea what to bring. A thoughtfully curated packing list takes the guesswork out of the process by telling you what to bring (and what to skip).

A general rule of thumb for packing is to only carry the items you’ll actually use regularly. Your residence hall’s guidelines are a great resource for restrictions and recommendations, so you can settle in quickly and without surprises.

Once you’ve gathered your essentials, be sure to pack them in sturdy moving boxes that will not only transport your belongings but also protect them and make unpacking much easier. Our sturdy plastic moving bins are designed to keep items safe and organized through every stage of a move. Plus, each rental comes with additional moving supplies like dollies and labels to make the process even smoother.

Don’t wait until the last minute; reserve your moving bins today!

Frequently Asked Questions

Each answered question gives you quick, practical advice on what to pack and what to leave behind.

What Should I Pack for College?

Pack the essentials that support your daily life, such as bedding, toiletries, clothing, and school supplies. Consider using space-saving items and avoid overpacking, as most dorms have limited space. Additionally, try to follow a detailed college packing list to help you stay organized and ensure you bring only what you truly need. a detailed college packing list to help you stay organized and ensure you bring only what you truly need.

Where Can I Find a Printable College Packing List?

Many college websites and moving blogs offer free downloadable checklists. You can also find a printable version at the beginning of this guide, covering everything from dorm essentials to study supplies.

What Household and Kitchen Items Should I Pack?

Stick to simple, compact items such as reusable dishes and utensils, a small microwave-safe bowl, and any mini appliances that are allowed. Most dorms restrict large or high-wattage devices, so double-check your school’s policies before packing.

What Are Some Recommended Foods and Snacks to Pack for College?

Granola bars, instant noodles, trail mix, and microwave popcorn for late-night study sessions. Include a few healthy options such as oatmeal cups or nuts to keep your energy up. Focus on foods that are simple to store, don’t require cooking, and fit in limited dorm space.

What Should I Not Bring to College?

Avoid bringing large furniture, duplicate appliances, or bulky décor because they will eat into your already limited space. Skip prohibited items like candles, space heaters, or hot plates, as they’re fire hazards and usually not allowed in dorms. Extra dishes, excessive clothing, and sentimental valuables also tend to cause clutter or risk damage, so be sure to leave those behind as well. Always check your college’s housing rules and coordinate with your roommate to avoid bringing the same items.

How Can I Save Money on Dorm Supplies?

Take advantage of back-to-school sales, student discounts, and clearance events to cut costs. Check with friends and relatives for gently used items they no longer need, and see what you already have at home before buying new items. Finally, coordinate with your roommate on shared items like appliances or cleaning supplies so you can split costs and shop together.

Do Colleges Provide Essentials?

Most colleges provide basic furniture like a bed, desk, and chair, but not personal items such as bedding, toiletries, or cooking supplies. Check your school’s housing list to see what items are already included, which will help you avoid bringing duplicates or wasting money on unnecessary items.

The Only College Packing List for Guys You’ll Ever Need (2026 Edition)

If you’re looking for a college packing list that will get you fully set for freshman year without any guesswork, you’re in the right place. By the time you finish reading this blog, you’ll have a clear idea of what to pack, what to skip, and how to optimize your limited dorm space for a smooth move-in day. To get started, you’ll want to sort your belongings into key categories like clothing, bedding, electronics, toiletries, school supplies, and dorm room basics. You’ll also need a reliable way to safely transport all your items to campus so everything arrives in one piece.

Over the years, Stack Moves has helped college students enjoy stress-free moves to college. Thanks to our durable moving bins for rent, students have been packing, organizing, and transporting their belongings safely and efficiently. If you’re planning a move soon and want a hassle-free way to get your stuff to campus, book your boxes today.

In this blog we’ll share our college packing list for guys, items you should leave behind, and tips for organizing a tiny dorm room.

Ultimate College Packing List for Guys

Ultimate College Packing List for Guys - Stack Moves

Packing for college can feel like a guessing game, especially if you’re a freshman who isn’t totally sure what college life really requires on a daily basis. Our college packing list breaks down exactly what every guy need to start college confidently.

Dorm Room Essentials & Decor

Dorm essentials are best packed in medium-sized boxes so they’re easy to carry and less likely to get crushed. Make sure you place heavier items at the bottom of your boxes and lighter ones on top to avoid crushing anything. And don’t forget to label each box clearly; this makes unpacking faster and helps you find what you need right away.

  • Command hooks and adhesive strips
  • Small rug or mat
  • Storage baskets
  • Small fan
  • Alarm clock
  • Door hook or over-the-door rack
  • Power strip/surge protector
  • Storage shelves
  • Under-bed storage bins
  • Trash cans
  • Posters, photos, or wall decor (removable)

Bedding

One effective way to pack bedding such as comforters, blankets, and pillows is to compress them in a vacuum-sealed bag and place them in a sturdy box. If you don’t have vacuum bags, you can still pack your bedding in extra-large boxes, but just keep in mind that these should be packed last. This is because their bulky size can take up valuable space in your moving boxes. Whichever method you choose, make sure all bedding items are completely dry and the container is free of moisture to avoid mold, mildew, or a damp smell when you unpack.

  • Twin XL sheets
  • Comforter or duvet
  • Mattress topper/mattress pad
  • Pillows
  • Extra blankets
  • Bedside caddy

Clothing, Shoes & Accessories

To save a ton of space in your moving box, roll casual clothes like T-shirts, shorts, and sweat pants instead of folding them. Hanging clothes should be left on their hangers and packed in a wardrobe box so they don’t end up wrinkled. Alternatively, you can cover them with a garbage bag and lay them flat in a plastic moving bin. Shoes should be packed in pairs, either in their original boxes or wrapped and placed in a separate bag to prevent scuffing.

Tops

  • T-shirts
  • Long-sleeve shirts
  • Sweatshirts/hoodies
  • Button-down shirts

Bottoms

  • Jeans and casual pants
  • Shorts
  • Sweatpants/lounge pants
  • Athletic pants/gym shorts

Undergarments

  • Boxers or briefs
  • Socks (regular and athletic)

Outerwear

  • Jacket/coat for colder months
  • Rain jacket or windbreaker

Shoes

  • Sneakers
  • Dress shoes/casual shoes
  • Rain boots
  • Flip-flops or shower shoes

Accessories

  • Belt
  • Hat/cap
  • Watch
  • Backpack or book bag

School Supplies

Ultimate College Packing List for Guys - Stack Moves

Even with all the fun college brings, your academics still take priority, so expect plenty of studying and assignments. That makes school supplies the real college necessities; think notebooks, binders, planners, and textbooks. Put books in small boxes so the weight stays manageable. Smaller items like pens, pencils, and chargers should go in a pouch or zippered organizer so they don’t get lost. Everything else can go into a medium-sized box and be cushioned with soft items or packing paper to keep them from shifting around.

Writing and Note-Taking Essentials

  • Notebooks
  • Binders
  • Pens and pencils
  • Highlighters
  • Sticky notes

Organization Tools

  • Planner or calendar
  • Folders
  • Desk organizer
  • Whiteboard or corkboard
  • Index cards

Desk Accessories

  • Stapler and staples
  • Paper clips and binder clips
  • Reading lamp
  • Ergonomic chair cushion
  • Desk lamp

Personal Care & Bathroom Items

The safest way to pack bathroom items is to keep liquids in spill-proof bags to prevent any leaks during the move. This way, even if something does break, it won’t spread to the rest of your stuff or ruin anything in your box. Fragile items like colognes, mirrors, or skincare bottles should be cushioned with towels or soft clothing so they don’t crack.

Oral Care

  • Toothpaste
  • Toothbrush
  • Floss
  • Mouthwash

Shower Basics

  • Bath towels
  • Hand towels
  • Flip-flops
  • Bathrobe
  • Washcloth or shower pouf
  • Shower caddy

Hair Care

  • Shampoo
  • Conditioner
  • Hair ties & clips

Skincare & Body Care

  • Body wash or bar soap
  • Razor or shaving cream
  • Perfume and body spray
  • Perfume & body spray

Electronics & Gadgets

Ultimate College Packing List for Guys - Stack Moves

The safest way to pack any device is in its original packaging, as these boxes are designed to fit the item perfectly and protect it from impact. If you don’t have the original packaging, pack your electronics in a sturdy box and use plenty of bubble wrap, packing paper, or foam to cushion them. Make sure everything fits snugly so nothing shifts around during the move.

  • Laptop and charger
  • Phone and charger
  • Headphones or earbuds
  • Power strip
  • Extension cord
  • Alarm clock (optional)
  • Flash drive or external storage

Kitchen & Eating Essentials

Even though most schools have a cafeteria, it’s still a good idea to have your own kitchen basics for snacks, late-night meals, or a quick breakfast. Pack fragile items like glass cups, plates, and mugs with bubble wrap or packing paper to prevent breakage. Non-fragile items like utensils and containers can be grouped together to make unpacking easier once you arrive at college.

  • Plates
  • Bowls
  • Cups
  • Eating utensils: forks, knives, spoons
  • Cooking utensils
  • Food storage containers
  • Reusable water bottle
  • Non-perishable snacks: granola bars, cereal, instant noodles, etc.
  • Snack storage bag

Cleaning Supplies & Laundry Supplies

People naturally form impressions based on how you present yourself and your space. That’s why having the right cleaning and laundry supplies is essential. A tidy room and clean clothes not only makes your dorm look good but it can also help you feel more put together.

  • All-purpose cleaner
  • Disinfecting wipes
  • Glass cleaner
  • Paper towels
  • Microfiber cloths
  • Small broom and dustpan
  • Mini vacuum (handheld)
  • Trash bags
  • Air freshener or odor absorber
  • Stain remover spray
  • Laundry detergent
  • Laundry pods or sheets (if you prefer them)
  • Fabric softener or dryer sheets
  • Laundry bag or hamper
  • Collapsible drying rack (if allowed)
  • Lint roller
  • Rubber gloves
  • Toilet cleaning wipes
  • Shower cleaner
  • Sponge or scrub brush
  • Mop or Swiffer-style cleaner (for dorms with hard floors)

Essential Documents

These are the documents you absolutely don’t want to lose because of their irreplaceable nature. You’ll need them for enrollment, campus jobs, banking, travel, and even medical situations. That said, you should store them in something waterproof or fireproof so nothing happens to them during the move.

  • Student ID (if you already received it)
  • Admission letter
  • Financial aid documents
  • Housing contract
  • Class schedule and registration info
  • Bank documents (account info, checkbook if you use one)
  • Health insurance card
  • Vaccination records
  • Prescription information
  • Driver’s license or state ID
  • Passport (if you have one)
  • Emergency contacts list

Nice-to-Have Extras

While these aren’t necessary, they can make college life more comfortable, fun, or convenient. Think of them as little add-ons that improve your daily routine or help you settle into dorm life more smoothly.

  • Blue-light glasses
  • Extra-long charging cables
  • Mini first-aid kit
  • Noise-canceling headphones
  • Portable speaker
  • Gaming console
  • Compact umbrella
  • Reusable shopping bags
  • Card or board games
  • Slippers or indoor slides

What Not to Bring to College

Every college has rules on what is and isn’t permitted on its campus. Usually, anything that’s hazardous, illegal, a fire risk, or could put you or anyone else in danger is off-limits. Some items are also banned simply because they take up too much space or violate housing policies.

Here’s a quick list of what to avoid and why:

Fire Hazards

Anything that can start a fire is generally prohibited in dorms to keep everyone safe. Even small flames or overheating appliances can quickly become dangerous, which is why most colleges have clear rules against them.

  • Hot plates and electric burners
  • Candles and incense
  • Space heaters
  • Halogen lamps
  • Fireworks

Weapons & Dangerous Items

Anything that could harm yourself or others is banned. This isn’t limited to firearms but also includes smaller items that could be misused.

  • Guns
  • Daggers
  • Knives
  • Machetes
  • Pepper Spray
  • Illegal drugs or paraphernalia

Animals & Pets

Most dorms don’t allow pets for safety, hygiene, and allergy reasons. Exceptions may exist for approved service or emotional support animals, but these always need proper documentation and prior approval.

Appliances & Electronics

Dorms often have rules about appliance size and electrical load to prevent accidents or power overloads. Check your campus guidelines before bringing any electronics or specialty devices.

  • Microwave
  • Mini fridge
  • TVs
  • Drones

Furniture & Valuables

Dorm rooms are small, so extra furniture can create safety hazards or block walkways. Expensive items aren’t banned but are discouraged due to the risk of theft.

4 Organization Tips to Maximize Your Tiny College Dorm

Dorm rooms are famously small, which can make it tricky to stay organized if you aren’t used to spaces that small. These are four of our tried-and-true tips for maximizing your space and keeping your dorm tidy, so everything has a place and your room feels more comfortable.

1. Use the Space Under Your Bed

Maximizing the space underneath your bed is the best way to make a small dorm room feel much larger and less cluttered. With heavy-duty bed risers you can elevate your mattress by several inches and instantly create space large enough to hold shoes, extra blankets, or bulkier items you don’t use often.

2. Assign Zones in Your Room

Divide your room into distinct areas such the study zone (desk), the rest zone (bed), and the storage zone (closet). Try not to let activities spill over; for example, keep school supplies confined to your desk and dirty laundry contained in your closet area. This practice will help you keep your space from turning into a giant mess.

3. Utilize the Back of Your Door

The back of your room door or closet door can be used for storage. With a sturdy over-the-door organizer with multiple pockets you can keep toiletries, hats, scarves, or even snacks out of sight but easily accessible.

4. Invest in Multi-Purpose Furniture

Look for items that serve more than one function. A small ottoman with a removable lid can serve as both seating for guests and discreet storage for electronics or games. Similarly, a shelf that hangs off your bed frame can replace a bulky nightstand, saving precious floor space.

Are Your Moving Boxes Ready to Go?

Packing for the first time can be overwhelming. Fortunately, with a packing checklist, you can stay organized, save time, and make sure nothing important gets left behind. Don’t forget that knowing what to pack is only the first step, getting everything to your dorm safely is the next big step.

The safety of your items hinges on the quality of your packing materials. Using subpar materials could result in damaged belongings, so it’s crucial to opt for sturdy boxes and protective supplies. The easiest way to get high-quality moving materials is to rent them from trusted companies like Stack Moves. We’ve made sourcing for moving boxes so hassle-free that you can do it all online from the comfort of home.

Plus, each rental comes with stackable boxes, labels, and dollies, making it easy to organize, transport, and unpack your stuff safely. Act now to reserve your moving boxes in time for move-in day.

Frequently Asked Questions

Have questions about packing for college? We’ve answered some of the most common concerns to help you stay organized, save money, and move in smoothly. If you can’t find your question, feel free to give us a call.

What Are the Must-Have Items for a Dorm Packing List for Guys?

Focus on items you’ll use daily like your bedding, toiletries, clothing, electronics, school supplies, and basic cleaning tools. Remember, if it supports your comfort or routine, it’s worth packing.

How Early Should I Start Packing for College Move-In?

It’s best to start about a month before move-in. This gives you enough time to sort your belongings, pick up anything you’re missing, and pack at a steady pace without feeling overwhelmed.

How Many Clothes Should I Pack for College?

Aim for about two weeks’ worth of clothes, plus some workout gear and a few nice outfits for formal events. Since there’ll be a laundry service available on campus, packing more than two weeks’ worth may just clutter your small dorm room.

What Tech Essentials Should Guys Bring to Their Dorm?

Plan to bring your laptop, chargers, headphones, and a surge-protected power strip. Depending on your major, you may also want an external hard drive or monitor.

How Can I Pack on a Budget Without Forgetting Important Items?

Create a checklist early and use it to guide what you pack or buy. Don’t purchase anything you already have, and borrow items when possible.

What Items Are Better to Buy After Arriving on Campus?

Hold off on things like snacks, basic cleaning and kitchen supplies, décor, and furniture. You can easily grab these at a local store once you move in, which saves you the hassel of transporting them from home to school.

College Packing List for Girls: Everything You’ll Need for Dorm Life

Even if you’ve never spent a single night away from home, you can still pack for college without second-guessing whether you have everything you’ll need or not with the help of a detailed college packing list. For a start, you’ll need clothing, bedding, school supplies, and toiletries, plus other must-haves like electronics, all of which we’ll cover in this guide.

Over the years, Stack Moves has helped students relocate smarter and faster. As a trusted name in the moving industry, we’re proud to offer sturdy, eco-friendly moving bins for rent across the U.S. that not only protect your belongings but also make packing and unpacking easier. If you’re a student and need help figuring out how our services can simplify your upcoming move, feel free to reach out to our team.

By the end of this blog, you’ll know exactly what to pack, what to leave behind, and how to make the most of your limited dorm space to ensure your move-in day goes smoothly.

Ultimate College Packing List for Girls

Dorm Room Essentials

Everything you bring should make college life comfortable, convenient, and stress-free. On that note, your college dorm list should include major categories, which are clothing, dorm essentials, bedding, school supplies, and personal care items. In addition to these basics, other items like electronics and important documents also help make daily life smoother and more organized.

Dorm Room Essentials

Dorm room essentials are items that make your space functional and comfortable, like bedding and lighting. Without them, you’d struggle to stay organized, keep your room tidy, or get a good night’s sleep, which can make studying and daily life harder. These basics form the backbone of your dorm setup, helping you feel at home from day one.

To pack your dorm essentials, start by grouping similar items, like room accessories, and packing them in a single box. Label each box clearly so you can quickly set up your dorm and find everything you need on move-in day. Wrap delicate or protruding items, such as hooks, in towels or bubble wrap to prevent damage. Place heavier items like your storage bins and trash cans at the bottom of your boxes, and lighter items on top to prevent crushing.

  • Command hooks and adhesive strips
  • Small rug or mat
  • Trash cans
  • Storage baskets
  • Small fan
  • Wall decor
  • Alarm clock
  • Door hook or over-the-door rack
  • Under-bed storage bins
  • Power strip/surge protector

Bedding

Investing in cozy, durable bedding makes your space feel inviting and helps you recharge after long days. Without the right setup, you’re more likely to have restless nights and feel constantly tired during classes.

Bulky yet light items like comforters, blankets, and extra pillows should be packed in large boxes. It’s best to pack them last so they don’t take up valuable space needed for smaller, essential items. Make sure all bedding is completely dry before packing to prevent mold or unpleasant odors.

  • Bedsheets
  • Mattress topper/mattress pad
  • Pillows
  • Throw blanket
  • Bedside caddy
  • Comforter or duvet
  • Mattress protector
  • Decorative pillows
  • Weighted blanket (optional)

Clothing and Accessories

While everyone knows to pack clothes, knowing what type to pack is just as important. You’ll need outfits for more than just classes since you will have to attend other social activities. It’s also critical that students follow the school’s dress code to avoid any issues, especially when it comes to modesty or professional events.

Hanging clothes are best packed still hanging using wardrobe boxes to prevent wrinkles. Alternatively, you can cover them with a large garbage bag and place them in a plastic bin for double protection. Casual items like T-shirts, leggings, and pajamas can be rolled to save space and reduce creasing. Pack shoes in separate bags or boxes to keep them clean.

Tops

  • Blouses
  • T-shirts
  • Hoodies
  • Sweatshirts

Bottoms

  • Jeans
  • Leggings
  • Skirts

Underwear

  • Bras
  • Panties
  • Tights
  • Socks

Sleepwear

  • Pajamas or nightgowns
  • Loungewear

Dresses and Formal Wear

  • Formal dresses
  • Business casual outfits

Footwear

  • Shoes
  • Sandals
  • Sneakers

Others

  • Rain Boots & winter boots
  • Workout clothes
  • Jackets and coats

Accessories

  • Purses
  • Handbags
  • Crossbody bags
  • Sunglasses

Desk and School Supplies

Desk and School Supplies

Juggling deadlines for assignments and exams and attending classes are all part of college life. To stay on top of everything, you’ll need these items to stay organized and manage your schedule.

The best way to pack your school supplies, like notebooks and binders, is upright so they don’t get bent or crushed. Smaller items like highlighters, pens, and pencils should go in a zippered pouch or small container to help you stay organized.

Writing and Note-Taking Essentials

  • Notebooks
  • Binders
  • Pens and pencils
  • Highlighters
  • Sticky notes

Organization Tools

  • Planner or calendar
  • Folders
  • Desk organizer
  • Whiteboard or corkboard
  • Index cards

Desk Accessories

  • Stapler and staples
  • Paper clips and binder clips
  • Reading lamp
  • Study timer
  • Ergonomic chair cushion
  • Desk lamp

Personal Care and Bathroom Items

Having your personal care items on hand keeps you feeling fresh, healthy, and confident. Without them, daily routines can become inconvenient or messy, especially in shared bathrooms.

The safest way to pack bathroom items is to keep them in sealed plastic bags to prevent leaks. Wrap fragile items, such as glass bottles, in towels or bubble wrap for extra protection. Group smaller essentials like toothbrushes, toothpaste, and menstrual products in a separate toiletry bag or container.

Oral Care

  • Toothpaste
  • Toothbrush
  • Floss
  • Mouthwash

Shower Basics

  • Bath towels
  • Hand towels
  • Flip-flops
  • Bathrobe
  • Washcloth or shower pouf

Hair Care

  • Shampoo
  • Conditioner
  • Hair ties & clips

Skincare & Body Care

  • Body wash or bar soap
  • Razor or shaving cream
  • Perfume and body spray
  • Makeup remover
  • Perfume & body spray
  • Menstrual products

Electronics

Electronics - Stack Moves

The right electronics make college life smoother, keep you connected, and keep you entertained during your leisure time.

Clearly label the boxes as fragile so they’re handled with care during the move. When packing electronics, do your best to protect them from bumps and scratches by wrapping each item with bubble wrap, clothing, or padded sleeves. Keep cords, chargers, and small accessories together in labeled bags to avoid losing them.

  • Laptop and charger
  • Phone and charger
  • Laptop sleeve
  • Extension cords or power strips
  • Portable speaker
  • Headphones or earbuds
  • HDMI cable
  • Surge protector
  • Flash drives or external hard drives
  • Mouse (optional)
  • Batteries (AA/AAA if needed)
  • Ethernet cable
  • Cable organizer
  • USB hub

Kitchen Supplies

Even if you don’t plan to cook much, having a few kitchen basics can save you time and money.

  • Reusable water bottle
  • Mugs
  • Reusable utensils and cutlery
  • Food storage containers
  • Can opener
  • Snack storage bag or box
  • Collapsible cooler bag
  • Dish soap
  • Dish towel or sponge
  • Small cutting board
  • Measuring cup or small measuring spoons

Cleaning Supplies & Laundry

Maintaining hygiene in a shared environment prevents clutter and makes your room feel welcoming every day.

  • Paper towels
  • Disinfecting wipes, e.g., Clorox & Lysol
  • Glass cleaner
  • Microfiber cloths
  • Broom & dustpan
  • Air freshener or diffuser
  • Trash bags
  • Dish soap and sponge
  • Cleaning gloves
  • Stain remover spray
  • Cleaning caddy or bucket
  • Detergent
  • Dryer sheets
  • Fabric softener
  • Bleach
  • Laundry bag or basket
  • Lint roller
  • Handheld steamer or iron

Essential Documents

These are the papers you can’t afford to forget, such as your IDs, health forms, insurance cards, and any college-required documents. Keep all important documents in a waterproof folder or accordion file because of their irreplaceable nature. Also, consider making digital copies as a backup in case of accidents.

  • College acceptance letter
  • Student ID
  • Health Insurance card
  • Bank cards
  • Class schedule
  • Medical records and prescriptions
  • Birth certificate (copy)
  • Social security card (copy)
  • Student handbook

Miscellaneous

While not strictly necessary, these extras add personality and convenience to your space, from small tools and decorations to comfort items and snacks.

  • Umbrella
  • Duffel bag
  • Board & card games
  • Sleeping bag
  • First aid kit
  • Reusable shopping bags
  • Small safe or lockbox for valuables

What Not to Bring to College

Most colleges have strict rules about what is not allowed in their dorms. Typically, this includes hazardous items, illicit substances, prohibited appliances, and duplicate or unnecessary belongings. These rules are meant to keep you and the dorms safe, prevent fire hazards, and save you from wasting space on things you won’t use.

Here’s a quick rundown of what not to pack and why:

  • Weapons: these could be considered a threat and are strictly banned on campus
  • Candles: Open flames are a major fire hazard in dorm buildings
  • Incense or oil burners: Pose fire risks and can trigger allergies or smoke alarms.
  • Space heaters: Often prohibited due to fire safety concerns
  • Hot plates or toasters: Can easily start fires if left unattended
  • Electric blankets: Some colleges ban them due to overheating and fire risk
  • Air fryers or deep fryers: Too much wattage for dorm outlets and not allowed in most residence halls
  • Large appliances (microwave, fridge over size limit): Most dorms have wattage limits or provide shared ones
  • Pets (other than approved service animals): Not allowed due to allergies, hygiene, and housing policies
  • Drugs or alcohol: Strictly prohibited under campus and federal laws
  • Illegal substances or paraphernalia: Can lead to disciplinary action or expulsion
  • Excess furniture: Dorms are small; adding big items clutters your space
  • Too many clothes or shoes: Storage is limited, so it’s best to bring what you’ll actually wear.
  • Duplicate items: Coordinate with your roommate so you don’t bring two of everything (like fridges or rugs)
  • Fireworks: Dangerous, illegal on most campuses, and can cause severe damage
  • Hoverboards or e-scooters (in dorms): Many schools ban them due to battery fire risks
  • Weapons replicas or toy guns: Can cause panic or violate campus safety policies
  • Expensive jewelry or heirlooms: Best left at home to avoid loss or theft

5 Dorm Room Decorating Ideas

Decorating a dorm room helps make a small, shared space feel like home, reflecting your personality and creating a cozy, comfortable environment. If you’re short on ideas, here are 5 suggestions to inspire your creativity:

1. String Lights or Fairy Lights

String lights instantly add warmth to any room. They provide soft lighting that can make the space feel cozy and inviting, especially for study or relaxation time. You can drape them over the bed frame, along shelves, or around windows.

2. Wall Posters or Art Prints

An easy way to show off your interests and personality is with posters and art prints. They can make bare walls feel vibrant and visually appealing and the best part is they don’t take up any floor space. It’s better to use removable adhesive strips to hang them instead of nails so you don’t damage your dorm walls.

3. Throw Pillows and Blankets

If you’re looking for a way to add some comfort and color to your space, decorative pillows are the way to go. These items make your bed or seating area cozier while reflecting your personal style. Throw pillows and blankets are also functional in that they can also keep you warm on a chilly night. Don’t be shy about playing with textures, patterns, and colors to create a visually appealing setup.

4. Wall Tapestries or Fabric Hangings

Wall tapestries and fabric hangings add texture, color, and personality to a dorm room by transforming blank walls into focal points. You can hang them behind your bed, over a desk, or across a wall to create a cozy atmosphere. The best part about them is you can easily remove and swap their designs as your style changes.

5. Personal Photos and Memory Boards

For a more sentimental touch, display your photos of family, friends, or travel experiences to create a cozy ambiance. You’ll notice how doing this makes your dorm feel more like home and reminds you of loved ones. You can create a photo wall, hang prints from string lights, or use a collage frame.

Ready to Pack and Personalize Your Dorm?

When you aren’t sure of what to carry, packing for college begins to seem less like an exciting step toward independence and more like an overwhelming chore. With a comprehensive packing list, you’ll be in a much better position to make sure nothing essential gets left behind without overpacking.

If you’re a girl getting set for college, you should always have dorm essentials, bedding, school supplies, and personal care items before thinking of adding anything else to your list. Without these basic items, it’s easy to feel unprepared and uncomfortable in your new space.

And don’t forget that how you pack is just as important as what you pack. Using poor-quality boxes or supplies increases the risk of damage or loss, especially if you’re moving across the country. Our student-friendly moving bins are designed to protect fragile items while making the entire Don’t wait until the last minute; reserve your moving bins today!

Frequently Asked Questions

Have questions about packing for college? We’ve answered some of the most common concerns to help you stay organized, save money, and move in smoothly.

What Are the Must-Have Items for a College Packing List for Girls?

Must-have items for girls in college include dorm room essentials like bedding, as well as clothing and accessories suited for both classes and social activities. Don’t forget personal care items, electronics, desk supplies, and kitchen basics if allowed.

Where Can I Find Affordable College Packing Items for Girls?

You can look for affordable packing items from retailers like Walmart, Target, and IKEA, as well as online stores like Amazon or eBay. Other budget-friendly options include thrift stores, marketplaces, and your local dollar store.

How Can I Pack Sustainably and Eco-Friendly for College?

The most effective and least expensive way to sustainably move is to rent plastic moving bins. These bins are made from recycled plastic and are reused hundreds of times before they eventually reach the end of their life cycle. Unlike single-use cardboard boxes, they are sturdier, making them a more environmentally friendly and cost-effective way to relocate.

What Are Some Budget-Friendly Packing Tips for College?

Reuse containers, bins, and supplies from home whenever possible to save money. Shop secondhand for furniture, decor, or clothing, and look for student discounts or clearance sales. Lastly, invest in multipurpose items; for example, a storage bin that doubles as a bedside table saves you both space and money.

How to Prepare for the College Move-In Day

If you’re heading to college soon and feeling unsure about what to bring or how to organize your belongings, you’ve come to the right place. By the time you’re done reading this guide, you’ll know exactly how to prepare for college move-in day. To get ready for college move-in day, start by reviewing your school’s move-in guide, gathering essentials early, and packing efficiently to make unloading simpler. This is where rentable plastic moving boxes come in.

At Stack Moves, we’ve helped students in the U.S. enjoy a smooth and stress-free college move-in day. With years of experience in the moving industry, we offer durable plastic moving boxes that make packing, loading, and unpacking easier from start to finish. Contact us today to rent your boxes and prepare for your college move-in day.

In this blog, we’ll share a step-by-step guide on how to prepare for college move-in day and a few pointers on what not to bring to campus.

An 11-Step Guide on How to Prepare for College Move-In Day

An 11-Step Guide on How to Prepare for College Move-In Day

These steps will help you stay organized, save time, and relieve yourself from stress during this big milestone of your freshman year.

1. Review Your College’s Move-In Guide

Before you start packing, take time to read through your college’s official move-in guide. You’ll usually find it on the school’s website. It includes important details about check-in times, parking areas, residence halls, and items not allowed in dorms. Some colleges also use their social media accounts to share links to campus resources like health services and safety offices to help new students settle in better.

2. Coordinate With Your Roommate Early

If possible, reach out to your roommate to decide who’s bringing what before move-in day. Share a list of what’s needed and who’s bringing it, so you don’t end up with duplicate items taking up valuable space. Similarly, you can discuss how to share closet space or organize common areas to keep your room functional and tidy. You can even agree on an arrival time so you can secure earlier time slots to avoid long lines during check-in.

This simple step can make the whole move-in process a lot easier for you and your roommate(s). It gives you a chance to break the ice and reduce those first-day nerves so that by the time you meet in person, it’ll feel like reconnecting with an old friend.

3. Pack Smart

Instead of packing everything you own, focus on only bringing what you’ll need for your first year. You’ll thank yourself later when unpacking feels like a quick, easy win instead of an all-day workout.

The right way to pack your moving boxes is to always pack heavier items at the bottom of your box, while the lighter ones are on top to avoid crushing them. Also, group similar items together and use smaller boxes for heavier items like books. Everyday items and appliances are best suited for medium-sized boxes, and bulky but light items like your comforters go in large boxes.

4. Bring a Dorm Essentials Kit

This should include everything you’ll need to settle in comfortably on your first day. Trust us when we say the last thing you’d want after a long day of moving and unpacking is to look for your phone charger. Having an essentials kit saves you that hassle and boosts your confidence in how prepared you are for your first year in school.

Examples of items to include are a change of clothes, toiletries, phone chargers, medications, and important documents. Some campus resources may even recommend certain must-haves for new students, so check your college’s housing site or orientation guide for ideas.

5. Label Everything

It might seem like an unnecessary extra step at first, but labeling your boxes can actually contribute to a smoother move, especially when done right. The correct way to label your boxes is to clearly write the content of the box and its destination on multiple sides. This method of labeling makes it easier to find what you’re looking for and speeds up the unpacking process. Alternatively, you can even color-code by category (clothes, toiletries, cleaning supplies, school supplies, etc.).

It’s also a good idea to write your room number and building name on each box in case something gets misplaced. This small step can prevent you from mixing up your things with those of someone else.

6. Keep Important Items With You

6. Keep Important Items With You

Keep a small bag or backpack for items you can’t afford to lose during move-in. This might include your student ID, keys, wallet, phone, charger, medications, and any important documents. You’ll save yourself the stress of a panic attack from rummaging through your boxes when you suddenly need them.

7. Plan Meals and Snacks

You may be tempted to skip meals or you might genuinely forget to eat something because of how busy you’ll be. Remember that you need food to keep your energy up and maintain a cheery mood through the day. Bring snacks, water, and maybe even a quick meal for yourself and anyone helping you.

The chances of you getting to explore the campus dining options right away are slim, so it’s best to prepare light meals that can keep you energized through the day. Once you’re settled, you can celebrate your successful move-in with a proper meal on or off campus.

8. Prep for Dorm Setup

Have a mental image of what your dorm room should look like before you move-in. Picture where you’ll place furniture, store clothes, and even hang family photos. If you can, check your school’s website for room measurements or photos of your residence halls to plan ahead. Having a comfortable setup right away makes it easier to relax and soak in the excitement of your first year on campus.

Carry paper towels and cleaning wipes to freshen up surfaces before unpacking. Most dorms may not allow nails. It’s best to come with as many command hooks and strips as you can to help you hang your decor, lights, and small organizers without damaging the walls.

9. Use Vertical Space in Your Dorm

Despite their small size, dorm rooms can feel a lot bigger if you’re intentional about how you organize them. The best way to organize a dorm room is to take advantage of vertical space. This means keeping as much as you can off the floor. To achieve this, you’ll need shelves, hanging organizers, and wall racks. They’ll keep your space a lot more tidy and make daily life easier since you know exactly where everything is. Also, choose moving boxes that can be stacked on top of each other, as this is the best way to organize moving boxes during and after a move.

10. Minimize Stress

Moving day can be emotional, especially if it’s your first time living away from home. To keep calm, start the day early. Also prepare a moving checklist to help you stay organized and allow yourself to take breaks at intervals. The key is to pace yourself and enjoy the process instead of rushing through it.

Remind yourself that everyone is feeling just as nervous as you, even your family. Once you’ve settled in, try to keep your door open because it invites friendly faces. Most campuses offer relaxation or orientation activities for incoming students, so take advantage of those as well. Especially if you have plans of getting involved in clubs or student organizations early on.

11. Make the Move Memorable

College is the start of a whole new chapter. Take photos, laugh with your family, and let yourself feel the emotions of the moment. These memories will mean a lot when you look back on your first year of college. Take time to walk around and explore your new community. Say hello to neighbors or other students moving in because you never know who could become a lifelong friend.

How Long Does College Move-In Take?

How Long Does College Move-In Take?

Most students take about 2 to 4 hours to unpack and set up their room. However, your total time can go up to a full day, depending on the number of belongings you bring. Simply put, the more you pack, the longer it’ll take to unload and organize. Plus, if you plan to decorate or rearrange furniture, expect to spend extra time setting up your space.

Another factor that could extend your total move-in time is logistics involving parking distance, elevator access, or even the building layout. For instance, if your dorm is a multi-story building and your room is on the top floor, it may take a while to get everything upstairs, even with an elevator.

You can ask your parents, friends, and family members to help you set up and cut down your move-in time. They’re usually happy to help because it gives them an opportunity to spend extra time with you before they say goodbye.

What Not to Bring to College (and Why)

What Not to Bring to College (and Why)

Avoid large appliances like toasters, hot plates, and air fryers. Most colleges won’t allow you to move-in with these for safety concerns, plus they’d only take up unnecessary space. Also, resist the urge to show up with bulky furniture such as full-sized dressers, because they won’t fit well in compact dorm rooms and can block movement.

Try not to come with duplicate items since they can quickly crowd your limited storage space. A short conversation with your roommate ahead of time can help you coordinate who’s bringing what and avoid unnecessary overlap. Leave seasonal clothing you won’t need right away; it can stay at home until you return for break.

There’s a higher chance for your belongings to get lost or damaged in shared spaces, so it’s best to leave expensive valuables or sentimental items. Finally, avoid bringing too many décor items, since your dorm will feel cozy with just a few personal touches and functional storage.

Feeling Ready for Your College Move-In Day?

While it’s okay to feel anxious about starting this new chapter of your life, remember that everyone’s figuring it out too. In college, you’ll meet new people who inspire you, learn new things, and create memories that you’ll remember for the rest of your life.

Since your entire college experience hinges on your first day, it is important for the move-in day to go smoothly. By staying organized during a college move, you help yourself save time, reduce stress, and settle into campus life smoothly.

One foolproof way to stay on top of your college move is to rent plastic moving boxes instead of buying cardboard boxes. Our rentals include uniform boxes, labels, and dollies, so you can pack, move, and unpack without a hint of chaos.

Make your freshman move-in day effortless; book your moving boxes today and start your college journey stress-free!

FAQs

We’ve answered some of the most common concerns students have, so you can feel confident, prepared, and ready to start your freshman year strong.

What Should I Pack for College Move-In Day?

Pack essentials like clothes, toiletries, bedding, and dorm necessities first, along with practical extras like snacks, chargers, and cleaning supplies. Also pack first-night essentials in a separate, easily accessible bag. To stay organized and ensure nothing’s left behind, create a detailed packing list and check items off as you go.

How Early Should I Arrive for College Move-In Day?

You can arrive about 30 to 45 minutes earlier than the allocated time slot to stay ahead of check-in lines and parking rushes. This gives you extra time to unload your stuff, start unpacking without feeling rushed, and settle in before meeting your roommate or joining any move-in day activities.

What Are Some Items I Should Avoid Bringing to College on Move-In Day?

Skip bulky furniture, excessive decor, or appliances not allowed by dorm rules. Avoid packing things you rarely use, as dorms have limited space. Instead, focus on essentials and leave other items behind since you can always bring more later once you know what you truly need.

How Should I Label and Organize My Dorm Items for Move-In Day?

Label every box with your name, room number, and contents to stay organized. Pack things in reverse order, meaning items you’ll need first should go last into the car or box. Color-code categories like clothes or kitchen supplies to make unpacking easier and keep your stuff sorted from the start.

11 Tips for Moving Into a Dorm Room

Stepping into dorm life for the first time can feel like a big change. Between packing, planning, and saying goodbye, it’s easy to wonder where to even start. No need to worry, because this guide will walk you through everything you need to make move-in day smooth and stress-free. Our most important tips for moving into a dorm include planning your setup in advance, packing smartly, and using the right moving boxes to pack. Simple steps like creating a checklist, arriving on time, and planning with your roommates in advance are all you need to move in with confidence.

Stack Moves is a U.S.-based moving service that has helped hundreds of students enjoy stress-free moves. For years, our durable plastic moving bins have made dorm transitions easier by cutting down on clutter and protecting personal items during every move. Contact us today to reserve your bins and guarantee delivery before your college move-in day!

In this blog, we’ll share expert tips for moving into a dorm, along with some advice on how you can make the most out of your space.

11 Practical Tips for Moving Into a College Dorm

11 Practical Tips for Moving Into a College Dorm

Using these great tips will make the entire process faster and much less stressful for any college student.

1. Make a Dorm Move-In Checklist

Before you pack anything for your college move-in day, create a detailed moving checklist to help you stay on track. With a checklist, you’re guaranteed a more organized move from the start. Your checklist should include all the things you’d need to make your stay comfortable, such as toiletries, bedding, and school supplies.

Also, be sure to find out from your college what has already been provided for and what items are prohibited, as most colleges have rules about appliances and decor. You can either print out your checklist or use a digital app to tick things off as you go.

2. Coordinate With Your Roommate Ahead of Time

If possible, connect with your roommate before the big day to discuss shared items like a fridge or TV. The major benefit of doing this is that you’d save money on the cost of big purchases. Plus, you’ll also avoid bringing duplicate items and cluttering the limited space you have. Not to mention that good communication early on sets the tone for a positive roommate relationship.

Once you agree on what each person will bring, make a mini checklist for reference. Then talk about how you’d like to arrange your new dorm so setup is faster when you arrive. By sharing your style preferences, you can create a comfortable space you both enjoy.

3. Pack Smart and Stay Organized

You can save time, space, and stress by packing efficiently. For starters, instead of folding your clothes, roll them so you can fit more into your box. When packing bulky items like jackets or blankets, use vacuum-seal bags to shrink them down and make more room. Make sure to always group similar items together so unpacking is easier. Clearly label every box or bin so you know what’s inside at a glance. The correct way to label boxes is to write what’s inside the box and where it’s going on multiple sides.

4. Choose the Right Packing Containers

4. Choose the Right Packing Containers

The containers you choose for your move can make a big difference. Keep in mind that the best moving box not only keeps your items safe but also helps keep your move organized from start to finish.

Consider using plastic moving bins instead of traditional cardboard, since they are more sturdy. They offer better protection thanks to their enhanced durability, plus they’re a much more eco-friendly way to move. For smaller items like toiletries, cords, and desk supplies, you can use compact containers to keep everything neat and easy to find.

5. Set a Budget for Your Move

Don’t buy anything without planning your budget first. Setting spending limits for your move will help you prioritize what’s truly necessary for dorm life. Plus, it also lets you save money while still creating a comfortable space for yourself.

To create your moving budget, all you have to do is list every possible expense you think you’d incur as a result of the move. Examples of typical moving expenses include transportation, moving supplies, cleaning supplies, decor, etc.

Another way for college students to save money when planning for a move is to take advantage of student discounts or back-to-school sales. You can stretch your budget even more if you reuse certain home items instead of buying new ones.

6. Pack an Essentials Bag

Preparing an essentials bag is one of the smartest things you can do for move-in day. It should contain items you’ll need right away to make your first twenty-four hours comfortable, such as toiletries, bedding, chargers, snacks, and pajamas. Also include a change of clothes and any important documents, like your student ID or housing info, so they’re easily accessible.

An essentials box can prevent you from rummaging through multiple boxes after a long day of unpacking. Keep this bag separate from your other luggage so it doesn’t get buried during the move.

7. Arrive Early on Move-In Day

Many students don’t realize that simply by showing up on time, they gain an advantage. Starting early allows you to find parking faster, avoid long lines, and get a head start on setting up. Be sure to check the school’s move-in schedule and follow all parking or unloading rules. If possible, recruit a friend or family member to help speed up the process. Also, bring along a hand truck or rolling cart to make carrying heavy bins and boxes much easier.

8. Set Up Your Room Strategically

8. set up your room strategically

To instantly make your room feel more inviting, start with setting up your bed. Then clean surfaces like desks, dressers, and shelves before you unpack. Move through your room one area at a time, to avoid feeling overwhelmed.

9. Personalize and Decorate Your Space

Once the basics are in place, you can start directing your efforts to making your dorm feel like home. Creating a space that reflects your style helps you feel more relaxed and settled in your new environment. A few well-chosen accessories are all you need to make your dorm room feel cozy without cluttering it.

To start, add personal touches such as photos, posters, or string lights to give the room warmth and personality. Since many colleges don’t allow nails, use command hooks or strips to hang decorations safely. You can also incorporate functional décor like storage ottomans or wall shelves to combine style with practicality.

10. Keep Your Dorm Room Clean

Any space immediately feels more spacious and comfortable when it’s clean. Create a weekly cleaning schedule with your roommates to divide chores fairly and stay consistent. Even setting aside just 10 minutes each day for cleaning can help prevent big messes from building up. We recommend using over-the-door organizers and wall organizers to keep clutter off the floor and surfaces.

11. Adjust to Dorm Life

We understand that it’s going to take some time to settle into dorm life; fortunately, all it takes is an open mind to make the transition easier. Some things you can do to help you adjust quickly include taking time to get to know your roommates and neighbors. This small step can help you build a friendly, supportive atmosphere that feels like home. Make sure you respect shared spaces by keeping noise levels down and cleaning up after yourself.

It also helps to stick to a consistent sleep schedule to keep your energy and mood balanced. And don’t forget to establish a study routine early so you can stay focused even with the constant activity around you.

How to Maximize Space in a Small Dorm Room

how to maximize space in a small dorm room

Moving into a dorm often means having to adjust to a much smaller living space. Thankfully, this doesn’t automatically mean you have to feel cramped. With these organization hacks, you can make your dorm room feel bigger and easier to live in.

  • Use Under-Bed Storage: Take advantage of the space under your bed by storing clothes and shoes underneath. This frees up your floor and keeps less-used items neatly tucked away.
  • Go Vertical with Storage: To keep your room organized and more open, install shelves, tall bookcases, or stackable drawers to utilize every inch of wall space.
  • Try Over-the-Door Organizers: You can use your door for extra storage. Use over-the-door hooks, pocket organizers, or shoe racks to hold accessories, toiletries, or school supplies.
  • Pick Multi-Functional Furniture: Choose furniture that does two things at once. For example, a bed with drawers. This way you can save space while still keeping everything within reach.
  • Keep Your Closet Organized: Use slim hangers, hanging shelves, and dividers to fit more in your closet without creating clutter.
  • Declutter and Prioritize: Dorm rooms can get messy fast, so only keep what you truly need. Store seasonal or extra items at home or in a storage bin under the bed.
  • Use Hooks and Wall-Mounted Racks: For a clear and visually tidy room, use hooks and wall-mounted racks to hang your backpack, jacket, or headphones.
  • Use Rolling Carts or Bins: Portable carts or bins are great for small spaces because you can move them wherever needed and tuck them away when not in use.
  • Use Small Baskets or Containers: You can keep your shelves and desks neat without taking up too much space by using small containers to store small items like pens, chargers, and toiletries.
  • Choose Foldable or Collapsible Items: Opt for foldable chairs, hampers, or storage boxes that can be packed away when not in use.

Ready to Make Your College Dorm Move-In a Success?

Moving into a college dorm might seem overwhelming, but with some planning and organization, it can be a breeze. The right dorm move-in strategy helps you save time, maximize your space, and settle in comfortably from day one.

Some of the most useful tips for moving into a dorm are to budget your expenses, only pack what’s necessary, and coordinate with your roommate ahead of time. If you want to simplify your move even more, consider packing with plastic moving boxes. These boxes make packing, transporting, and unpacking a breeze. Each rental from Stack Moves includes stackable bins, labels, and dollies, so you can move in faster and stay organized.

Don’t let move-in chaos slow you down; book your plastic moving bins today and start your college experience with confidence!

FAQs

Moving into a dorm for the first time comes with lots of questions, from what to pack to how to make your space feel like home. These FAQs address your concerns to help you move in easier, stay organized, and settle comfortably into dorm life.

What to Do on the First Day in a Dorm?

Start unpacking right away to make the space feel like yours. Introduce yourself to roommates, organize essentials, and check for any maintenance issues. Label your desk drawer and hang a few decorations to settle in faster.

How to Prepare for Living in a Dorm?

Preparation starts before college move-in day; bring only what you’ll use daily. Most colleges provide lists of what’s allowed, so review them carefully. Remember, safety matters; avoid overloading outlets or using anything that could be a fire hazard.

What Are Some Essential Items to Bring When Moving Into a Dorm?

Some essential items to bring when moving into a dorm include bedding, toiletries, school supplies, and cleaning supplies. Don’t forget organizers for your desk drawer and closet to keep your space tidy.

How Can I Emotionally Prepare for Moving Into a Dorm and Leaving Home for College?

It’s normal for a college kid to feel nervous leaving home, but remind yourself this is an exciting step toward independence and personal growth. Stay connected with family, but also focus on new friendships and activities on campus.

What Should I Pack for Move-in Day to Ensure a Smooth Transition?

To make move-in easier, organize items by category and pack fragile things last. Put a trash bag over your hanging clothes to move them wrinkle-free, and label boxes clearly with their content. Keep snacks handy so you can stay energized and focused while unpacking.

How Can I Stay Organized in My Dorm Room?

Use stackable drawers and command hooks to save space. Keep frequently used items easily accessible, and make your desk drawer your productivity hub. These great tips help keep clutter under control and your room feeling like a calm, functional space.

What Are the Best Tips for Sharing a Dorm Room?

Respect is key. Have a discussion around quiet hours, cleaning schedules, and shared spaces early. Use headphones for calls or music, and set clear expectations for guests. It’s important to remain considerate to ensure a smooth roommate experience.

How to Move a College Student Across the Country

Planning a cross-country move for your child can feel overwhelming, especially when you’re trying to figure out how to keep it organized. The good news is that with some careful planning, you can make the entire process hassle-free for both you and your student.

To move a college student across the country successfully, start by budgeting and creating a moving timeline, arranging transportation, and securely packing their belongings. For maximum protection, consider using plastic bins to pack your belongings.

At Stack Moves, we’ve helped families and students enjoy stress-free long-distance moves nationwide. With years of experience in the moving industry, we offer reliable moving solutions and durable plastic moving boxes that make packing and unloading easier every step of the way. Contact us today to rent your boxes and make your cross-country college move simple and organized.

By the end of this guide, you’ll know how to coordinate a move across the country so your student arrives at campus ready to start their next chapter.

How to Move a College Student Across the Country

How to Move a College Student Across the Country

As a parent or guardian, your role is to make sure your student’s move goes smoothly. With our clear step-by-step guide, you can help your college student start the school year with zero stress.

Plan Ahead and Set a Budget

By preparing early, you can make smarter decisions about how much stuff should go with your student and what can stay in storage. Start planning your cross-country move at least 8–12 weeks in advance to avoid any last-minute stress. Your moving timeline should cover each step, from packing to arrival day. To stay organized, make a moving checklist of everything your student might need.

Try to set a realistic budget that includes all major moving expenses, such as truck rental or professional movers, shipping fees, and travel expenses like flights, gas, or meals. Do not forget to include college-related costs such as dorm room supplies, too. It’s also a good idea to keep a small emergency fund for unexpected expenses that might come up during the move.

Arrange Transportation

Once you’ve set your budget, the next step is to choose how you’ll get everything and everyone across the country. Decide early whether you will rent a moving truck, hire professional movers, or use a secure storage service to ship items. Plan the student’s personal travel too, whether that means booking a flight or planning a road trip.

It’s best to set a date with your transportation provider as soon as you can because it saves money and ensures everything arrives on time. If you’re planning to drive yourself, map out rest stops and overnight stays for comfort and safety.

Declutter and Organize Belongings

Declutter and Organize Belongings

Before packing, assist your students in deciding what truly needs to make the trip. Categorize items in keep, donate, or sell piles and encourage your student to part with things they no longer use. This simple step makes it easier to figure out how much stuff they need to move and can save money on moving services or shipping.

To keep your things organized and speed up unpacking, clearly label your boxes. The best way to label your moving boxes is to write down the contents and destination of each box on multiple sides. Alternatively, you can also color-code your boxes to guide movers on what goes where, further shortening unloading time.

Gather Moving Supplies

Gather all the supplies you’ll need in advance. This includes moving boxes, packing tape, bubble wrap, and markers for labeling, to name a few. We also advise most movers to consider renting plastic moving boxes instead of using cardboard boxes. Plastic bins are more durable, protect belongings better during long-distance travel, and save time since there’s no assembly or tape required.

Pack Strategically

Proper packing reduces the risk of lost or damaged items and helps your child feel comfortable and prepared in their new space. The right way to pack your box is to place heavy items at the bottom of each box and lighter ones on top to prevent damage during transit. Bulkier items like comforters should be packed last and in large or extra-large boxes since they take up a lot of space. Protect fragile items, electronics, and important documents with bubble wrap or soft clothing as a substitute.

Make sure you prepare an essentials bag that contains everything your child will need to comfortably settle in on their first day on campus. Items like toiletries, chargers, medications, and a few days’ worth of clothes are examples of what should go in your essentials bag. Additionally, important documents, like IDs, transcripts, and payment receipts, should be kept in a secure folder that travels with the student.

Coordinate With the College

Coordinate With the College

Before move-in day, reach out to the college to confirm move-in dates, policies, and dorm check-in procedures. Some colleges have scheduled time slots or designated unloading areas, and having this information handy can save stress and prevent delays. Do not shy away from asking if the school offers moving assistance, storage options, or rental equipment to make the process easier. If possible, review the dorm layouts or photos to plan where furniture and belongings will go.

Unpack and Settle In

When you arrive, unpack essential items first, such as your bedding, bathroom supplies, and kitchen necessities. Do not feel under pressure to set up everything at once; instead, take time to set up the room in a way that feels comfortable and functional. Explore the campus together to find key areas such as dining halls, libraries, and student services.

Reduce Stress During the Move

Prepare snacks, drinks, and meals for travel time to keep everyone energized. Plan for breaks and allow extra time to handle unexpected events that can happen during a busy move-in weekend. Keeping stress levels down helps both you and your student stay focused and make better decisions during the move. You also get to enjoy a more positive experience, allowing your child to start college feeling confident and supported.

Simple Ways to Reduce Stress and Save Money on Your College Move

Simple Ways to Reduce Stress and Save Money on Your College Move

These simple strategies will help you save money while keeping stress levels under control as you plan for your move.

  • Set a realistic budget: List all expected expenses, including transportation, packing supplies, travel, and meals. Track spending to make sure you stay on target and avoid surprises.
  • Compare moving options: Get quotes from multiple moving companies to find the best fit for your needs. Comparing options ahead of time saves money and prevents last-minute headaches.
  • Rent reusable moving boxes: Reusable plastic moving bins are sturdier and more eco-friendly than cardboard. They protect your child’s belongings better and make packing and unpacking faster.
  • Ship items directly to college: Consider ordering dorm essentials online and shipping them to campus. This way, you can save space in your moving truck or car and reduce the amount of stuff you need to carry during travel.
  • Ask for student discounts: Many moving, storage, and transportation services offer special student rates. Taking advantage of these can lower overall costs and make the move more affordable.
  • Use checklists and apps for organization: You can avoid any last-minute stress and ensure nothing important gets left behind by keeping track of tasks with a checklist.
  • Meal prep for travel days: Pack snacks, water, and simple meals for the journey to keep energy levels up. Having food ready reduces stress and keeps both you and your child focused on the move.
  • Provide emotional support: Supporting their emotional needs helps them adjust to the new college dorm or apartment more smoothly.

Ready to Move Your Student Across the Country?

It’s natural to feel stressed about moving your child across the country. But with careful planning, a clear timeline, and organized packing, you can ensure your child’s belongings arrive safely and that the move-in weekend goes smoothly.

One cost-effective way to stay organized is to rent plastic moving boxes for your move. These boxes are reusable, easy to transport, and make the entire moving process faster and more secure. Reserve your moving boxes and set your student up for a smooth start.

Frequently Asked Questions

This FAQ section answers the common concerns parents have to help make the process smoother and less stressful.

How to Move Stuff Across the Country for College?

Start by creating a detailed plan that includes packing, decluttering, and arranging transportation for your child’s belongings. Organizing early and labeling everything clearly ensures the student’s dorm room or apartment is ready for their trip and reduces stress for both of you.

What Is the Best Transportation for College Students?

For large shipments, moving pods or professional movers are reliable, while the student can fly, drive, or take a bus depending on travel time and convenience. Coordinating the students’ personal travel with the arrival of their belongings helps ensure a smooth move and a comfortable start to the school year.

How Much Does It Cost to Move Belongings Across the Country?

The cost of moving a college student across the country can range from around $1,000 to $10,000. The final cost depends on factors like the distance, the amount of belongings, and whether you hire professional movers or use a DIY method.

What Are the Cheapest Ways to Move a College Student Across the Country?

Cost-saving strategies include renting a truck and moving belongings yourself, using shipping or moving pods for heavier items, and decluttering. Parents can take advantage of student discounts on moving, storage, and travel services and ship dorm essentials directly to campus. These methods reduce travel time, stress, and overall costs while keeping the student’s items safe.

How Far in Advance Should I Plan to Move a College Student Across the Country?

Planning should begin at least 8–12 weeks before move-in weekend. This gives enough time to create a budget, book movers or trucks, gather supplies, declutter, and coordinate the student’s travel. Early preparation reduces stress, prevents last-minute problems, and ensures the dorm room or apartment is ready for the school year.

What Are the Benefits of Using Dorm Moving Services for Moving a College Student Across the Country?

Dorm moving services provide professional packing, secure transportation, and sometimes storage options for seasonal items. Parents and guardians can save time and reduce stress knowing belongings will arrive safely for move-in weekend. These services help students settle in faster and ensure essential items like bedding, clothing, and laundry detergent are ready when the school year begins.

How Can College Students Find Community Before Arrival in Their New Location?

They can join online groups or forums for other students attending the same university. They should also take part in campus orientation programs and connect with their roommates. Early connections help the student feel more comfortable and supported, making the transition to college life smoother and less overwhelming.

Medical Office Relocation Checklist Template

Download Medical Office Relocation Checklist

Relocating a medical office is a lot more complex than a standard business move. In addition to the usual logistics, healthcare facilities also have to account for patient safety, how they dispose of their waste, HIPAA-compliant data handling, among other things.

It all goes to show how the smallest oversight can lead to serious consequences. With a comprehensive moving checklist, you can allocate resources efficiently and avoid making any costly mistakes.

For this kind of high-stakes move, you can rent sturdy plastic moving crates from Stack Moves, which offer more protection than traditional cardboard. Backed by years of experience supporting corporate relocations across the US, our durable crates help keep sensitive equipment and files secure throughout the process. Rent your crates today and make your medical office move smoother from start to finish.

In this post, we will walk you through how to plan for your medical office move with a detailed medical office relocation checklist. We will cover everything from early planning and compliance to IT setup and post-move operations. Use this as a roadmap to ensure your relocation process is smooth, compliant, and stress-free.

Why You Need a Medical Office Relocation Checklist

Why You Need a Medical Office Relocation Checklist

Relocating a medical office involves complex legal, operational, and logistical requirements. A clear and detailed office moving checklist can help you stay organized, minimize disruptions, and ensure nothing critical gets missed along the way.

The first reason to create a medical office relocation checklist is that you’re dealing with more than just boxes. The requirements that apply to a medical office during a move are different from those of other businesses. They are regulated by multiple agencies and need to remain compliant every step of the move, or else they could face serious penalties such as losing their license.
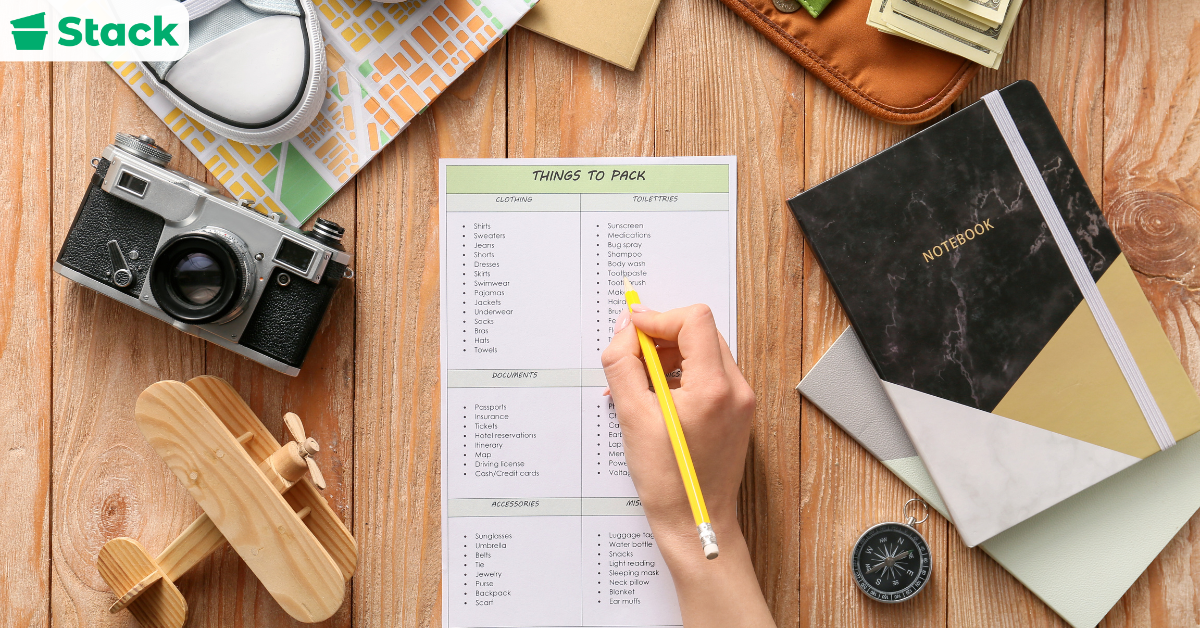
The second reason to plan your move with a checklist is that there’s a risk of HIPAA violations or patient care gaps. Relocating improperly could put patient data at risk. If such an incident happens at any point during the move, it could lead to HIPAA violations and heavy fines. There’s also the risk of missed appointments or service interruptions, which can erode patient trust and harm your reputation.

Additionally, without a checklist, it would not be easy to get everyone on the same page. One of the great things about working with a checklist is that it clearly communicates everyone’s roles. Plus, vendors can be scheduled properly, and patients can receive timely updates about your new address.

Medical Office Relocation Plan for Beginners

This beginner-friendly plan breaks down the process step by step so your move stays organized, secure, and on schedule.

Pre-Planning Stage (6–12 Months Before Move Date)

Pre-Planning Stage (6–12 Months Before Move Date)

The success of your move is determined long before any box is packed. Understand that the decisions you make during this phase will shape the entire relocation. And so this stage is all about building a strong foundation by getting organized, aligning stakeholders, and setting expectations.

Begin by notifying all key stakeholders of your intent to relocate. Clear and early communication ensures everyone is on the same page and allows time to coordinate responsibilities. Next, set a realistic relocation budget that accounts for moving expenses, downtime, equipment upgrades, and any unexpected costs that may arise.

It’s also crucial to assign a dedicated project manager or build a small relocation team. This group will be responsible for overseeing everything concerning the move. This includes timelines, tasks, and being a point of contact for vendors and internal teams.

Once your leadership structure is in place, start researching potential new office locations that support your operational needs, meet zoning regulations, and offer easy access for patients and staff. You can also start searching for trusted professionals for the move itself.

To tie it all together, review your current lease agreement and determine your required notice period or any penalties. This is also a good time to initiate your compliance planning, such as certifications needed for your new facility.

Compliance and Communication (3-6 Months Before Move Date)

During this stage, focus on meeting all regulatory requirements and keeping all key stakeholders in the loop of what’s happening. Begin by updating your address with all relevant regulatory and administrative bodies, including:

  • Your state’s medical board
  • Drug Enforcement Administration (DEA)
  • Centers for Medicare & Medicaid Services (CMS) and all insurance payers
  • Any applicable state licensing authorities

Failing to notify any of these organizations could violate legal standards. Plan for possible inspection appointments, site approvals, or credential re-verifications, especially if your move involves controlled substances or changes to your service offerings.

Keep in mind that compliance-related tasks often move slowly, so allocate extra time into your planning process. So if your new office location requires local occupancy permits, zoning clearance, or business registrations, start the process early to avoid last-minute delays.

Equipment, IT, and Layout Coordination (1–3 Months Before the Move)

Any successful move requires early coordination of your equipment, IT infrastructure, and new office layout. This is especially true for medical facilities because of how heavily they rely on tech. Use this time to assess your current setup and ensure your new office location can support the same functionality.

Start by notifying your IT provider or in-house team well in advance. You want them to have enough time to create a transition plan for transferring your office IT services, such as internet service, phone lines, internal servers, and cloud-based platforms.

Next, schedule a secure backup of all patient data and essential files. This protects you in case anything gets lost or damaged in transit. Before you reopen your medical facility, test all critical systems to confirm everything works smoothly. This will allow you to troubleshoot in advance and reduce downtime.

To wrap things up, finalize your new office layout and confirm all tech-related installations meet your workflow needs.

Packing and Labeling (2-4 Weeks Before Move Date)

Packing and Labeling (2-4 Weeks Before Move Date)

The goal of everything done during this phase is to ensure that your items arrive safely and that they can be unpacked quickly at the new facility. Using labels to organize your move can be a game-changer. With a color-coded labeling system or room-based tags, you can indicate where each box should go in the new space.

For a more efficient packing experience, consider renting plastic moving bins instead of buying cardboard boxes. These containers are not just sturdier but also more eco-friendly. Pack sensitive medical equipment using foam-lined containers or custom padding to prevent costly damage.

Heavy items should go in smaller boxes to reduce the risk of someone getting hurt from lifting them. Be sure to clearly label each box with its contents and the appropriate department so staff can find what they need quickly at the new office.

For any hazardous materials, follow all safety regulations for separation and secure transport. Confidential patient records should be packed in tamper-evident containers to maintain compliance with HIPAA and ensure privacy throughout the move.

Pack essential supplies last so they’re the first to be unpacked at your new location. Items like PPE, prescription pads, or daily-use instruments should be immediately accessible once operations resume.

Final Preparation (1 Week Before Move Date)

In the final week leading up to your medical office move, your focus should shift to execution. By now, you should’ve packed all non-essential items and labeled every box with its content and destination. Doing this helps to avoid any confusion on move day and speeds up the unpacking process. You can even use color-coded labels or numbers to match your floor plan, so movers and staff can easily place items where they belong in the new office.

Next, confirm all vendor appointments, moving times, and access instructions. This means getting in touch with any vendor responsible for medical waste disposal, specialized equipment, or installations. Make sure everyone has the right address, entry times, parking instructions, and contact persons. Miscommunication at this stage could cause delays or missed services on move day.

Set up mail forwarding with the postal service and transfer your utility accounts to your new office location. As a final step, prepare signage and entry instructions for both staff and patients at the new space.

Your company address should be up to date on all printed forms, digital listings, and even insurance portals. Even a temporary sign will be useful in directing patients and vendors where to go during the first week.

Move Day

This is a busy day for everyone, so it’s important to have a clear plan for how it should go. Assign staff members to supervise both the current and new office locations. The point of doing your part is to have someone on-site who can answer questions, provide access, and direct the movers as needed. It also minimizes confusion and helps catch any last-minute issues that might arise on either end of the move.

As items are being moved from your current office to the new one, secure all sensitive materials and medical equipment. This includes protected health information (PHI), controlled substances, and any diagnostic devices like an X-ray scanner. Be sure to pack, label, and move them according to the relevant safety and legal standards.

Upon arrival, inspect everything for damage. It’s best to start with your most valuable and fragile equipment before moving on to furniture and supplies. Use your office relocation checklist to confirm all items have arrived and are placed in the correct rooms. Address any issues right away with your movers.

Finally, distribute keys, access cards, alarm codes, and update your security system. Confirm that all staff members know how to enter and exit the new facility safely. Also, be sure that all security protocols are in place before you leave. You want to be sure that your office, equipment, and information are safe from day one.

Final Setup (First Week After Move Date)

Final Setup (First Week After Move Date)

Once your office is fully relocated, your first line of action should be to make sure that all systems are operational within the first 24 hours. Test your phones, internet connections, appointment software, EMRs, and internal communication tools. Even minor issues, such as a voicemail not routing correctly, can have a big impact on the patient experience.

After confirming that your core systems are up, gather your team for a brief walkthrough of the new office space. Even if everyone helped during the move, an orientation can help clarify workflow, emergency exits, and process changes. This is also a good time to remind staff of any newly implemented protocols related to the new space, such as how to use upgraded equipment or access updated digital tools.

Next on your list should be to verify that all professional licenses, billing systems, and patient forms reflect your new office address. Any inaccuracies can lead to insurance claim denials, reimbursement delays, and compliance concerns.

Lastly, send a follow-up message to your patients to confirm the move was successful. Mention your new office address, your business hours, and how they can reach you. This is also a good time to thank them for their patience during the move.

Want to Rent Reusable Bins and Cut Moving Costs?

To guarantee a successful transition, you need to create a detailed budget, set clear timelines for each task, and organize your team. The best way to accomplish this is with a comprehensive checklist. A relocation checklist won’t just help you prevent costly mistakes; it can also help you minimize possible disruptions.

Remember to start planning early, at least a year before your intended move date. Assign responsibilities to staff members and allow time for any necessary renovations or permit delays. After moving in, don’t overlook your post-move assessment.

And don’t forget that your assets are far too valuable to be packed in flimsy moving containers. Instead, opt for reusable plastic moving boxes offered by rental companies like Stack Moves. They’re strong, secure, and stackable, making them perfect for protecting sensitive equipment and confidential records in a high-stakes healthcare environment. Ready to simplify your move? Rent a moving bin today!

Frequently Asked Questions

There are many parts to planning a medical move, literally and figuratively. These FAQs address common concerns that medical practices face when preparing for a smooth and compliant move.

How Far in Advance Should I Start Planning My Medical Office Move?

Ideally, planning should begin 9-12 months before your intended move date. This gives you time to get everything set. You can notify your patients, secure necessary permits, and book a professional moving company experienced in medical facility relocations.

What Packing Materials Are Recommended for Fragile Medical Instruments?

Firstly, make sure you consult professional movers who specialize in medical office relocations to ensure proper handling and transport of your devices. That said, sensitive equipment should be packed with high-quality materials such as foam inserts, anti-static bubble wrap, and hard-shell crates. Avoid using standard boxes or cheap fillers, as they won’t protect against damage or shifting in transit.

What Items Should Be Prioritized for Packing First in a Medical Office Move?

Start by packing non-essential items such as archived records, excess office furniture, and seasonal supplies. Gradually move toward less frequently used medical equipment and office décor. Leave essential tools and patient care equipment until the very end to avoid interruptions to your daily operations.

Can I Customize the Medical Office Relocation Template for My Practice?

Absolutely. Just like every business is different, every medical practice has its unique business needs. Your relocation checklist should be tailored to what happens in your business. This will help you allocate your resources more efficiently.

Rent Boxes!