Skip to main content

Moving Tips

Average Moving Cost for a 1 Bedroom Apartment

For local moves, the cost of relocating a one-bedroom apartment typically ranges from $300 to $1,500. This price is influenced by several factors, like transportation fees, the cost of packing materials, such as cardboard boxes, labor charges for professional movers, and any additional services you may need.

Even for a one-bedroom apartment move, the total cost of the move can still be surprisingly high. And while cardboard packaging is readily available and inexpensive, it may not always be the most eco-friendly or cost-effective choice in the long run.

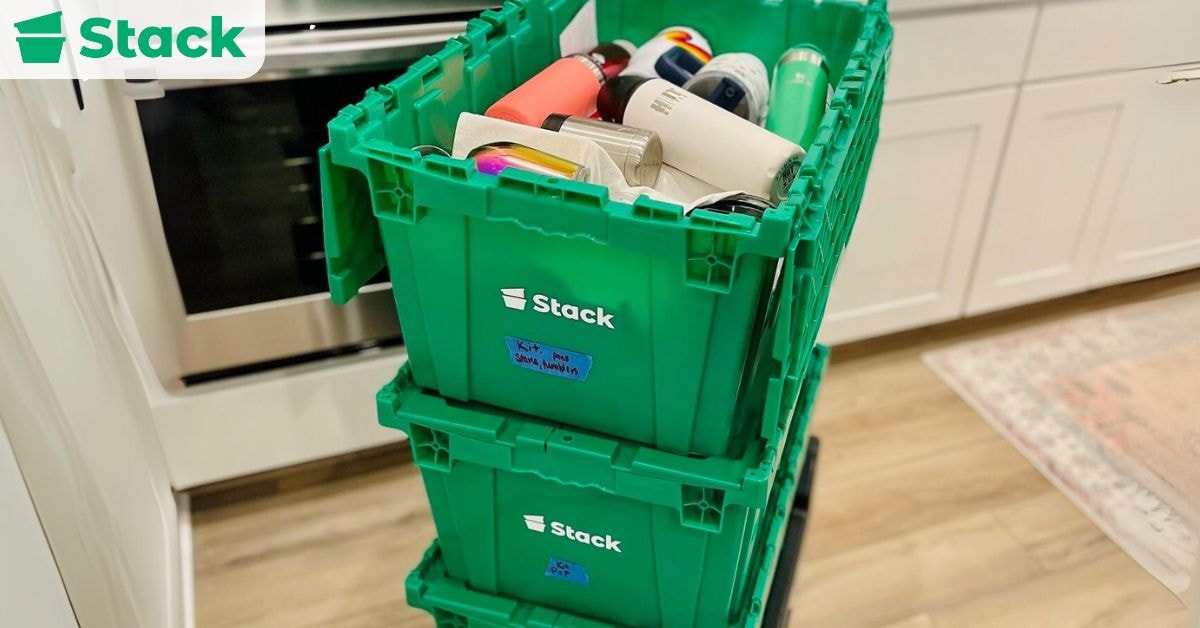
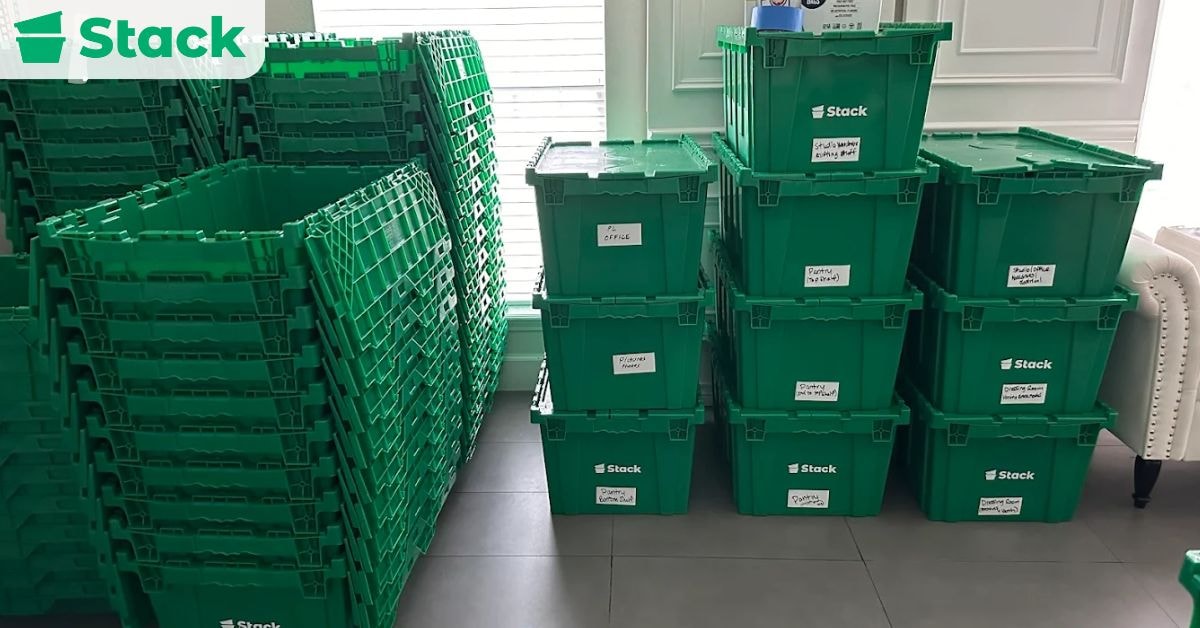
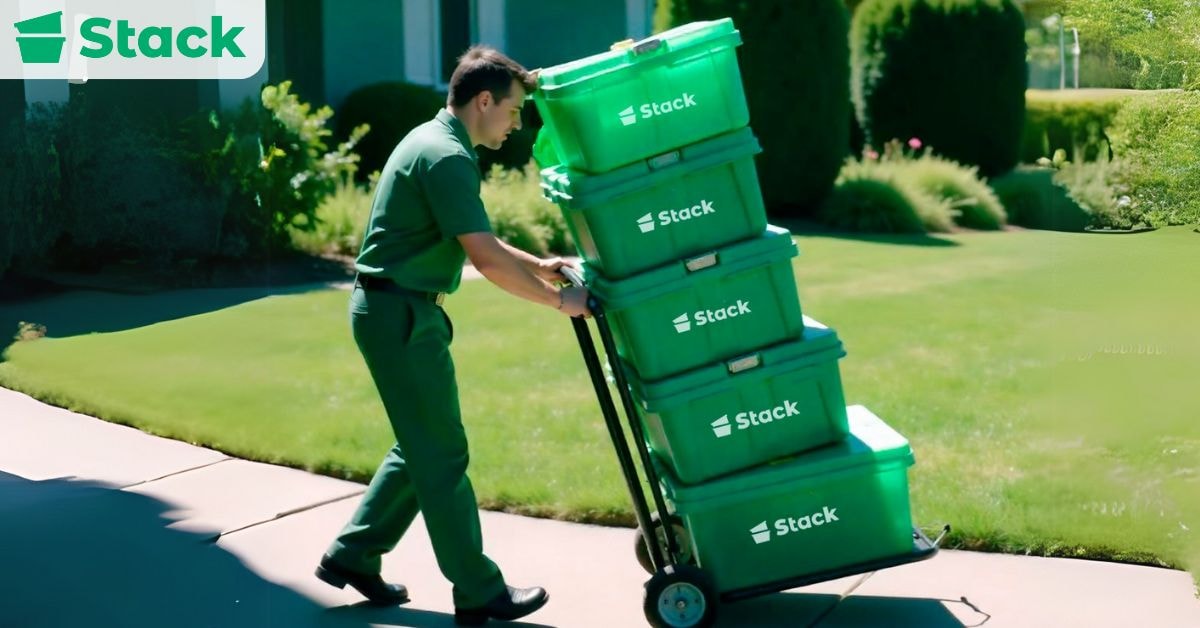
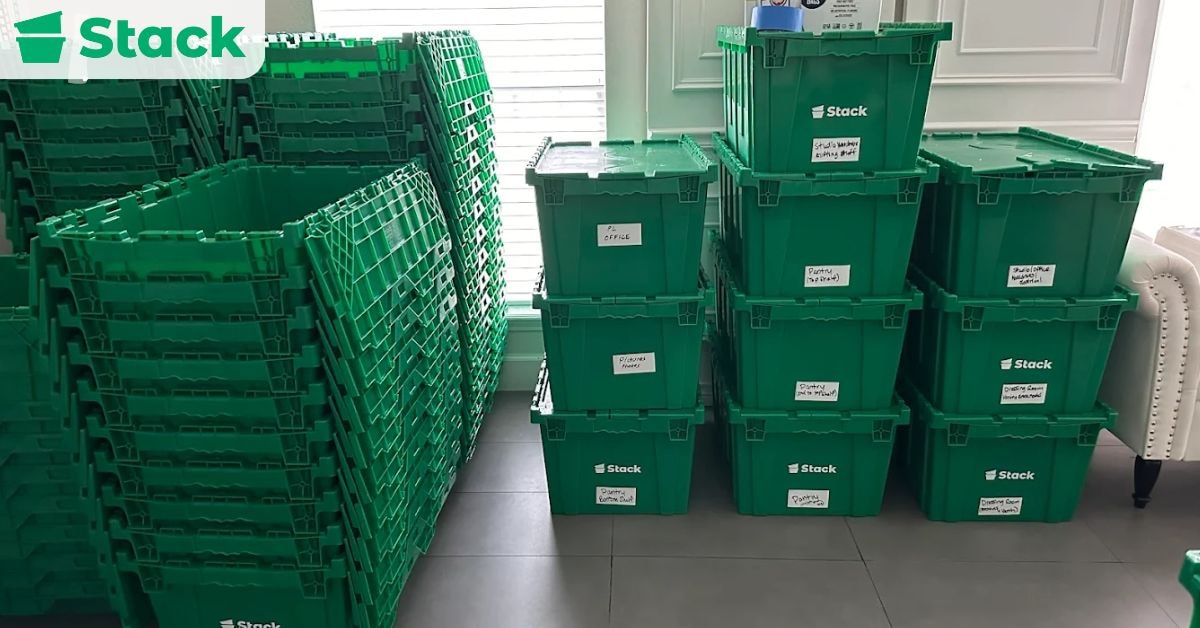
At Stack Moves, we offer sturdy, eco-friendly plastic bin rentals to help you move out of your 1-bedroom apartment with ease and peace of mind. Made for stacking and able to endure a cross-country move, our bins are the perfect choice for getting your belongings to your ne*w home in one piece. Contact us now, and let us make moving easier for you!

In this article, we will explain everything you need to know about the average moving cost for a one-bedroom apartment and other factors to consider.

How Much Does It Cost to Move a One-Bedroom Apartment?

How Much Does It Cost to Move a One Bedroom Apartment?

The average cost to move a 1-bedroom apartment ranges from $300 to $1,500 for local moves and $2,000 to $5,000 for long-distance relocations. Several factors can affect the price of your move, including the distance of your move, the number of movers required, and what services are part of your package.

When planning for a move, here are a few things you need to consider:

  • Size and Weight of Items: Larger, heavier items are more expensive to move.
  • Distance of the Move: Long-distance moves are considerably more expensive.
  • Amount of Items You Need to Move: More items take more resources.
  • Level of Assistance: Full-service moves cost more.
  • Time of Year: Peak-season moves (usually May through September) are often pricier.
  • Storage: Renting storage space can add to the cost.

Careful planning can keep costs down. For example, using tools like a moving box calculator during the planning process takes the guesswork out of packing, so you get exactly what you need without overspending or running out mid-move.

Average Moving Cost for a 1-Bedroom Apartment in 2025

The average cost to move a 1-bedroom apartment largely depends on the distance of your move, the level of service you opt for, and the amount of belongings you’re moving. For local Los Angeles movers, the average moving cost for a 1-bedroom apartment typically ranges from $300 to $1,500, which includes labor, transportation, and basic packing materials. Long-distance moves can range from $2,000 to $5,000+, influenced by the total weight of your items and how far you’re relocating.

If you’re planning a DIY move, renting a moving truck is a common alternative. Daily rates can range from $20 to $40, with additional charges for mileage and fuel costs depending on the duration and distance of your move. While this option may seem cheaper upfront, it tends to be more expensive after factoring in hidden costs, such as moving insurance.

The packing process requires an assortment of materials, including boxes, packing paper, bubble wrap, and tape. While some may opt for free moving boxes from local stores or community sites, investing in high-quality packing supplies can safeguard your belongings, especially for long-distance moves.

The average cost for packing supplies for a 1-bedroom apartment can range from $50 to $200, depending on the quantity and quality of the materials. Eco-friendly options, such as rented plastic bins or boxes made from recycled materials, offer a sustainable alternative that can minimize the environmental impact while potentially saving money.

Type of Move Estimated Cost Range Notes
DIY (Truck Rental Truck) $300 – $700 Includes truck rental, gas, and labor
Local Movers $400 – $1,500 Full-service with 2-3 movers
Long-Distance Moves $1,000-$3,500 Based on mileage and volume

The Hidden Costs of Moving

The Hidden Costs of Moving

In busy, dynamic environments like Los Angeles, the price of moving is often greater than you’d expect. Beyond the anticipated expenses of professional movers, truck rentals, and packing supplies, hidden costs can catch you off guard and affect your overall moving budget.

Here are some of the most common hidden costs to budget for:

Moving Insurance

Insurance is one of the hidden costs involved in moving. While hiring professional moving companies often includes basic coverage, they often do not fully cover the value of belongings if anything is lost or damaged. 

If something gets lost, broken, or damaged during the move, you may be left paying out of pocket. Consider third-party moving insurance or upgrading to full-value protection to avoid surprise expenses.

Extra Fees for Heavy Items

Many movers charge additional fees for heavy or oversized items like pianos, safes, gym equipment, or large furniture. These aren’t always disclosed upfront, so it’s important to ask during the quote process. Even a short move can become costly if specialty handling is required.

Last Minute Packing Supplies

Even with careful planning, most people end up needing more boxes, bubble wrap, or tape than expected. This can lead to rushed purchases at higher prices. It’s best to overestimate your packing needs or rent reusable plastic bins that include everything you need upfront.

Cost of Cardboard Boxes

On average, purchasing enough cardboard boxes for a 1-bedroom apartment move can range from $50 to $100, depending on the quality and quantity of boxes needed. This estimate does not include additional supplies such as tape, bubble wrap, and packing paper, which can further increase the cost. That is why you should opt for Stack Move’s affordable option of plastic bins that do not require these additional supplies. 

Durability and Security Risks

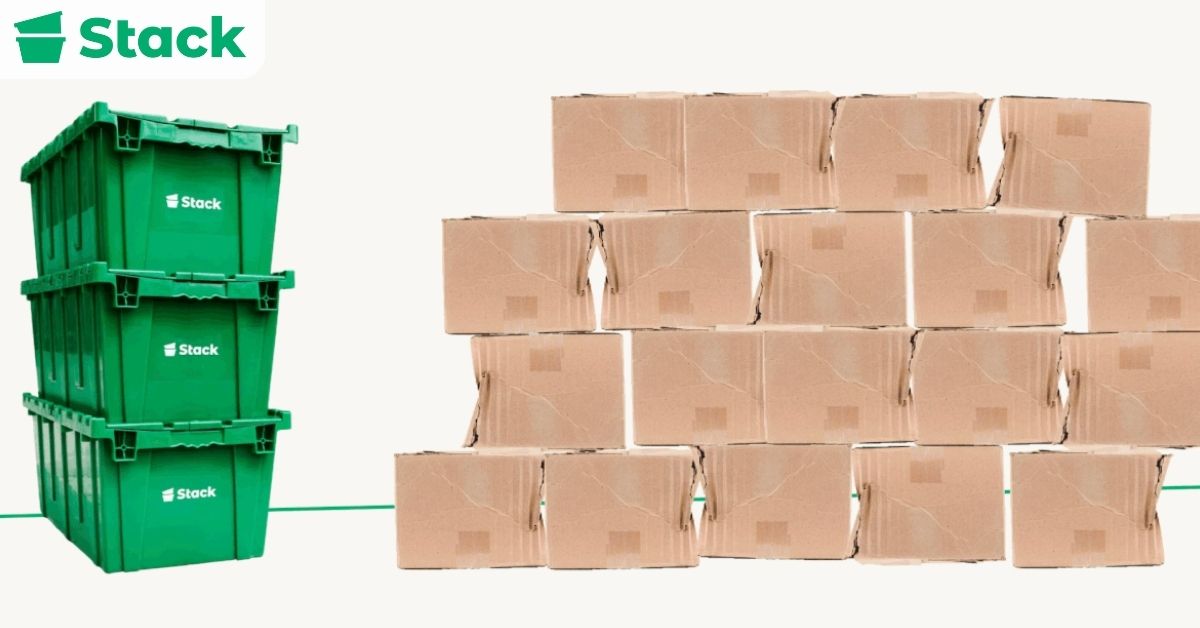
Cardboard boxes, while cost-effective, are susceptible to damage from moisture and tearing, and can easily be crushed, risking the safety of the contents inside. Plastic bins, on the other hand, offer superior durability, better protection against environmental factors, and added security with the ability to lock or seal the bins. These features make plastic bins a preferable option for ensuring the safety of your belongings during a move.

While it may seem like the initial cost of renting plastic bins is higher than purchasing cardboard boxes, this isn’t the case. When you factor in the reduced risk of damage to your belongings and the potential for multiple uses, plastic bins can be more cost-effective in the long run.

Environmental Concerns

The environmental impact of using new cardboard for each move adds up, contributing to deforestation and waste. Here, the significance of eco-friendly packing options becomes evident. Renting eco-friendly plastic bins presents a cost-effective and environmentally friendly solution. By opting for these sustainable packing options, you not only save money but also contribute to a healthier planet.

Planning Your Move With the Right Steps

Planning your Move with the Right Steps

Planning your move with the right steps can make the difference between a stressful relocation and a smooth transition. Here’s a step-by-step guide on how to prepare your things for a move:

1. Create a Moving Checklist

Begin by drafting a comprehensive moving checklist that covers every aspect of your move, from hiring movers or renting a moving truck to purchasing packing supplies. This checklist should include important dates, such as your moving date, deadlines for changing your address, and when to cancel or transfer utilities.

2. Budget Your Move

Calculate the expected costs for professional movers, truck rental, packing supplies, movers’ cost, and additional services like packing and storage units. Use a moving cost calculator to estimate expenses for both local and long-distance moves. Don’t forget to set aside money for unexpected costs like last-minute supplies or additional moving insurance.

3. Declutter and Donate

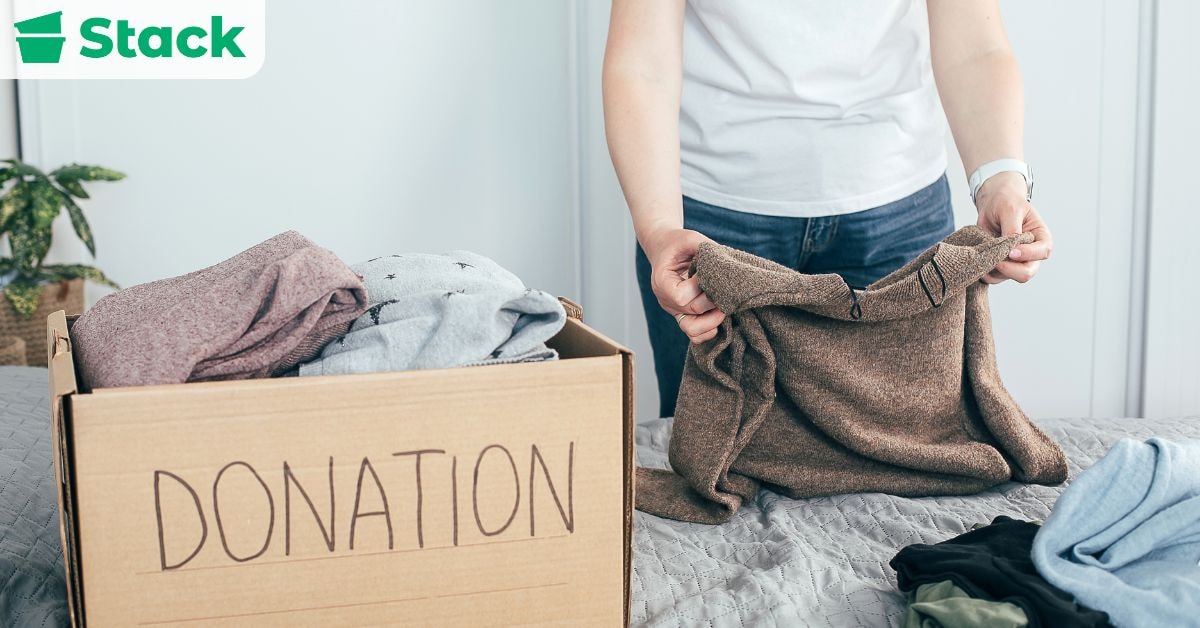
Reduce the volume of items you need to move by decluttering. Sell, donate, or dispose of things you no longer need. This not only simplifies your move but can also reduce the cost of moving services and packing supplies.

4. Gather Packing Supplies

Invest in quality packing supplies. While free-moving boxes can be tempting, ensure they are sturdy enough to protect your belongings. Consider eco-friendly options like rented plastic bins for a sustainable move and to save on the costs associated with buying new cardboard boxes.

5. Start Packing Early

Begin packing non-essential items well in advance. Label each box clearly with its contents and the room to which it belongs, which will simplify the unpacking process. For valuable items, consider professional packing services to ensure they are securely packed.

6. Plan for Moving Day

Confirm arrangements with your moving company or truck rental. Prepare an essentials box with items you’ll need immediately upon arrival at your new home, such as toiletries, a change of clothes, and important documents.

Tips for Saving Money and Reducing Costs

Tips for Saving Money and Reducing Costs

There are several things you can do to save money on your move.

1. Plan Ahead

Failing to plan ahead can lead to underestimating the requirements for your move, resulting in common mistakes such as:

  • Not Having Enough Packing Supplies: Leads to last-minute, often expensive purchases.
  • Overlooking the Need for Specialty Movers for Heavy Items: This often adds last-minute costs.
  • Misjudging the Time It Takes to Pack and Move: May lead to rushed packing and damaged belongings.

By meticulously planning each step of your move, you can avoid the pitfalls of moving and save costs. One way to save money while moving is by comparing quotes from multiple moving companies or truck rental services to find the best deal. You can also use a moving box calculator to avoid overspending on packing materials.

You should also book movers or rental trucks well in advance, especially during peak moving season, to avoid higher rates. In addition, use towels, bedding, and clothing to wrap and protect fragile items, saving money on bubble wrap and packing paper.

2. Consider Reusable Moving Boxes

Cardboard moving boxes are a popular packing choice. However, once you’ve arrived and unpacked, you must figure out how to break them down and dispose of them. Durable, plastic moving bins like those provided by Stack Moves allow you to pack your items using fewer materials.

3. Start by Decluttering

The fewer items you have to move, the less costly the move will be. You may be able to offset the moving costs by selling unneeded items.

4. Pack Your Items Yourself

Packing before the movers get there can greatly reduce the cost.

5. Only Hire Movers to Help With What You Can’t Move Yourself

You can save money by loading most of your items, such as clothes, books, and miscellaneous keepsakes, on your own and only hiring movers to help with heavy appliances and unwieldy furniture like sofas, refrigerators, bookcases, etc.

Eco-Friendly Plastic Bins as a Cost-Effective Alternative

Eco-Friendly Plastic Bins as a Cost-Effective Alternative

Opting for eco-friendly plastic bins as a packing solution for moving offers a practical and environmentally conscious alternative to traditional packing methods. The process of renting eco-friendly plastic bins is straightforward and designed to alleviate the stress and waste typically associated with moving. 

Here are a few key reasons why plastic bins are a smart choice for your next move:

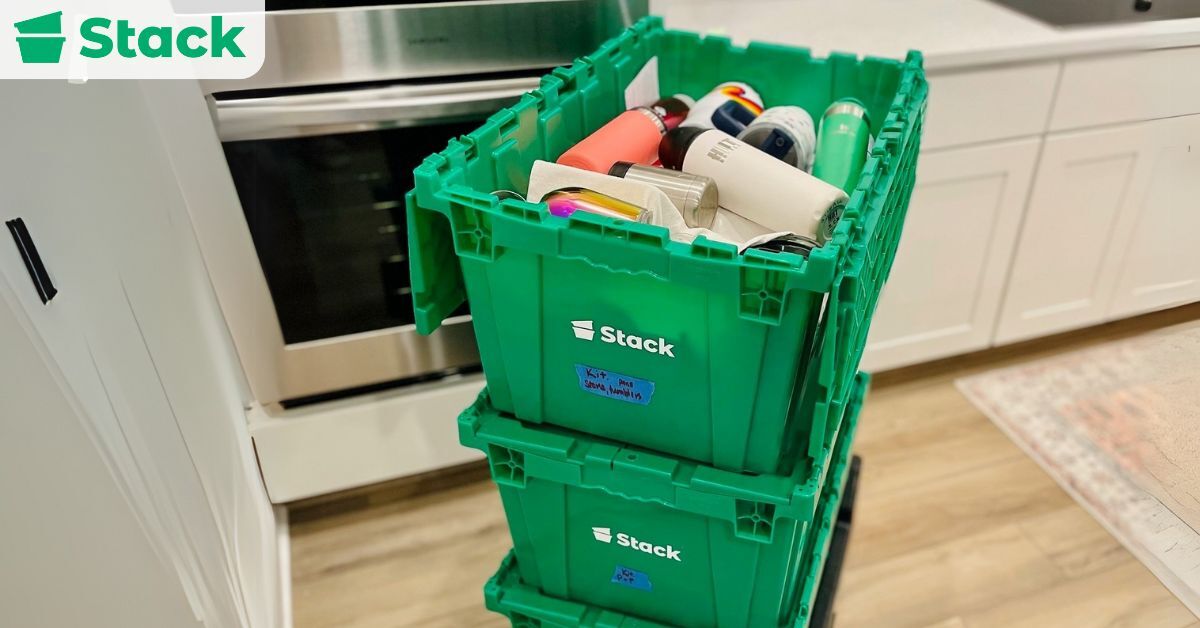
  1. Easy Rental Process: Many moving companies now offer plastic bin rentals. These bins are delivered to your door before your move and picked up once you’re done. No breakdown, cleanup, or trips to recycling centers.
  2. Durable: Unlike cardboard, which can be crushed, torn, or collapse under heavy or fragile items, plastic bins are designed to withstand heavy weights. They’re waterproof, stackable, and far better suited to protecting your belongings during long-distance or cross-city moves.
  3. No Extra Packing Supplies Needed: With plastic bins, you don’t need to buy as much tape, bubble wrap, or reinforcement materials. That can save you $50–$100 or more, especially if you’re figuring out how many boxes you need to move and planning for the risk of breakage.
  4. Better for the Environment: Each move with cardboard boxes contributes to landfill waste and deforestation. Reusable plastic bins are designed to be used dozens (or even hundreds) of times, offering a more sustainable option that aligns with eco-conscious values.
  5. Time Saving: Plastic bins are a uniform size, which makes loading trucks, stacking in storage, and unpacking at your new place much easier. It’s a cleaner, more organized process, especially helpful if you’re hiring movers or using storage containers for moving.
  6. Cost-Effective: While the upfront rental fee may seem higher than that of free or low-cost cardboard or plastic bins, they often pay for themselves by reducing packing material waste, time spent packing, and the risk of damaged items that need to be replaced.

Looking to make a residential move soon? Reach out to Stack Moves now for your plastic bins and dollies! You will be amazed by the affordability of these supplies.

If you’re looking for ways to save on your move, consider renting plastic bins. They’ll protect your belongings better than cardboard boxes, which will help you save on potential costs for repair or replacement.

And thanks to the convenience of company-provided delivery and pickup, you’ll save plenty of time and energy, ensuring you have everything you need for a successful move without having to hunt down several dozen boxes.

Ready to save time and money on your move and make an eco-friendly choice, too? Schedule with Stack Moves today!

FAQ

Still have questions about the cost of moving a one-bedroom apartment? We’ve answered some of the most common ones to help you plan your move more effectively.

What Is the Average Cost to Move 1-Bedroom Apartments?

Local moves usually cost between $300 and $1,500. Long-distance moves can be $2,000 to $5,000 or more.

How Much Should I Budget for a Local Move?

For most local moves, you should budget between $300 and $1,500, depending on the size of your home, the distance of your move, and the type of moving service you need. Choosing the best storage containers for moving can help protect your items and reduce damage-related costs.

Are Moves Cheaper During the Week or Weekend?

Weekday moves are generally cheaper because there’s less demand compared to weekends. Planning ahead, such as knowing how many boxes you need to move, can also help avoid last-minute fees and secure lower weekday rates.

Does the Number of Movers Affect the Final Price?

Yes, the more movers you hire, the faster the job goes, but the overall cost will be higher. If you’re short on time, hiring professionals to help with packing is a smart move. Many moving companies pack for you as part of their full-service options, but it comes at a higher cost.

Is Tipping the Movers Necessary, and How Much Should I Tip?

Tipping isn’t required, but it’s a common way to show appreciation for a job well done. Most people tip between 10% and 20% of the total cost, or an hourly rate per mover per hour. Whether you should tip your mover or not depends on the quality of service you received. Meaning you don’t have to leave a tip if you aren’t satisfied with the job.

Moving in NYC Checklist

Moving to NYC is different from moving to other cities because of its unique challenges, like strict apartment building rules and limited parking. If you’re not prepared to deal with these, they can quickly turn your move into a stressful nightmare. That’s why we’ve put together the ultimate NYC moving checklist to guide you every step of the way.

For a hassle-free move, you should research different neighborhoods, set a realistic moving budget, and start apartment hunting early. Once your moving date is confirmed, you’ll need to book a moving truck and notify key stakeholders about the move. These are just a few of the many steps involved in a successful NYC move.

Why go through the stress of buying and figuring out which boxes are reliable for a move, when you can just rent sturdy, plastic moving boxes from Stack Moves in NYC? These boxes are reusable, durable, and can be delivered to your door anywhere in New York. Contact us to secure your moving boxes today.

This guide walks you through each step of moving in NYC and breaks it down into actionable steps. It also covers how much it costs on average to move in the city.

How Much Does Moving in NYC Cost?

How Much Does Moving in NYC Cost?

The cost of moving in NYC can vary depending on a lot of factors, but you’d generally spend around $500 -$3,500 on a local move, while long-distance moves can cost as much as $10,000.

Hiring professional movers costs more, but it can save you a lot of time, stress, and even damage to your items. On the other hand, DIY moves are great if you’re on a budget, but if you forget to factor in costs like moving permits, tips, and parking tickets, they can turn out to be more expensive.

To save money on your upcoming move, start packing early so you don’t have to rush and overpay for last-minute help. Also, declutter your belongings so that you can reduce the number of boxes you’ll need to move, which in turn lowers both labor and truck size fees.

Moving in NYC Checklist for Beginners

Moving in NYC Checklist for Beginners

Whether you’re moving into your first apartment or simply switching neighborhoods, without a moving checklist, you could miss some important steps that could cost you your peace of mind. Here’s our beginner-friendly breakdown to conquering any move, whether you’re a first-time renter or seasoned New Yorker.

  1. Research Different Neighborhoods: Choose a location that fits your lifestyle and budget.
  2. Set a Moving Budget: Plan for all moving expenses.
  3. Start Apartment Hunting: Take the time to compare your options.
  4. Decide on Your Move Date: Pick a date outside of peak times to save costs.
  5. Notify Your Current Landlord or Building Management: Give proper notice and clarify move-out expectations.
  6. Book Professional Movers or Reserve a Moving Truck: Lock in your preferred schedule before their schedules fill up.
  7. Apply for NYC Moving Permits: This will help you avoid any fines on moving day.
  8. Reserve Elevator and Loading Dock Time: Make sure both buildings are ready for the move.
  9. Declutter and Donate Unwanted Items: Lightening your load can make your fresh start easier.
  10. Gather Packing Supplies: Have everything you need for the move before the move.
  11. Pack Smart and Label Everything: Staying organized makes unpacking easier.
  12. Prepare an Essentials Box: Keep your first-day necessities close.
  13. Notify Important Parties of Your Change of Address: Keep your records updated to avoid missed mail, bills, etc.
  14. Transfer or Set Up Utilities: Make sure your new home is move-in ready.
  15. Confirm Moving Day Logistics: Double-check with all parties to avoid issues.
  16. Do a Final Walk-Through: Make sure you don’t leave anything behind.
  17. Unpack Essentials First: Focus on the rooms you’ll need right away
  18. Register With NYC Services (if you are a new resident): Connect with your community.

Research Neighborhoods

Do your research about the neighborhood before falling in love with an apartment listed there. Every city in NYC has its own vibe, and careful planning is needed at this stage to avoid ending up in a place that doesn’t match your lifestyle.

One good way to assess each neighborhood is to visit it at different times of the day so you can get a clear picture of what life is like there. Some places are peaceful during the day but really noisy at night. While you are exploring the environment, also consider practical things like access to public transportation, grocery stores, and other essentials. Remember that your daily routine will depend on how connected your new area is to your needs.

Also, compare rent prices and lease terms in each area. Some neighborhoods may offer more space for less money, while others charge premium prices because of the location. These small details can guide you in choosing your ideal neighborhood.

Set a Moving Budget

Now that you’ve gathered meaningful information about the neighborhoods you’re interested in, it’s time to set a moving budget. Without a clear budget, your expenses can quickly pile up and put a strain on your finances. To start your budget, just list all your potential moving expenses and how much you’d be willing to spend on them.

Some essential expenses you shouldn’t forget when planning your budget include your professional movers, cleaning services, and packing supplies, because these can take up a large chunk of your budget.

Be sure to get quotes from multiple companies so you can compare prices and services. Don’t be shy to ask whether those prices include other essentials like fuel and labor. It’s also important to leave some wiggle room in your budget for unexpected expenses like last-minute repairs and storage fees.

Start Apartment Hunting Early

Starting your apartment search early is one of the smartest things you can do. The earlier you start, the more time you have to compare options and make an informed decision. Rushing into a lease rarely ends well, especially in a city like NYC, because a late search could leave you stuck with an assignment you don’t really like.

Before you attend any viewing, bring the necessary documents to apply. In NYC, it’s common practice for landlords to request documents like your credit card report and proof of income. Having these ready shows that you’re serious and can help you stand above the competition because sometimes apartments are awarded on a first-come, first-served basis.

If you’re planning to see multiple places in a day, schedule your apartment viewings in advance. It’s helpful to carry along a checklist of must-haves so you can stay focused during these inspections. Remember to take notes, and if permitted, photos. You’re bound to see so many places during your search, and the details may blur together.

Decide on Your Move Date

Decide on Your Move Date

Choosing the wrong date can make your moving experience a stressful and even more expensive one. For example, when moving out of a house, if you leave too early, you could end up stuck with unnecessary storage fees.

You also have to think about the city’s traffic patterns because they can make or break your moving day. If your movers get stuck in traffic, you’ll lose valuable time and probably get charged for those extra hours lost as well. So, planning around your city’s traffic can help you enjoy a smooth move.

Another thing to confirm before you fix a date is your new apartment’s move-in/move-out policies. Many NYC buildings have strict rules about when people can move. Having an idea of these rules can help you book a time that will guarantee you and your movers have access to the building.

Notify Your Current Landlord or Building Management

Once you feel confident about your move, it’s important to notify your current landlord since most leases require a written notice. Giving proper notice helps you protect your security deposit. It also helps you maintain a good relationship with your landlord, which can be helpful if you need a reference in the future.

Some important things to include in your written notice are your rental address and intended move-out date. Be sure to ask when and how your security deposit will be returned. New York law requires landlords to return it within 14 days, but delays can happen if there’s any confusion about damages or unpaid rent.

Also, ask about the procedures for returning your keys, disconnecting utilities, and accessing the building for moving day. This proactive step will keep things organized and guarantee a smooth transition. Keeping everything in writing and following up respectfully can help ensure you get what you’re owed.

Book Professional Movers or Reserve a Moving Truck

Both options have their advantages, but it’s best to make a decision based on which one aligns best with your budget and time constraints.

NYC buildings tend to have multiple flights of stairs, and professional movers who can handle the heavy lifting can be helpful. If you’re planning a DIY move, it’s better to be realistic about how much help you’ll need and how much time you can dedicate to the move.

Before you book any moving company, make sure they are licensed and insured. Also, take the time to read their online reviews and see what past clients have said about them. Get at least three quotes from different moving companies and ask questions about what’s included in the quote. They might charge extra for lifting furniture or long carries, and some moving companies provide boxes, but many won’t, so always confirm.

Apply for NYC Moving Permits

New York is densely populated, and it’s unrealistic to think you can just pull up a truck and start moving. Depending on your neighborhood, you may have to apply for a temporary parking permit through the NYC Department of Transportation. These permits will help you legally reserve a space for your moving truck, which can help you avoid parking fines, delays, or even getting your truck towed.

If your move falls on a weekend or towards the end of the month, plan to apply for your permit in advance. You’ll be required to provide some information like your address, the duration of your move, and the size of your vehicle to process your application. Once approved, print and post your permit as needed.

Reserve Elevator and Loading Dock Time

Reserve Elevator and Loading Dock Time

NYC apartments tend to have strict building rules when it comes to move-ins and move-outs. This means you may have to reserve the loading dock or elevator in advance, especially if you’re moving into a large or shared building. These systems are in place to prevent congestion and minimize damage to shared spaces.

Reach out to both your current and new building management to find out exactly what’s required. Some buildings may ask you to submit a reservation form, pay a refundable deposit, or provide proof of insurance from your moving company. Having these details sorted out ahead of time will help your movers stay on schedule while also keeping things smooth for other tenants.

Declutter and Donate Unwanted Items

A move is the perfect time for a fresh start, and one way to go about it is to declutter your home before you start packing. You’d be surprised how much stuff you’ve accumulated over the years, from clothes that no longer fit to random kitchen gadgets.

Before you start boxing things up, sort them into four piles: keep, sell, donate, and discard. This process not only saves you time during packing, but it can also significantly reduce your moving costs. Creating an inventory list can help you track what you’re taking and what you’re giving away. Remember, the fewer items you move, the less you have to pay for packing materials, labor, and transport.

Gather Packing Supplies

Without the right supplies, packing would be a disaster. You should start by gathering moving boxes of different sizes so that you can fit in your different-sized items, from books to beddings. Bubble wrap, packing peanuts, and any other material will be useful when packing fragile items.

If you’re using cardboard moving boxes, you’ll need to get tape for extra reinforcement, as these boxes can sometimes buckle under heavy weight. To keep things organized, also get some labels and markers so that you can mark each box with its content and the room it belongs to. Now that you’ve gathered all your supplies, this is where learning how to organize moving boxes really comes in handy. Lighter boxes should go on top of heavier ones, and boxes should be stacked when loaded into the moving truck to maximize space.

Pack Smart and Label Everything

Focus your effort on being able to find what you need once you’ve arrived at your new address and not just getting everything into a box. A smart way to pack is to pack room by room, to help you maintain order throughout the packing process.

When packing delicate items like glass, use plenty of padding and avoid overstuffing your boxes so you don’t break anything. Label each box with its content and the room it should be taken to. This can be really helpful to the movers when unloading because it will guide them on what goes where.

Another way to pack your belongings is to keep a master inventory list, then pack and number your boxes according to the list. This is a great way to keep track of all your belongings, and it also helps you know what to search for if anything goes missing. There are also various ways to label your boxes when you’re moving. For example, you can label your boxes by room or content, depending on what works for you.

Prepare an Essentials Box

Prepare an Essentials Box

An essentials box should contain everything you’ll need to comfortably get by on the first day of your move before you unpack the rest of your things. This box also acts as a security measure, allowing you to keep valuables and irreplaceable documents with you and not in the moving truck.

To prepare your essentials box, think about what you’ll want access to as soon as you arrive. This should include things like toiletries, medications, chargers, a set of clothes, basic kitchen utensils, and any important paperwork. If you’re using eco-friendly moving boxes, set aside one clearly labeled as your “Essentials” container to avoid any mix-ups.

Notify Important Parties of Your Change of Address

Another crucial part of your move is updating your address. A missed notification can affect your coverage or credit history, so be thorough with this step. Start with the USPS to ensure your mail gets forwarded to your new address without interruption.

The next set of people to notify is your bank, credit card company, and insurance provider, especially if your renter’s insurance is tied to your old apartment. Don’t forget to let your employer, subscription services, and medical offices like your doctor or dentist know about your change of address.

Transfer or Set Up Utilities

Coordinating utilities might not be the most exciting part of the moving process, but without it, your first night could be frustrating and uncomfortable. Imagine arriving at your new apartment with no electricity, water, and other utilities, and it can be a turn-off. This is what makes it important to transfer or set up your utilities before moving in.

Confirm installation appointments well ahead of time, especially for electricity, gas, water, internet, and cable. Arrange for your current services to be disconnected the day after your move out and schedule your new services to begin a day before you move in.

Confirm Moving Day Logistics

As moving day draws closer, go over all your arrangements to be sure they are still in full swing. Reconfirm your moving company or truck reservation and make sure they have the correct move-in date and address. Double-check building requirements like reserved elevator time or parking permits; it’s best not to assume that your new apartment will be flexible.

You’ll also want to set aside some cash for tips if you’re satisfied with your movers’ service. Go through your checklist one last time so that you’re confident nothing’s missing. These few extra minutes of organization can spare you hours of stress later.

Do a Final Walk-through

Do a Final Walk-through

Don’t hand over the key without doing a final walk-through of your old apartment. Even with careful planning, you’d be surprised how often people end up forgetting something when moving out. Check storage spaces like your closet and cabinet because they’re the easiest places to forget things. It helps to work with a comprehensive checklist because it can prevent you from missing anything in the last minute.

It’s good practice to take a photo of your apartment before leaving, especially if you’re expecting your security deposit back. Documenting how you left the place can come in handy in case there are any disputes with your old landlord or building management. Also, clean your apartment according to your lease’s expectations. This can help you get back your deposit and create a good final impression.

Unpack Essentials First

You shouldn’t feel pressured to set up everything in one go; instead, start with your essentials box. This box gives you access to everything you’d need to keep you comfortable while the rest of the house comes together.

The first place to set up is your bedroom and bathroom, so you can rest and freshen up after a long day. Then start unpacking basic kitchen items like your pots, plates, and utensils so that you can enjoy a quick meal while you’re settling in. Once those are done, move on to high-use spaces like your closet or work desk.

Taking these small steps prevents you from feeling overwhelmed and makes the unpacking process less stressful. Plus, it ensures that your routine isn’t disrupted, even if you’ll need a couple of days to fully unpack.

Register With NYC Services (If You Are a New Resident)

If you’re new to NYC, you shouldn’t skip this step because it can help you settle in faster by connecting you to local resources within your community. One of the first things you should do is get a public library card. With it, you can gain access to events and local programs. It is a simple and effective way to start blending into your new community.

The next thing you should do is to register to vote or update your voter registration to reflect your new address. You’ll also want to notify agencies like the DMV and update tax records to match your new living situation.

Why Buy Boxes When You Can Rent in NYC

Moving in a city like NYC can be a handful, but with the right plan and boxes, it can be as easy as 1-2-3. A solid moving checklist helps reduce stress, avoid surprises, and keep your transition smooth from start to finish.

Most people assume that they have to buy their boxes to take care of their packing needs, but that’s no longer true. In a city like New York, where convenience and time management matter, renting moving boxes isn’t just a smarter choice, it’s also a more convenient one.

With Stack Moves, renting moving bins in New York has never been easier. You get clean, durable plastic bins delivered right to your door, and we’ll pick them up once you’re done. Just contact us to schedule your boxes.

FAQs

When Is the Best Time to Move in NYC?

The best time to move to NYC is usually during the off-season, between October and March. During this time, rental prices tend to be lower, and moving companies may offer better rates. If you’re really keen on saving money, February is often the cheapest month to move, thanks to low demand.

How Can I Make Moving Day Less Stressful?

Plan ahead, pack early, and use a moving checklist. Hire professional movers if you can and keep essentials like documents and keys easily accessible.

Should I Hire Movers or Do It Myself?

Hiring movers saves time and effort, especially in NYC. However, DIY moves are cheaper but more stressful. In the end, your choice should depend on your budget and schedule.

How Far in Advance Should I Book Movers?

At least 4–6 weeks before your move-in date, especially during peak seasons like summer.

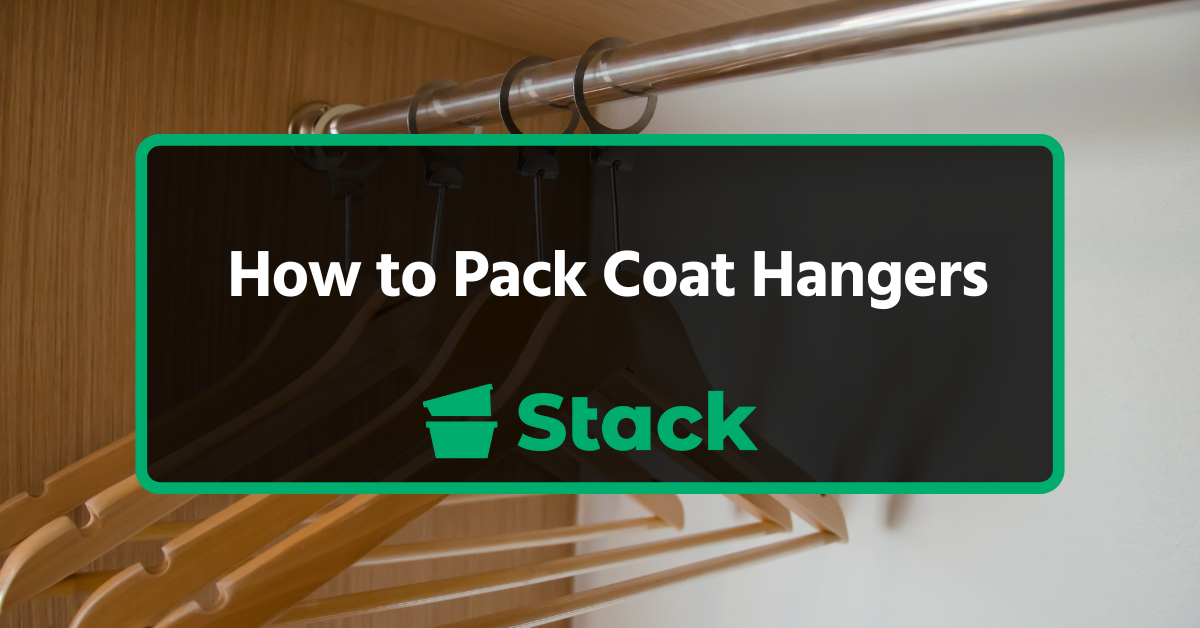
How to Pack Coat Hangers

Packing coat hangers may not seem like a big deal, but if done incorrectly, these hangers can take up a lot of space, become tangled, and create a huge mess. With a little planning, you can keep everything organized and make unpacking way easier.

To pack your coat hangers properly, align the hooks to face the same direction, then bundle them together with a rubber band, twist tie, or zip tie. It’s a simple step that can make moving day much smoother by protecting your hangers from damage.

Our eco-friendly moving bins are perfect for transporting awkward closet items like a bunch of hangers. They’re not just sturdy and stackable, but also spacious and easy to carry, making them the best choice for keeping things organized. If you’re looking for a smarter way to pack contact us to rent to your moving boxes today.

In this blog, we will teach you how to store and transport your coat hangers. We will also share tips on how to care for your hangers based on what material they’re made from.

What to Do Before Packing Coat Hangers

What to Do Before Packing Coat Hangers

Before you toss your hangers into a box, take a moment to prep them properly. Sort them by type, clean them up, and organize them to help save space, prevent damage, and make unpacking much easier.

  1. Sort and Declutter: If you’re trying to cut down clutter before a move, your hangers are a good place to start. Start by throwing out anything that’s broken, bent, rusted, or warped. These hangers are more likely to damage your clothes or other belongings. After tossing out the damaged hangers, group the remaining hangers by type, such as wooden hangers in one bundle, velvet hangers in another, and so on. Grouping your hangers like this makes packing easier because similar hangers stack better and fit more neatly into your moving containers.
  2. Clean and Sanitize: This is really important if your hangers have been at the back of your closet or laundry room for a long time. A quick rub down can go a long way because it’ll ensure that you don’t transfer dirt from your hangers to your clothes.For plastic and metal hangers, wipe them with a damp cloth and mild soap to remove dust and grime. Wooden and velvet hangers need gentler handling, so you need to use a dry cloth for wood and a lint roller or fabric brush for velvet to avoid damaging the surface.

How to Pack Coat Hangers

These packing techniques make sure that your hangers stay tangle-free and easy to unpack later.

The Bundle and Wrap Technique

The simplest way to pack your clothes hangers is to bundle them according to type, like plastic or wire, before wrapping them. Stack them on top of each other so they’re all facing the same direction, and then secure them at both ends with a rubber band or twist tie. This stops them from shifting and it makes it easier to move them.

After you’ve tied them, slip them into a garbage bag to prevent them from catching on other items. This works well for lightweight hangers like the ones made out of plastic and wire. It’s a quick, hassle-free way to start packing up your laundry room or closet without making a huge mess.

Use Garment Boxes or Specialty Hanger Boxes

Use Garment Boxes or Specialty Hanger Boxes

Some clothes are better packed hanging, like suits, delicate shirts, and blouses, so that they can stay wrinkle-free. To pack your clothes hanging, you can either use a garment box, popularly called a wardrobe box, or a specialty hanger box. But you can also use these to pack your hangers alone.

Garment boxes come with built-in hanging bars where you can place your hangers. Specialty hanger boxes are designed in a similar way, and they offer enough depth for your padded and velvet hangers.

Pack them in a Suitcase or a Box

For a small collection of hangers, your suitcase or single box will work just fine. Lay the hangers flat, so they can fit snugly in your box. Pad them with a towel or even some folded clothes to protect them from damage and to keep their sharp edges from poking through.

This method works best for a small trip. You can also replicate this with plastic bins. They’re sturdy, stackable, and perfectly suited for awkward items like clothing hangers and even jewelry boxes.

Repurpose a Trash Bag or Large Tote

For a quick fix, you can group your hangers and slide them into a large trash bag or soft tote. Poke a small hole at the top so the hooks can stick out, and then tie the bottom closed to keep everything together. It’s easy to carry, takes up little space, and works well for light, everyday hangers.

Tips for Specialty Hangers

Tips for Specialty Hangers

Some hangers need a little extra care when preparing for your upcoming move. Here’s how to keep your specialty hangers protected:

Wooden Hangers

Wooden hangers are sturdy but bulky, and they can take up a lot of space in your closet. To pack your wooden hangers, start by securing them with a rubber band and then wrapping them in packing paper. Once secured, place them in your moving box and try to fill up the remaining space with additional materials. This prevents them from moving around while on the move and also protects them from scratches.

Velvet Hangers

To keep your velvet hangers in good condition, place them between layers of soft clothing to stop the velvet from rubbing off. Also, keep them away from moisture because any dampness can cause the velvet to peel or stain.

Metal Hangers/Wire Hangers

Metal hangers are slim and can help you save space. However, they bend easily and have sharp edges that can scratch and even damage your other belongings. First things first, secure them tightly with a rubber band or twist tie before packing them into a garment bag. You can also cover them with a towel, packing paper, or anything that can stop them from scratching other items.

Padded Hangers

With padded hangers, you can prevent wrinkles in your delicate clothing. But a downside to using these hangers is that they get crushed easily. To prevent them from getting flattened during transport, start by covering the hanger with bubble wrap, packing paper, or soft items like scarves. Then secure them with a rubber band or twist tie before placing them in a box. Fill any remaining space with packing peanuts to help prevent any shifting while on the move. This will reduce their risk of getting damaged.

How to Store and Transport Clothes Hangers

The easiest way to store your clothes hangers before a move is to bundle them up and tie them with a rubber band. You can group them by type, like metal hangers or padded hangers, then secure both ends of the hanger to prevent them from tangling. This keeps them compact and easier to manage when you start packing.

You can also store your hangers in a garment bag or trash bag by threading the hooks through a small hole. This way, their sharp edges won’t scratch any other items, and it makes them easier to carry. Some people have tried using stretch wrap because it holds everything in place and protects the shape of the hanger.

When you’re ready to move your hangers, place them in a cardboard box or plastic container. Make sure you place them flat and facing the same direction so they don’t get damaged. If you’re tight on space, tuck them between other items packed in the truck to maximize space.

Why Reusable Plastic Moving Bins Work Well for Hangers

Why Reusable Plastic Moving Bins Work Well for Hangers

Reusable plastic moving bins can be surprisingly useful for packing coat hangers. Plastic boxes are sturdy, and they can keep your bundled hangers upright without shifting around during transit. Plus, their lids also keep things secure.

Another advantage of packing hangers with plastic totes or boxes is that they are stackable. What this means is that you fill them with your hangers, shoes, and even clothes before stacking them in your moving truck. It’s a smart way to stay organized and avoid the chaos of loosely packed, awkward closet items.

Looking to Rent Plastic Moving Bins?

From bundling and wrapping to using garment bags, there are plenty of ways to pack coat hangers without creating a tangled mess. The key is to group by type, secure them properly, and choose the right container to keep everything in place.

Staying organized while packing won’t just save you space, it’ll also make unpacking in your new home so much easier. And if you’re looking for a convenient way to get it done, Stack Moves can help out.

Our sturdy plastic bins can store all kinds of items, including coat hangers. Plus, when you rent from us, we deliver them to your address, saving you time, money, and stress on moving day. Contact us to rent your plastic moving bin today.

FAQs

Can You Pack Hangers With Clothes Still on Them?

Yes, you can pack hangers with clothes still on them. This is a good way to reduce the amount of time you spend packing, and it also reduces wrinkling. You can use garment bags, wardrobe boxes, or even garbage bags with holes for the hanger hooks.

Are Wire Hangers Recyclable?

It depends on where you take them. They’re generally not recyclable through your standard recycling program, but they can be recycled at a scrap metal facility and some recycling centers. Some dry cleaners will also accept used wire hangers for reuse.

Can You Put Coat Hangers in Your Suitcase?

Yes, you can pack your coat hangers in a suitcase, but it’s important to do so correctly, or you could damage your suitcase. The best way to put coat hangers in a suitcase is to group them together and secure them using rubber bands or tape.

What Is the Best Way to Store Coat Hangers?

The simplest and most effective way to store your coat hangers is with rubber bands. Just organize your hangers into groups of 10 and then wrap a rubber band around each group to keep it in place.

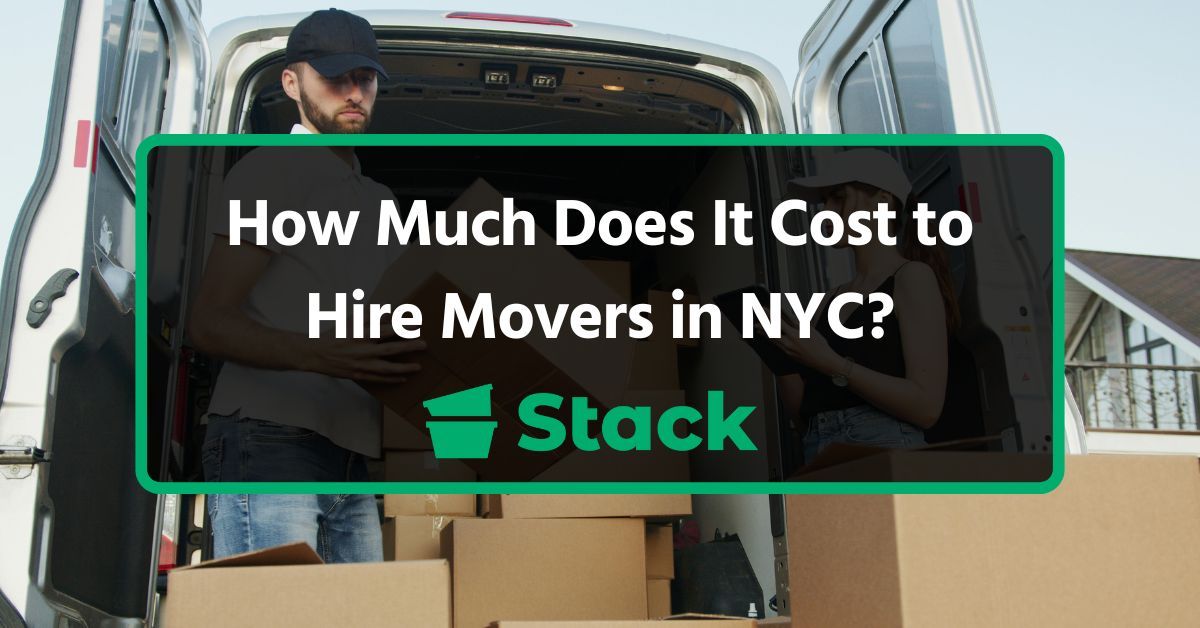
How Much Does It Cost to Hire Movers in NYC

Without a proper moving plan or realistic moving budget, New York City’s unique challenges can lead to delays, added stress, and even unexpected costs. From limited parking to long carry fees, the logistics in this city are no joke. This is why it is important to have a clear idea of what to expect, starting with how much a move usually costs in your city and factors that could influence this cost.

Hiring movers in NYC will cost you anywhere from $500 to $3,500 or more, depending on the size and distance of your move. Other factors that could influence this price include additional services and even what time of the year you’re moving.

Rather than take chances with free moving boxes, consider renting reusable moving boxes from Stack Moves instead. It’s one of the easiest ways to cut down your moving costs without sacrificing convenience or quality. Our boxes are durable, ecofriendly, and come with additional packing supplies like labels. Rent moving boxes in New York City today!

In this blog, we will break down the average cost of hiring movers in NYC, discuss factors that impact moving costs, and share tips that can help you save money.

Is It Cheaper to Hire Movers or Do It Yourself?

Is It Cheaper to Hire Movers or Do It Yourself

While moving yourself is usually cheaper, there are a few trade-offs to consider when choosing this option over using professional movers. An example of a hidden cost associated with a DIY move is how physically exhausting it is. You also run the risk of getting hurt, damaging your belongings, and losing time or money due to poor planning.

Even though hiring a professional mover may cost more upfront, it will save you time, energy, and even stress. They’re equipped and experienced enough to handle everything from packing to maneuvering tight walk-ups. They also have moving insurance, so if something goes wrong, the financial burden won’t fall on you.

At the end of the day, if saving money is important to you and you don’t mind the heavy lifting, a DIY move might work for you. But if you’d like to enjoy a stress-free moving experience, you’ll benefit from hiring professional movers.

How Much Does It Actually Cost to Hire Movers in NYC?

How Much Does It Cost to Hire Movers in NYC

Although the cost of hiring movers in NYC can vary widely, working with a general price range in mind can help you set a realistic budget.

Average Cost by Apartment Size

The size of your apartment has a direct impact on your overall moving cost. This means that beyond what you’ll pay your movers, it will also affect how much you spend on packing materials and added services. Because of this, moving larger homes, which often requires more time, a bigger crew, and sometimes even specialized equipment, tends to cost more.

  • Studio apartment: Hiring movers for a studio apartment typically starts at $500, with total moving costs ranging from $500 to $1000.
  • 1-bedroom apartment: The cost of hiring movers for a 1-bedroom apartment usually falls around $800, while the full moving cost for a 1-bedroom apartment could go up to $1,500.
  • 2-bedroom apartment: This will roughly cost you $1,100, and the total cost for moving a two-bedroom apartment can be as high as $4,000.
  • 3+ bedroom apartment: Expect to pay $1,900 or more to hire a mover for a move of this size, and anything from $4,000 for the whole move.

Local vs. Long-Distance Moves

The cost of moving out of state is much higher than the cost of moving locally, but each move has a unique pricing model.

  • Local moves (within NYC): These are charged hourly and usually involve a crew of 2–3 movers. NYC typically ranges from $200–$2,200 per hour, depending on services, time of day, and access. Expect additional costs for things like long carry fees, tight staircases, or elevator restrictions.
  • Long-distance moves: These are charged based on distance, weight, or volume. For example, a move from NYC to another state may range from $2,500+, depending on how much stuff you’re moving.
  • Flat-rate moves: Some regional long-distance moves, like to Philadelphia or Boston, may qualify for a flat rate that includes truck, labor, tolls, and basic moving insurance.

Hourly Rates for Movers in NYC

Hourly Rates for Movers in NYC

Most professional movers charge by the hour for local moves. Your final bill will depend on how long the job takes and how many crew members you hire. The average move should take about 2-4 hours at the minimum, and with 2-3 movers you should be able to conveniently move your home. Here’s a general estimate of hourly rates:

  • 2 movers + truck: $140–$180 per hour
  • 3 movers + truck: $180–$250 per hour

Flat Rates

You’re more likely to get charged a flat rate if you’re moving over a long distance or when an hourly rate is impractical. If your move includes specialty items, multiple stops, or maybe you’re moving out of state, then a flat rate is more practical.

Most flat-rate moving estimates cover labor, transportation, tolls, fuel, and basic packing materials. Be sure to ask whether there are additional services you’ll need that aren’t covered by your rental fee.

Should You Tip NYC Movers?

Yes, you should. Tipping is a thoughtful way to show your appreciation for the hard work they’ve done, especially if they did a good job and handled your belongings with care. Additionally, while tipping isn’t mandatory, it’s definitely encouraged, especially for jobs involving stairs, long carries, or heavy furniture.

A general guideline for how to tip movers is to tip 10% – 20% of your total moving bill. Cash is usually preferred because the movers can divide it among themselves on the spot. Let’s say your move cost $2,000, a $200 – $400 tip would be appropriate.

What Factors Influence Average Moving Costs in NYC

What Factors Influence Average Moving Costs in NYC

From how far you’re going to what time of year you’re moving, several variables are responsible for how much you spend on a move. Knowing what drives up your moving expenses can help you plan smarter and spend less on your upcoming move.

1. Distance of the Move

You should expect to pay more if you’re moving over a long distance (anything above 100 miles). Local moves, usually within the same borough, are usually charged an hourly rate. On the other hand, long-distance moves are charged a fixed price based on several factors. If you’re moving from another city to NYC, be prepared for fuel surcharges, tolls, and even overnight fees.

2. Size and Type of Move

Large homes usually need more labor and a bigger truck, which means more money. Because of this, moving a studio apartment will cost significantly less than it would to move a three-bedroom apartment.

Business moves also tend to be more expensive than residential moves because of the amount of specialized equipment involved, among other things. Some movers may charge a flat rate for small jobs, but most of the time, their pricing is based on how much stuff you have to move and how long it will take them to move it.

3. Time of Year / Seasonality

Spring and summer are peak moving seasons in NYC, and so prices tend to skyrocket during this period. If you’d like to shave a few dollars off your moving budget, consider moving during off-peak months like November through March.

You may also find that most reputable movers are more available during the slower seasons. However, you should keep in mind that snow or ice during winter months can still impact timing and logistics.

4. Day of the Week and Time of Day

Most people prefer to move over the weekend, which makes moving on weekends more expensive than on a weekday. However, you could enjoy lower rates if you choose to move on a weekday instead and schedule your move date in advance. Early morning moves also tend to be cheaper than late afternoon and evening moves. It also helps to avoid booking your movers at the last minute because there’s a high chance that they’ll bump up the price just to accommodate the short notice.

5. Building Access and Layout

New York City buildings have unique challenges that can influence your moving expenses. Apartments with narrow staircases and more than three flights of stairs often attract higher labor charges. If there’s no elevator, your movers will need more time and manpower to carry those items, especially if they’re heavy.

Another common challenge when moving in NYC is the limited parking access or the need for permits to legally park near your building. Be sure to always provide your movers with an accurate description of your building so they can come prepared and give you a fair quote.

6. Services Requested

The more services you request, the higher your moving costs will be. If you hire full-service movers, they’ll pack, unpack, disassemble, and even reassemble your furniture, but all this comes at a premium price.

Some companies even offer storage services for instances where you need a place to temporarily keep your belongings before you move into your new house. It’s a good idea to ask whether your movers provide boxes or other packing supplies, as this could save you time and money. If you’re looking to save money, consider packing yourself and only paying for the essentials like transportation and loading.

Local vs Interstate Moving Companies

Local vs Interstate Moving Companies

Understanding the difference between local and interstate moving companies can help you choose the right service and avoid unexpected fees.

Local NYC Movers

Local NYC movers specialize in short-distance moves within all five boroughs (The Bronx, Brooklyn, Manhattan, Queens, and Staten Island.) They usually charge hourly rates for as low as $100 per hour, depending on factors like the crew size and the services required.

Local movers often use smaller trucks and work with tight crews to navigate city streets and complex building layouts. A majority of local moves can be completed in a day, typically within a few hours.

But most local movers will charge you extra for having to deal with parking restrictions and carrying items up multiple flights of stairs.

Interstate Movers

Interstate movers are the best people to handle relocations that cross state lines, such as New York to Florida or California. Instead of charging hourly, they charge you based on the weight of your belongings and the distance of the move.

In contrast to local NYC movers, they use larger moving trucks and need detailed planning to successfully complete each move. Interstate moves also take a lot longer; some can take as long as 14 days.

It’s also mandatory for interstate moving companies to be registered with the U.S. Department of Transportation and carry proper insurance to meet federal regulations.

How to Save Money When Hiring Movers in NYC

How to Save Money When Hiring Movers in NYC

Working with movers can get expensive pretty quickly, but there are a few smart ways to keep your costs under control:

  1. Move Mid-Month and Mid-Week: Avoid weekends, summer months, and the beginning or end of the month because this is when demand is highest. Movers are often cheaper during off-peak seasons, which can significantly lower your moving price.
  2. Declutter Before Moving: The more stuff you have, the more you have to pay, so take the time to declutter before packing. You’ll also spend less time on packing and unpacking when you arrive at your new home.
  3. Pack Yourself: The convenience of hiring full-service movers costs a pretty penny, but you can save a significant amount of money if you just pack yourself. Start packing early and use what you already have, like your suitcases. Just make sure everything is labeled clearly.
  4. Compare Multiple Quotes: Instead of contracting the first company you find, contact at least three professional movers and ask for a quote. This will give you a fair picture of the average moving costs in NYC and help you avoid surprise fees like long carry charges.
  5. Rent Plastic Moving Boxes: Your first thought might be to buy boxes, but it’s a lot more affordable to rent moving boxes. For a fraction of the cost of purchasing boxes, you can enjoy sturdy, moving bins when you rent them instead.

Need Reusable Plastic Bins for Your Move?

The average cost of hiring movers in NYC can range from $200 to over $4,000, depending on factors like your apartment size and add-on services requested. Keep in mind that these are just estimates, and your actual moving cost will depend on the details of your move.

What matters more than estimated costs is how well you prepare. The best way to keep your moving costs within a comfortable range is to start planning early, compare quotes, and look for simple ways to save, like handling parts of your move yourself.

Another way to save money when moving is to rent affordable moving bins instead of buying or collecting boxes. These boxes are clean, designed to survive the rigors of moving, and can be stacked on top of each other to take up less space in your moving truck. Make your move less expensive by scheduling moving boxes for rent.

FAQs

How Can You Find Cheap Movers in NYC?

To find an affordable moving company, get multiple quotes and ask about what’s included in that quote. Also, try to plan your move outside of peak moving seasons because prices tend to soar during holidays and weekends.

How Do You Choose a Reputable Moving Company?

The easiest way to find a good moving company is to ask friends and family for recommendations. These companies have been tested and trusted by people you know, which can give you peace of mind. Also note that a reputable mover will be transparent about their pricing, offer written estimates, and won’t pressure you into paying large deposits upfront.

What Is the Average Cost of Movers in NYC?

For local moves, you can expect to spend around $500 – $3,500, but long-distance moves can cost as much as $10,000. The biggest determining factor is the size of your home, followed by the distance of the move, and the season.

How Much Does It Cost to Rent a Moving Truck?

The cost of renting a moving truck varies, but the general range is between $20 $100 a day, depending on the size of the truck and how long you’re renting for. In addition to the base price, you may also be charged mileage fees, insurance fees, and other additional charges.

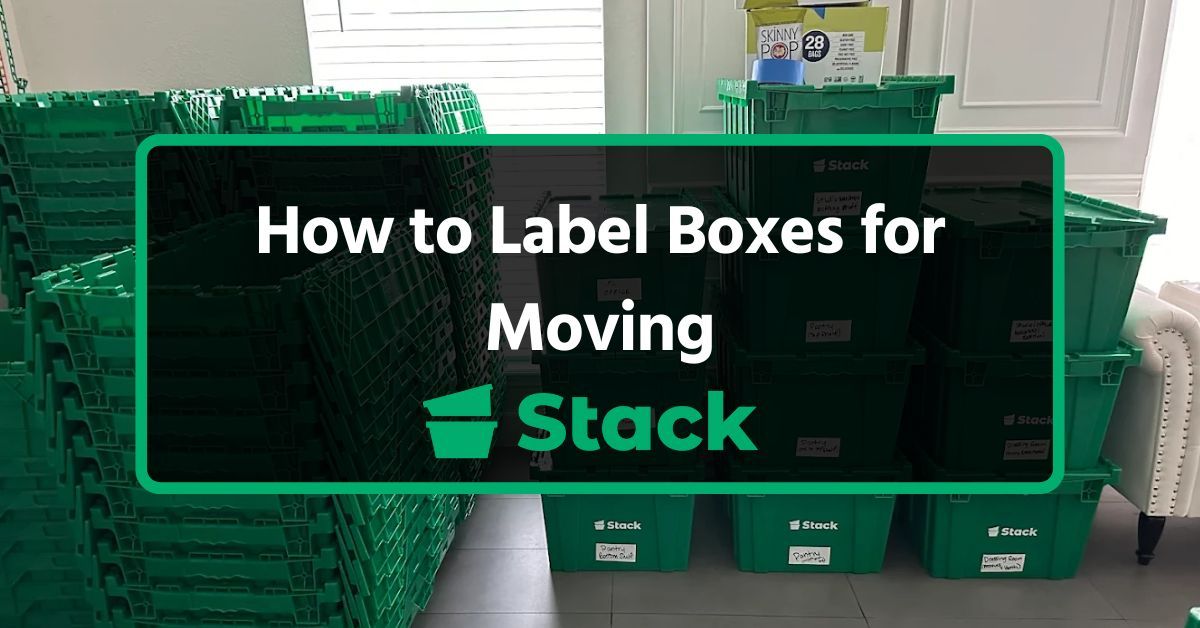
How to Label Moving Boxes Like a Pro (Step-by-Step Guide)

One of the biggest frustrations when labeling moving boxes is realizing too late that your system doesn’t actually help you find anything. The best way to label boxes for moving is to use a clear system that combines room names, box numbers, and detailed descriptions so everything is easy to track and unpack. When done right, labeling can shorten your moving time by helping you avoid the stress of digging through random boxes just to find essentials.

Stack Moves is a moving box rental company that helps make packing and organizing your move simpler from the start. With our rental bins, you don’t just get durable moving boxes, you also get labels included, so you can start packing with a consistent system from day one. If you want a simpler, more organized move without the usual hassle, contact us today to reserve your bins and get started.

In this guide, you’ll learn a step-by-step method to label your boxes quickly and unpack without the usual stress.

Step-by-Step Guide to the Best Way to Label Boxes for Moving

Stack Moves reusable moving box rental service

The key to labeling boxes is to create a method that helps you quickly identify, track, and place every box without second-guessing. Follow these steps to label your boxes efficiently and make both moving day and unpacking far more manageable.

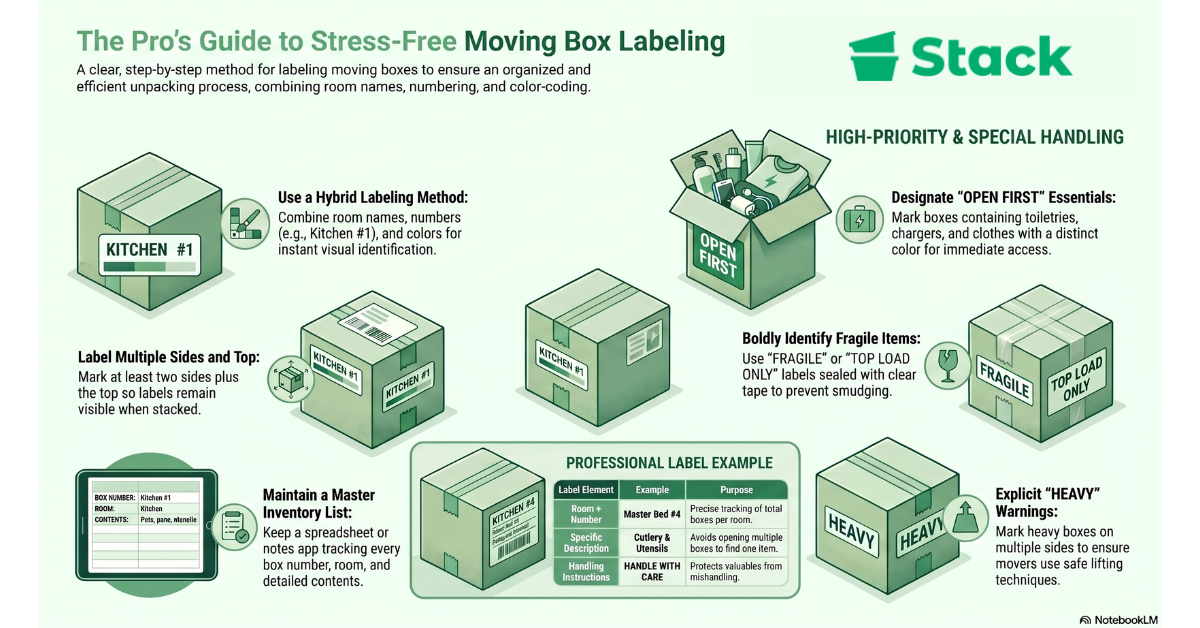
1. Choose a Labeling System

Before you even touch a box, decide how you’re going to label everything. You can label by room, use colors, assign numbers, or combine all three. Keep in mind that it’s important to stay consistent from the very first box to the last. Most people find that a hybrid system works best, for example, labeling by room, adding a number (Kitchen #1, Kitchen #2, etc.), or using a color for quick visual sorting. This way, even if one part of the label isn’t clear at a glance, something else will be. That extra layer of clarity makes it easier for your movers to load and unload

2. Assign Each Box a Room and Number

Every box should have a clear destination. Start by writing the room it belongs to, then assign it a number so you can keep track of how many boxes belong to that space. This becomes especially useful when you’re unloading. If you know there are 12 boxes for the bedroom and only 10 show up, you’ll catch the issue immediately instead of days later. It also helps movers place boxes correctly without constant direction, which speeds everything up, especially when you already know how many boxes you need to move ahead of time.

3. Write Clear, Detailed Descriptions

A label that just says “kitchen” isn’t doing you many favors once you start unpacking. Instead, take a few extra seconds to write what’s actually inside, like “cutlery or cooking utensils” rather than something vague. You don’t need to list every single item, just enough detail so you know what to expect when you pick up that box later. This becomes incredibly helpful when you’re looking for something specific and don’t want to open five different boxes to find it.

4. Label Multiple Sides of Each Box

It’s tempting to label the top of a box and move on, but once boxes start stacking up, that label disappears. Adding labels to at least two sides, along with the top, means you’ll be able to identify boxes no matter how they’re positioned. You won’t need to rotate boxes or dig through stacks just to figure out what’s what.

5. Create a Master Inventory List

As you number your boxes, keep a running list of what each one contains. Your inventory list can be as simple as a notes app or spreadsheet, but it should include the box number, room, and a short description of what’s inside. If something goes missing or gets delayed, you’ll know exactly what you’re looking for instead of guessing. It also makes unpacking more intentional since you can prioritize certain boxes instead of opening things at random.

6. Mark Priority & Special Boxes

Not all boxes should be treated the same, and your labels should reflect that. Set aside boxes that contain essentials, fragile items, or anything heavy, and mark them clearly so they stand out right away. Something like “OPEN FIRST” or “FRAGILE” should be bold and easy to spot, even from a distance. This helps prevent delicate items from being mishandled and makes sure you’re not digging through everything just to find your toothbrush or phone charger on the first night.

Why Labeling Boxes Properly Makes Your Move Easier

Why Labeling Moving Boxes Matters

Labeling moving boxes is important to easily identify items, reduce stress, save time, and protect fragile items for easy identification when moving. Without a clear labeling system, you end up opening multiple boxes just to find one item.

One of the simplest ways to make labeling more effective is to use a color-based system alongside clear written labels. Assigning colors to different rooms, like blue for the kitchen or yellow for the bedroom, helps movers place boxes faster without needing constant direction. When combined with short descriptions and room names, it creates a system that’s easy to follow even in a rushed, moving environment.

The challenge is that most people underestimate how many boxes they’ll need to label and how many supplies that actually takes. That’s where Stack’s moving box rentals help simplify the process. When you rent from us, you get durable boxes along with the right labeling materials, so you’re not scrambling for extras mid-pack.

Tools and Materials Needed for Labeling Moving Boxes

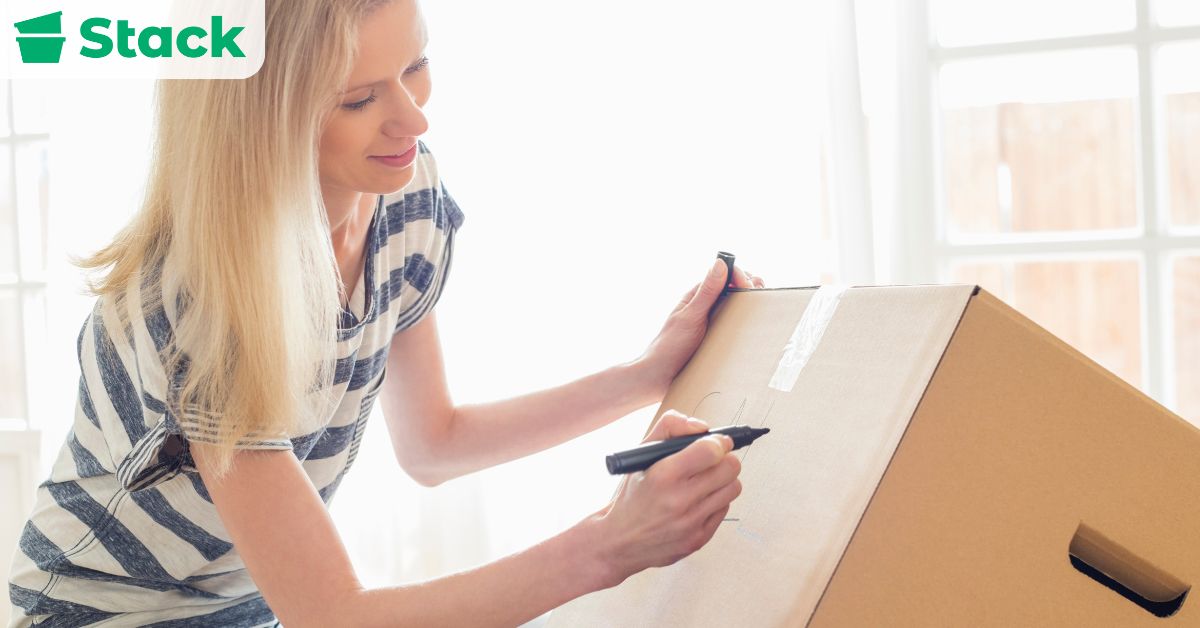
Start with the basics, a good permanent marker for clear, bold writing. Also get some labels or stickers that give you space to include the room, box number, and a brief description of the contents.

From there, you can build a more efficient system with a few extras. Colored tape or color-coded labels are useful if you’re assigning different colors to different rooms, while a tape dispenser helps you seal and reinforce labels so they don’t peel or smudge during the move. If you prefer a more structured approach, printed labels or templates can help keep everything consistent across all your boxes.

Best Practices for Labeling Moving Boxes

Start by sticking to one clear format across all your boxes, whether that’s “Room + Number + Description” or a variation that works for you. When every label looks and reads the same way, it becomes much easier to scan, sort, and unpack without second-guessing anything. If you want to take things a step further, learning how to organize moving boxes can also help you create a system that works before, during, and after the move.

Clarity matters just as much as consistency. Use bold, easy-to-read writing or printed labels, and avoid cramming too much information into a small space. A label should be readable from a few feet away, especially on a busy moving day when boxes are being moved quickly.

Placement is another detail that’s easy to overlook but makes a big difference. Always label more than one side of the box, along with the top, so you can identify it no matter how it’s stacked or carried. This saves you from having to turn boxes around just to figure out where they belong.

Finally, make sure your labels actually last through the move. Smudged ink or peeling labels can undo all your effort, so it’s worth using quality markers and sealing labels with clear packing tape. A few extra seconds here ensures your system holds up from packing to unpacking without falling apart halfway through.

How to Label Different Types of Items

How to Label Boxes for Moving for Maximum Efficiency

While your overall labeling system should stay consistent, certain items need extra clarity so they’re handled properly and easy to find when you need them. It goes without saying that these small adjustments based on what’s inside each box can save you a lot of time and prevent costly mistakes once everything is in motion.

Fragile and Valuable Items

Fragile items need to stand out immediately, not blend in with everything else. Use bold labels like “FRAGILE” and add simple instructions such as “Handle With Care” or “Top Load Only” so there’s no guesswork when the box is being moved. Using a bright, noticeable color can also help these boxes catch attention quickly, especially during a busy move. To make sure the message doesn’t get lost, seal the label with clear tape so it stays visible from start to finish.

Frequently Needed Items

For items that you’ll need immediately upon arrival, you should label the moving boxes as “essentials” or “open first.” These might include things like toiletries, chargers, a change of clothes, or basic kitchen items. Giving these boxes a distinct color or marking makes them easy to spot, even in a room full of boxes.

Heavy and Large Items

Heavy boxes should be labeled in a way that helps people handle them safely. Clearly marking them as “HEAVY” makes it easier for movers or helpers to approach them with the right care from the start. Adding the label on multiple sides ensures it’s visible no matter how the box is lifted or placed. Keeping this information obvious helps prevent strain, damage, and unnecessary back-and-forth during the move.

Common Mistakes to Avoid When Labeling Boxes for Moving

It’s often the small labeling mistakes that cause the biggest headaches once you start unpacking. What looked like a quick fix during the packing phase can easily lead to confusion. That’s why it’s important to know what to avoid for an effective labeling system from the start.

Labeling Only One Side of the Box

It’s easy to write a label on the top of a box and move on, especially when you’re trying to pack quickly. The problem shows up when boxes are stacked or turned sideways and that label is no longer visible. Instead, label at least two sides and the top so you can identify each box from any angle without having to move it around.

Using Vague or Generic Descriptions

Labels like “miscellaneous” or just “bedroom” don’t give you much to work with when it’s time to unpack. People usually do this to save time, but it ends up costing more time later when you’re opening multiple boxes to find one item. Be specific enough to recognize what’s inside at a glance, even if it’s just listing the main items in the box.

Skipping a Numbering or Inventory System

Many people rely on memory or assume they’ll remember what went into each box, especially for smaller moves. Adding numbers to your boxes and keeping a simple inventory list gives you a clear way to track everything and makes unpacking far more organized.

Not Marking Fragile or Special Items Clearly

Fragile items often get packed carefully but labeled poorly, which defeats the purpose. If a box isn’t clearly marked, movers or helpers may handle it like any other box without realizing what’s inside. Use bold labels like “FRAGILE” or “HANDLE WITH CARE,” and make them easy to spot so those boxes get the attention they need.

Being Inconsistent With Your Labeling System

Switching between different labeling styles creates confusion. This usually happens when people don’t plan their system before they start packing. Pick one clear system (or a combination) and stick with it from beginning to end so every box follows the same logic.

Waiting Until the Box Is Full to Label It

A lot of people wait until a box is sealed before thinking about labeling it, which leads to rushed or incomplete labels. By that point, it’s easy to forget exactly what went inside or skip details altogether. Label boxes as you pack them so the information is accurate and you don’t have to rely on memory later.

Want a More Organized, Stress-Free Move?

The Final Double-Check Before Moving

Labeling your moving boxes properly makes the entire moving process smoother from start to finish. When every box is clearly marked with its contents, destination, and any special instructions, you spend less time searching and more time settling into your new home.

Having the right packing supplies makes labeling your boxes even easier. Our moving box rentals come with durable bins and labels included, so you can start packing with a clear, consistent approach from day one. Ready to make your move more organized and stress-free? Contact us today to reserve your boxes and get started.

FAQs

Even with a solid labeling system, there are always a few details that can trip you up once packing begins. Most of these questions come down to making your system clearer, faster, and easier to follow on moving day. Here are practical answers to help you stay organized and avoid unnecessary mix-ups.

Is Color Coding Moving Boxes Really Worth It?

Color coding moving boxes can be a game changer, especially if you’re dealing with multiple different rooms. Assigning a corresponding color to each room makes it easy for movers to quickly sort boxes without reading every label. When done right, it helps avoid confusion and keeps everything moving in the right direction.

How Do You Create a Color Key for Moving Boxes?

A color key is simply a guide that matches each room in your new house to a specific color. You can write this key on colored paper and place it on the wall or keep it on the same page as your inventory list for easy reference. This way, anyone helping with the move can quickly understand which boxes belong in which spaces.

What Is Proper Labeling for Moving Boxes?

Proper labeling means including the room, a brief description of the contents, and any special instructions on every box. This ensures that boxes are placed in the right rooms and unpacked without guesswork. Keeping your format consistent across all boxes is what makes the system actually work.

Should You Use Colored Stickers or Color-Coded Labels?

Both colored stickers and color-coded labels work well, so it really comes down to what’s easier for you to use consistently. Stickers are quick to apply, while labels can include more detailed information alongside the color. Either way, the goal is to make each box instantly recognizable at a glance.

How Do You Avoid Mix-Ups When Labeling Moving Boxes?

Mix ups usually happen when labels are unclear, inconsistent, or missing key details. Sticking to one system and making sure every box follows it helps keep everything organized from start to finish. Adding a contents list also gives you a backup reference if anything gets misplaced.

Do Professional Packers Label Boxes for You?

Yes, professional packers typically handle labeling as part of their packing process. They use structured systems, often combining numbering, color coding, and detailed descriptions to keep everything organized. This level of proper labeling helps ensure a smoother, more stress-free move.

What Should Be Included on a Moving Box Contents List?

A contents list should include the box number, the room it belongs to, and a short description of what’s inside. Keeping this list on the same page or in one place makes it easy to track everything during the move. It also helps you prioritize what to unpack first once you arrive.

Top Office Relocation Solutions to Simplify Your Move

Relocating an office can be a complex process, often accompanied by risks like misplaced documents, damaged equipment, and costly downtime. You can, however, make a stressful relocation into a smooth and well-organized transition if you use the right tactics.

Simple solutions, such as creating a detailed moving checklist, using a reliable transport company, and using sturdy moving containers, can make a huge difference in keeping your move organized and efficient.

Stack Moves helps companies move smarter with durable office moving crates designed to protect your valuable assets and simplify the packing process. Contact us today to get a custom quote for your rental or learn more on how we can support your next relocation.

In this blog, we will go over the most common challenges businesses face during a move and the practical relocation solutions you need to get back to business faster.

What to Consider When Planning Office Relocation

What to Consider When Planning Office Relocation

Anything that could potentially impact the success of your move is a factor to consider when relocating your business. Key factors include:

  • Budget and Cost Estimation

Before you start your move, it’s important to estimate how much you might potentially spend on your move. Your estimate should include moving services, packing materials, insurance, and possible downtime.

With a detailed budget, you can avoid unexpected expenses that could hinder the relocation process. It also increases your chances of reopening your business without facing any financial difficulty. You should be proactive in looking for ways to reduce your moving costs. A good place to start is to compare quotes from multiple companies and schedule your move outside of peak seasons.

  • Timeline and Planning

With a clear timeline, you can execute your move without any delays. Establish key milestones, such as lease signing, furniture installation, and moving day, to track your progress. Be flexible with your timeline in case there are any unexpected issues.

If you’re working with a commercial moving company, they may assign you a project manager to help you stay on track with your timeline.

  • Employee Involvement and Communication

For any office move to be successful, its employees have to be involved. When you keep your employees in the loop by making them a part of the planning process, you strengthen their confidence in the relocation process. Open communication also maintains productivity because it sets clear expectations of who should do what and when.

Encourage feedback and assign persons who will answer all questions regarding the move so your employees feel supported. The goal is to make your employees feel like active participants and not passive bystanders in the relocation journey.

  • IT and Infrastructure Planning

Most people consider relocating their IT infrastructure the most complex part of any commercial move. For this aspect of the move, it’s important to start planning early so that you can back up all your systems, pack, and move them without losing or damaging any data.

For moves like this, we’d advise you to partner with a commercial mover that specializes in IT relocation services to increase your chances of getting back online quickly. If you’re planning a move on a global level, be sure to align your infrastructure plan with country-specific regulations and compliance standards.

Office Relocation Solutions to Simplify Your Move

The right office relocation solutions can help you enjoy a smoother transition into your new space. From planning to transportation, we highlighted the major areas that are needed for an organized move.

Solutions for Relocation Planning

Solutions for Relocation Planning

Without the right systems in place, simply planning for a move can quickly become overwhelming. One of the simplest ways to stay on track is to create a detailed moving checklist and timeline. It’s a step-by-step guide that tells you what should get done and when.

Before the move, conduct a pre-move assessment check. This involves walking around your current office and the new office to figure out what should go where and what can be discarded or replaced. To keep everything organized, consider using project management tools like Trello or Asana

Another key part of a move is open communication. Regularly update your team about the moving plan, their responsibilities, and any changes to the move. This keeps their morale high during the transition. And lastly, build a contingency plan in case things don’t go as planned.

Solutions for Efficient Office Packing

Packing is a time-consuming task that also comes with a lot of risk, and if done poorly, it could lead to loss or damage of property. The first step to packing correctly is to use the right size moving box. A box that’s too big or too small could potentially cause damage to items packed inside.

Office moving crates are a sturdier alternative to cardboard boxes that are much better for protecting valuable items. To avoid having too many or too few boxes, use a moving box calculator to estimate how many boxes you need for a move.

The next step is to invest time in labeling and organizing boxes clearly. Label each box with its content and where it should go. You can even color-code labels by department to make unpacking easier. Use specialized packing strategies for sensitive equipment like servers, computers, and IT systems.

Disassemble large pieces of furniture when possible, and wrap fragile parts to prevent damage. For paperwork, pack files securely in waterproof and lockable containers to keep sensitive information out of reach during transit.

Solutions for Secure Office Transportation

Solutions for Secure Office Transportation

Making sure everything arrives safely should be top priority. How to ship moving boxes usually depends on the size of the office and the items being moved. So, a regular moving truck might not be suitable for all cases.

Large and heavy furniture items or equipment, like filing cabinets and conference tables, need special handling. Professional movers often have dollies and lift gates for moving these items around without damaging them.

Despite these precautions, accidents still happen. So, it’s important to make provisions for insurance and liability. If possible, work with a moving company that covers insurance, or purchase an insurance policy to cover your high-value items.

For added peace of mind, many companies now offer tracking solutions for their transports. Having a clear idea of where your shipments are at all times can help you quickly address any unexpected delays. Plan the best routes ahead of time, accounting for traffic, building access hours, and parking permits. This helps avoid costly delays on moving day.

Solutions for Furniture Assembly and Disassembly

Moving office furniture can be a hassle because of its size. With the help of professional movers, these items can get to their new location with minimal damage and in record time. If your office has any specialized equipment with custom-built installations, it’s best to work with movers who have experience handling these types of items because it prevents costly mistakes.

Before your move, work with a member of your moving team to design a furniture layout for the new office. This will save you a lot of precious time that would have been spent rearranging.

You may need some temporary storage if you are facing timing gaps between your move-out and move-in dates. Look for a secure, climate-controlled storage solution where your furniture and equipment can be safely stored until you’re ready to install them in the new space.

Solutions for Office Space Setup and Organization

How you set up your new office can impact how well your teams settle in. It helps to plan your new office layout in advance. Think about where each team should sit, your meeting spaces, and how people will move around the office.

Another thing to pay special attention to is the kind of workstations you’ve provided for your team. Ergonomic workstations that promote good posture and comfort are a must. They help reduce future health issues and improve overall employee satisfaction.

When it comes to organizing paperwork, an efficient filing and storage system can help prevent chaos. Label shelves and storage rooms clearly, and create a central system for both digital and physical files.

Plan for waste removal. Moving often generates a lot of waste, such as unwanted furniture, old files, and broken equipment. Partner with a recycling company or waste management service to responsibly dispose of anything you’re not taking with you.

Solutions for Post-Relocation Support

Solutions for Post-Relocation Support

People usually say, It’s not over until it’s over. In moving, it’s not over until everything’s unpacked. After your move is completed, address issues that popped up, like missing items, damaged furniture, or technology that isn’t working.

A simple yet effective way to do this is to gather feedback from employees about the move. Use surveys or casual check-ins to find out what worked well and what could be improved for future relocations.

You’ll also want to provide ongoing IT support to troubleshoot tech problems like setting up hardware. And to help your team adapt to the new space, host orientation sessions or tours to help everyone feel at home and learn where everything is.

Solutions for Tech & IT Infrastructure Relocation

First, invest in tools for managing IT assets like trackers that can tell you the location and condition of your tech to prevent loss or damage during the move. To minimize downtime, schedule your IT relocation outside business hours and back up all your systems to avoid data loss. You could also opt for using temporary servers to keep your operations running.

It’s also important to keep your data safe throughout your move. Common security tips include encrypting sensitive files and using secure transportation methods. You should also consider having an IT specialist oversee the move to prevent data breaches.

Follow best practices for relocating servers and network infrastructure. Common ones are shutting down your devices properly, labeling every cable and port, and planning the new server room setup carefully.

Full Office Moving Services vs DIY: Which Is Best for You?

Full Office Moving Services vs DIY: Which Is Best for You?

When deciding what’s best for your business, it’s important to consider your timeline, the resources needed, and the complexity of your move. Many of the best corporate relocation companies offer a range of office relocation services from basic transport to full-service packages, but at a premium price. Whereas, managing the move yourself could save you money, but it requires a lot of planning and manpower to be executed successfully.

Here’s a breakdown of what both options have to offer to help you decide.

Full-Service Office Relocation Providers

Full-service commercial movers take care of everything involved in an office move, from packing your office supplies to setting up IT infrastructure in your new space. Some movers provide moving boxes alongside other necessary packing supplies, saving you the trouble of looking for them yourself.

The benefits of working with business movers include:

  • Efficiency: Experienced movers know how to navigate unexpected hurdles and tight deadlines, making even the most complex moves a breeze.
  • Expertise: You’ll be working with experts who know how to handle delicate tasks like server transfers and furniture installation, without disrupting your business operations.
  • Superior Service: A lot of commercial moving companies offer extra services that help you set up your new office as quickly as possible, like asset management and workplace setup.
  • Peace of Mind: Whether you’re moving to a new country or across town, working with a team of experts gives you peace of mind that nothing critical will fall through the cracks.

DIY Office Relocation

Small to mid-sized companies may opt to manage their moves internally. Handling your own move can offer cost savings, but it comes with trade-offs.

For starters, you’ll be responsible for planning every detail, from creating a moving timeline to coordinating transportation, while keeping daily operations running smoothly. Without the right structure and resources, it’s easy for a seemingly simple move to turn into a major disruption.

On the plus side, organizing the move yourself gives you greater control over decisions, such as the layout in the new space. Not to mention, it will significantly reduce your moving expenses.

But DIY moves come with a lot of risks. Because your team isn’t as experienced as professional movers, there’s a greater chance that someone will get hurt or something will get damaged. This is because they’ll be required to step into the roles of project managers, laborers, and equipment handlers.

If you choose to handle the move internally, you’ll need a clear moving plan, designated team leads, and resources like rented trucks, lift equipment, and sturdy boxes or totes for moving to protect your assets.

Pros:

  • Greater control over the relocation process
  • Significant cost savings, especially for short-distance moves

Cons:

  • Increased responsibility for logistics, packing, transporting, and setting up
  • Higher risk of damage, delays, or misplaced assets without professional support

5 Tips for a Smooth Office Relocation Process

5 Tips for a Smooth Office Relocation Process

These five tips will help you plan a move with minimal disruption to your business operations.

  • Tip 1: Plan Ahead to Avoid Last-Minute Expenses

Procrastination is one of the biggest causes of unexpected costs during an office move. You’re more likely to pay higher fees, get rushed service, or settle for a vendor you don’t really like when you book late.

To avoid this, create a clear relocation timeline that outlines every major task, such as booking movers and packing up workstations, and stick to it. When you plan ahead, you have more freedom and time for comparison shopping. Plus, you can secure better services at better rates.

  • Tip 2: Declutter Before You Move

One of the easiest ways to lower your office moving costs is to move less stuff. Get your team to sort through outdated files, electronics, and unnecessary office supplies before the move. Sell anything that’s still valuable, donate what you can, and responsibly discard the rest. Not only will this cut down your packing time, but it’ll also give more space to work with in your new space.

  • Tip 3: Use Recycled or Cost-Effective Packing Materials

The cost of packing materials can add up quickly, especially when you’re buying in bulk. Instead of buying everything, consider using materials you already have, like old boxes and bubble wrap from previous deliveries.

You can also choose to rent moving boxes instead of buying them. While you can choose between cardboard and plastic bins, we recommend using plastic bins because they are sturdier and more economical than single-use cardboard.

  • Tip 4: Hire Local Movers or DIY Moving Services

If your move is a short distance ( under 50 miles), it makes more sense to hire a local commercial mover because it could significantly reduce your expenses. For small teams, you may be able to handle some of the moving in-house, saving you even more on labor costs.

If you have enough hands on deck, rent a moving van or truck to save money on transportation. This hands-on approach works best for short-distance moves, where downtime can be minimized and logistics are simpler.

  • Tip 5: Get Multiple Quotes and Negotiate

Whether you run a small or big business, it’s never a bad idea to gather at least three quotes from different commercial moving companies. Carefully review what’s included in each package because some office movers include additional services like post-move cleanup.

You shouldn’t be afraid to negotiate either. Ask if there are any discounts available or bundle services to reduce costs. With a little back-and-forth, you might unlock deals that will help you save hundreds of dollars.

Searching for a Stress-Free Moving Solution?

Moving an office is a major project, but with the right office relocation solutions, it can be a hassle-free one. Every step is a lot smoother when you have the right tools, team, and strategies in place. Relocation solutions tailored to your company’s unique needs can minimize downtime, protect your assets, and help your employees settle in faster.

Our specialty at Stack Moves is providing durable, eco-friendly office crates designed to simplify office moves. Our rental solutions help businesses pack, move, and settle into their new space faster while reducing costs and stress along the way.

Ready to make your next move easier? Contact us today to get a customized quote for your office moving crates.

Office IT Relocation Services

Relocating your office is hard enough, but moving your entire IT infrastructure? That’s a different level of stress. IT relocations are arguably one of the most complex parts of a move because equipment like servers, monitors, and cables gets damaged easily if they aren’t handled properly. Which is why investing in a team that specializes in tech-heavy moves is so important.

Your typical IT relocation company will offer services like tech inventory audits, cable mapping, hardware transport, and setup support. Some even provide a dedicated project manager to oversee the process and minimize downtime.

Stack Moves prides itself on making moves safer by renting out durable, plastic moving crates. Their design protects fragile items like cables and adapters during transit. Beyond safety, these crates help you cut down on packing costs since you only pay a fraction of what it would cost to buy them. Book your moving crates today!

In this blog, we will break down the key components of a successful IT relocation. We’ll also guide you on how to safely pack your equipment and how to choose a reliable relocation partner for your move.

What Are Office IT Relocation Services?

What Are Office IT Relocation Services?

These are a specialized category of office relocation services that focus on moving your tech from one location to another. What makes them different from general office moves is that the handlers need to have a good understanding of hardware, network setup, and data protection.

A full-service provider typically helps with hardware transport, server relocation, cable management, data backup, and post-move troubleshooting. They also plan your new IT infrastructure layout in the new office and ensure a smooth switchover to minimize disruptions.

The risk level associated with IT moves is too big to ignore. One mistake could lead to days of downtime or even data loss, which is why protecting your IT systems is one of the most critical factors to consider in any office move.

What’s Included in IT Office Relocation Services?

What’s Included in IT Office Relocation Services?

There’s a lot more to it than simply moving computers and cables – key services are everything needed to set up properly at the new location. Taking advantage of professional relocation services can save you hours on your move.

IT Infrastructure Assessment

Modern office environments are filled with systems that require extra care during relocation. That’s why, before you physically move anything, your IT relocation provider will audit your current setup. They do this because they need to understand what you have and how you use it to design a relocation plan with minimal downtime.

They will also record everything you own so that nothing goes missing during the move. This step also helps you decide if anything needs upgrading or decommissioning before the move. Additionally, they will take note of any system that needs special handling or backup.

Project Planning and Coordination

Without a well-thought-out move plan, your IT relocation experience is bound to be a chaotic one. Work closely with your relocation provider to come up with a moving timeline. This timeline will factor in your company’s needs and possible disruptions that could hinder the success of your move.

Some of the best providers assign a dedicated project manager to coordinate the move and serve as your point of contact. This way, you can enjoy a move with minimal disruption to your team.

Data Backup and Security

Before you even think about unplugging anything, first make sure all your data is backed up. Experienced teams encrypt sensitive files in addition to backing up the data on critical systems so that they remain safe throughout transit.

In the event that your hardware gets damaged or your data is corrupted during the move, you can navigate it knowing that your business’s data is protected. The goal is to move your data safely while keeping it out of the wrong hands.

Network and Server Room Setup

This isn’t as simple as plugging things back in. Your IT relocation team should plan the layout for your new server room in advance. This is where they map out cables, position server racks, and work out access to power outlets.

It’s also their job to ensure that the space meets the cooling and ventilation requirements needed to keep your servers from overheating. Another thing this service covers is assessing the load on the power supply to avoid outages.

Workstation and Device Relocation

Every piece of equipment should be handled with care, whether it’s a phone or a monitor. To keep things organized during the move, clearly label your items so that they arrive at the right desk in your new space. Normally, devices should be packed using anti-static wraps to protect their screens and any other delicate components.

Once they’ve made it to the new office, the team should test each device to make sure it still works. This minimizes disruption and gets employees back to work faster.

Testing and Troubleshooting

Until everything’s up and running, the move isn’t over. A post-move check allows your provider to confirm that all systems are a go. They’ll check for things like your internet connectivity, server access, and software performance.

If anything breaks during the move or doesn’t work as it should, your providers will troubleshoot on the spot to resolve it quickly. Having an experienced team handle this step ensures your business gets back up and running with as little downtime as possible.

How to Choose an IT Relocation Provider

How to Choose an IT Relocation Provider

Start by checking their certifications, because most reputable providers will have industry credentials and a proven track record with tech-heavy moves. Always ask for references and client testimonials to see how they’ve handled similar projects. It’s also important to confirm that the company carries full insurance coverage in case of accidents or damage.

Before you sign anything, ask key questions about their experience with data center relocation, how they handle data backup and recovery, and other relevant details. Their answers will tell you how prepared they are to manage your infrastructure.

We recommend working with a team that offers comprehensive office relocation services so that you don’t have to work with separate vendors for different parts of the move.

A typical average IT relocation service quote should include project planning, packing and transport, cable management, network setup, and post-move testing. Make sure every detail is clearly outlined before moving forward.

Need help comparing providers? Here’s a list of top corporate relocation companies to start with.

How to Properly Pack IT Equipment for an Office Relocation

How to Properly Pack IT Equipment for an Office Relocation

Moving your IT equipment isn’t as simple as just tossing everything into a box. Taking the time to protect your gear reduces the risk of damage, so you can enjoy a smoother transition to your new office.

1. Use the Right Packing Materials

Electronics are sensitive, so start by gathering materials to protect them. You need anti-static bubble wrap, foam inserts, and cable ties. The real game changer is your moving container. We recommend getting plastic over cardboard boxes because they don’t buckle under pressure or get soggy if they get wet.

These plastic bins can hold just about anything, but if you’re not sure what you can or can’t pack in them, consult your moving coordinator.

2. Label Everything Clearly

A surefire way to make your move day chaotic is to skip labeling. That’s why you should label each box with its content and where it should go. Also, label individual devices and cables either with color-coded tags or masking tape and markers. Small steps like this make a difference when setting up your new office space because they save your IT team hours of guesswork when reconnecting workstations and troubleshooting.

3. Protect Sensitive Components

Components like hard drives, motherboards, and exposed ports are very vulnerable when moving. Wrap hard drives individually in anti-static material, and consider placing them in their own padded bins. For desktops or CPUs, ensure internal components are secured to prevent them from shifting in transit. If a machine has fragile ports (like HDMI or USB-C), cap them off or fill them with foam plugs to avoid damage.

4. Create an Inventory List

Before sealing up a single box, take note of what’s going in and where it belongs. This document is called an inventory list, and you can use a spreadsheet or a moving inventory app to log items by category. Number your bins and match them to your list for easy cross-checking when you unpack. This step is especially useful for large offices or shared equipment rooms where multiple teams rely on the same devices.

5. Avoid Common Mistakes

Avoid tossing all your cords into a miscellaneous box; keeping them organized will save you time later when unpacking.

There’s a low chance that your equipment will survive a bumpy road without protection, so don’t take that risk. In the same vein, we won’t advise you to skip anti-static wraps because this could lead to internal damage in your devices.

When it’s time to unpack, leaving devices unlabeled can cause delays and frustration at the new office. Plus, using cheap or worn-out boxes can cause the entire load to shift and get damaged in transit.

What to Expect During an IT Office Relocation?

What to Expect During an IT Office Relocation?

To have a successful IT business relocation, you should compile an in-depth process plan that will be responsible for moving your tech and keeping your business running safely.

Ideally, you should begin planning for your IT relocation several months in advance to allow enough time for site audits, vendor selection, and detailed coordination.

It all begins with a site audit and inventory check. Before you box up anything, the relocation team will visit your current location and the new location for an assessment. During these visits, they will also create a detailed inventory of your IT assets.

Then, they create a moving timeline with the help of your internal team. The goal is to come up with a timeline that aligns with your business operations. This is an important step for businesses that offer 24/7 support or work across different time zones so that downtime can be minimal.

Before disconnecting anything, full backups are performed, locally and to the cloud. Some businesses also opt for encrypted transport to prevent exposure during the move. Relocation support teams usually have recovery protocols in place in case of an emergency.

As moving day approaches, the packing begins. Start with using anti-static materials to protect your equipment and then placing them in durable moving crates. Every cable, every screen, and every device should be tagged so it can be reconnected without second-guessing.

Once everything is packed, the equipment is carefully transported. Vehicles are often GPS-tracked, and delivery is handled with white-glove care because of the high-value or sensitive gear involved. When your tech arrives at the new office, the team gets to work to set the place up.

Now it’s time to test everything before you go live. Every connection, from VoIP lines to internal databases, should be checked. If there are DNS conflicts or connectivity issues, they’re addressed immediately. Until everything is stable, the move isn’t considered complete.

Want to Make Your IT Relocation Safer?

Relocating your IT infrastructure isn’t something to figure out on the fly. Partnering with an IT relocation service reduces the risk of damaging anything important. And while you may not need a full-service mover, you will need the right tools to get the job done right.

Stack Moves has supported countless relocations by providing durable commercial moving boxes that are perfect for sensitive IT equipment. Don’t wait until the last minute to plan for your move. Get a quote today!

How to Plan a Successful Business Relocation

Corporate relocations involve moving your entire business’s operations from one location to another, whether it’s across town or even to a new country. Some common reasons for corporate relocations include expansion, cost reduction, or simply improving accessibility for key stakeholders. When done right, it can mark the beginning of a new phase of growth and productivity.

To successfully move your business, you need to carefully plan for every detail. It starts from choosing the right location, setting a clear moving timeline, and communicating with your stakeholders for the entire move. When you break it down into manageable steps, the process becomes far less overwhelming.

Stack Moves makes office relocations easier by providing heavy-duty office moving crates for rent. These containers are designed with convenience and durability in mind, plus each rental comes with a dolly to make moving your boxes effortless. Rather than blow your budget on single-use boxes, opt for a more cost-effective and ready-to-roll solution. Contact us to get started.

This blog post will teach you everything you need to know to relocate your business with confidence. Our relocation checklist will guide you from planning to setup, and we have included a cost breakdown to help you budget wisely.

Factors to Consider When Relocating a Business

Factors to Consider When Relocating a Business

Anything that could potentially affect how your company operates, earns, or grows is a factor to consider when relocating your business. Your business environment, the tax implications associated with your move, and even access to your suppliers are examples of things to carefully consider before signing a lease. Other important factors to always consider are:

  • Legal and Compliance ConsiderationsReview your current lease agreement to understand what’s expected of you when terminating your contract. Before you sign your new agreement, familiarize yourself with the local laws in that area to be sure your business is permitted there. There may be a need to get new business licenses or amend the current ones you have. To be on the safe side, engage the services of a legal advisor.
  • Financial Planning for Relocation – A move can have a significant impact on your cash flow, which is why it’s necessary for you to create a detailed budget that accounts for everything at the start of your move. Explore funding options outside of your profits, like relocation grants or business loans. Alternatively, look for ways to reduce costs, like downsizing unused space. Also, consider the economic incentives, such as tax breaks and subsidies, available in your new location. They could be used to offset some incurred operational costs.
  • Employee Management and Communication – Your team has a big role to play in ensuring the success of your move. Keep everyone in the loop from the start and give them all the details they’d need to understand how the move will affect their roles and commute. For a smooth transition, offer relocation support or work flexibility to reduce turnover.
  • Customer and Brand Impact – If not handled carefully, a move can be destabilizing for your business partners. Educate your business partners on how the move will benefit them, for example, more space might mean better in-person support. Update your business information across all your channels, including both online and offline channels, such as printed materials.
  • Supply Chain and Vendor Relationships – Moves tend to disrupt logistics when vendors aren’t informed on time. To avoid this, notify your vendors of your new address and update your delivery schedules well in advance. Go over your contracts to see if any changes are needed to make your relocation smoother.
  • Business Growth Opportunities in a New Location – A new location could mean access to untapped markets and emerging business hubs. You may be closer to a more talented labor pool where workforce development initiatives are prioritized. Additionally, you could benefit from tax incentives offered to new businesses in the area. See your move as an opportunity to reintroduce your services or expand your business services.

Business Relocation Checklist for a Smooth Moving Process

Without careful planning, a successful move is impossible. Our office moving checklist covers every step of the moving process, so you can enjoy a seamless move without disrupting your operations.

Determine Why Your Business Needs to Move

Determine Why Your Business Needs to Move

Start by pinpointing the reason you want to relocate your business. Are you looking for more space? Or is it a strategic way to be close to your clients? Whatever the case, knowing your “why” will guide every decision you make for the rest of your move.

Select the Best Location for Your Business

We should also mention that the right office space doesn’t necessarily mean the one that’s available. It’s important for you to carry out your research on the different areas you’re looking to rent in order to find a location that benefits your company activities. This means paying attention to how accessible the area is for your employees, suppliers, and customers, amongst other things.

Create a Detailed Moving Timeline

To avoid any last-minute chaos, you should have a well-structured moving timeline. We suggest appointing one or more of your staff as relocation managers, so that there is someone to oversee the entire process. Break the move into phases like packing, moving equipment, and set up, and assign deadlines for each task.

Set a Realistic Moving Budget

Your office moving cost isn’t limited to the moving company alone. You also have to account for professional movers, space renovations, and IT setup. Also include a buffer to cover unexpected expenses like damages, so you aren’t taken by surprise.

Notify Employees, Clients, and Vendors

Notify Employees, Clients, and Vendors

To enjoy a smooth transition, it’s crucial for you to keep communication between you and your stakeholders open. Hold meetings with your employees, clients, and everyone else who should be aware of your move to get their support.

Pack and Organize Your Business Inventory

When everything is in place, packing can be a breeze. For example, with enough boxes, you don’t have to pause your packing to gather more. A simple tool like a moving box calculator can take out the guesswork. To stay organized, sort your inventory into categories such as furniture, electronics, and documents.

Secure Packing Supplies

Protecting your property is only possible with the right materials. While cardboard boxes are common, plastic bins are more durable and stack better, which is helpful for managing space. Other packing supplies, like packing peanuts and bubble wrap, are also useful for protecting fragile items and minimizing damage during transit.

Protect IT Equipment and Electronics

These deserve extra care because they are crucial for your business’s continuity and are costly to replace. Back up all your data before you set out for your move. If possible, hire a professional IT team to handle this aspect of your move for a seamless transition.

Dispose of or Donate Unused Items

Use this opportunity to declutter your inventory. Donate or sell gently used furniture and properly dispose of hazardous materials according to your local regulations. This will lighten your load and lower your moving costs.
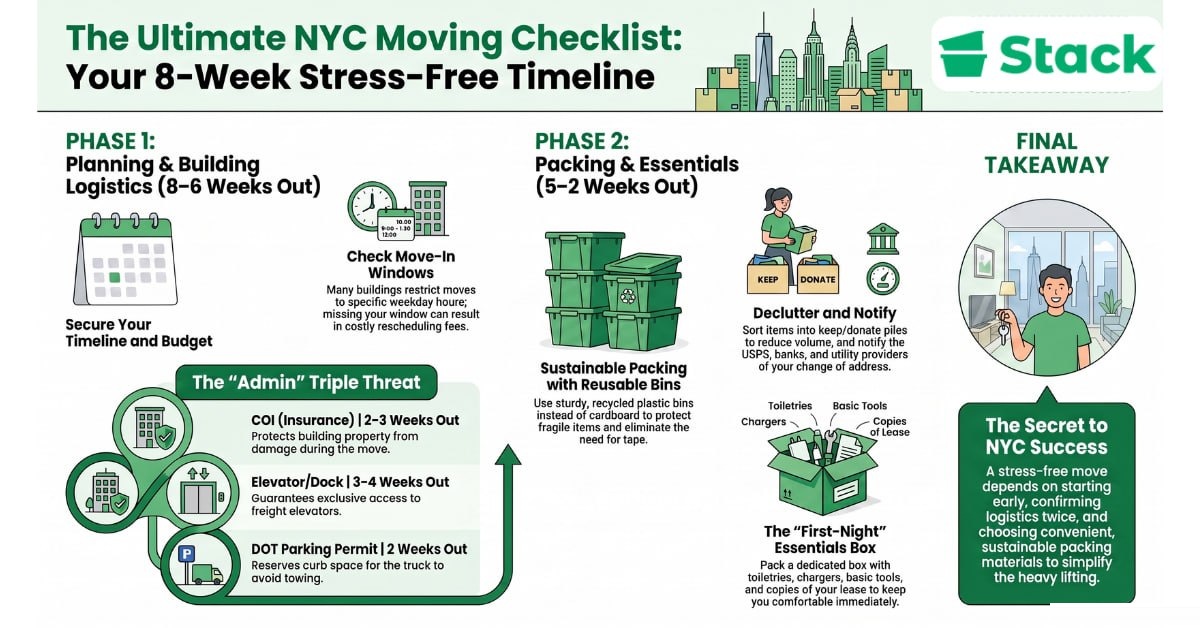
Choose the Right Moving Company

Choose the Right Moving Company

To save time and prevent damage to your property, hire experienced commercial movers. Reach out to multiple companies to get their quotes and secure the best deal. Be sure to confirm if their fee covers essentials like insurance, and also ask about their liability policies. To minimize disruptions, schedule your move outside of peak business hours.

Arrange for Safe Transportation

This should be one of your non-negotiables when relocating your business. The best way to ship moving boxes is to hire a reliable moving service. This guarantees your assets are handled with care from start to finish.

Clearly mark fragile items so that movers handle them with care, and use GPS trackers to monitor your high-value assets. Our office moving crates are built to withstand the rigors of relocation, which keeps your items safe from start to finish. Book your boxes to move with peace of mind.

Transfer Utilities and Business Services

Schedule utility transfers for your electricity, internet, and water in advance. Also, make arrangements for your new space to be cleaned by professionals before move-in day. This way, you and your team can arrive in a fully functional and conducive space from your first day.

Change Your Business Address on Official Records

Update your business address with all relevant parties such as the IRS, tax authorities, banks, insurance companies, vendors, and more. You’ll also need to update some contracts, licenses, and legal documents to reflect this change.

Organize the New Office Layout

Organize the New Office Layout

Before you move into your new office, plan your workspace. Map out workstations, meeting rooms, and other important spaces to ensure everything complies with safety standards applicable in your industry or area while remaining comfortable for your employees. This will make it easier for your team to settle in quickly and stay productive.

Reinstall IT and Communications Systems

Now that you’re in your new space, test all computers, check phone lines, internet connection, and internal network. Confirm that your data protection systems are active and that all your systems, both hardware and software, are running without issues. With this sorted, your business can reopen without any hiccups.

Hold an Employee Orientation at the New Business Location

Provide support for your employees to settle in quickly by offering a tour of the new office space. Address any concerns they may have about the relocation, such as changes in their commute time or transport costs. Use the orientation to review updated policies, emergency procedures, and facility protocols.

Promote Your Business Relocation to Customers

Once you’re all settled in, the last thing to do is to let everyone know you moved. Ideally, you would’ve informed all your stakeholders of your move before now, but after successfully moving, you still need to let them know. Update your online profiles and consider launching a campaign to encourage visits to your new address.

How to Make Packing Office Equipment Easier

How to Make Packing Office Equipment Easier

Before touching a single box, create a comprehensive moving inventory list of everything you plan to move. Take note of everything from your desks to your printers to help you stay organized throughout the move.

Label Everything Clearly – Clearly labeling your boxes will save you hours when it’s time to unpack your load. We recommend using a simple numbering system linked to your inventory list or color-coding your labels. This way, everything ends up exactly where it needs to be in your new office.

Disassemble Large Furniture and Equipment – When possible, large pieces of equipment and furniture should be disassembled. This makes them easier to move and also reduces their risk of getting damaged. Before taking anything apart, be sure to take a quick photo to make reassembly easier. A great tip to try is to store all your screws, nuts, and bolts in a labeled zip-lock bag, then tape the bag to the corresponding piece of furniture it belongs to or in a centralized container.

Maximize Space and Minimize Weight – A golden rule when packing is to keep heavy items in small boxes and lighter but bulky items in large boxes. This makes it easier to lift these boxes without physically straining yourself. Be sure to use durable boxes that can handle the weight of your items without collapsing. To make the most out of your space, fill in gaps between large equipment with small items like notepads.

How Much Does It Cost to Relocate a Business?

How Much Does It Cost to Relocate a Business?

Corporate relocations cost anywhere from $1,500 to $30,000, depending on the size of the office, the distance of the move, and the needs of your business. Businesses with specialized moving needs, such as tech companies with sensitive equipment, should expect to be on the higher end of that range or even exceed it.

Typical relocation costs include:

  • moving expenses like hiring commercial movers, trucks, and packing supplies,
  • new office setup, i.e, furniture, décor, and tech infrastructure,
  • administrative fees such as deposits, permits, and marketing updates,
  • specialized services like IT professionals, consultants, designers, etc.

Don’t forget to include hidden costs like temporary storage, employee relocation assistance, and utility installations in your plan.

Factors That Influence Business Relocation Costs

Multiple factors can affect how much you’ll spend on relocating your business, starting with the size of your company. Large businesses usually have more furniture, equipment, and even staff. This all adds to the cost of your move.

The industry that you operate in also matters. For example, healthcare providers work with a lot of specialized equipment that needs to be specially packed and transported, which adds to the overall expense.

Distance is another major cost driver. Local moves are generally more affordable than long-distance moves since they’re less likely to require multiple days of transport, temporary storage, and additional coordination.

Ready to Make Your Business Move Easier With Bin Rentals?

Relocating your business boils down to proper planning, clear communication, and making smart choices. The more prepared you are, the smoother your move will be. Don’t hesitate to consult experts, because these professionals can help you avoid costly mistakes.

Stack Moves helps you reduce costs while staying organized by offering durable and reusable office moving crates for rent. They’re built to handle the demands of commercial relocations. Plus, your rental would be delivered to your current location and picked up after your move! Contact us to get started.

Frequently Asked Questions

How Can I Reduce the Costs of Relocating My Business?

One way to cut costs is by renting reusable moving crates instead of buying moving boxes. You can also save by decluttering your inventory before the move. Scheduling your move during off-peak seasons or mid-month can help you negotiate lower rates with movers. And handle certain tasks in-house, like packing non-fragile items to reduce outsourcing expenses.

How Long Does a Business Relocation Typically Take?

This could take a few weeks to a full year. You can speed things up by planning early, assigning a relocation manager, and setting clear timelines with your vendors and team.

How Can I Minimize Downtime During a Business Move?

Start by moving in phases to keep important operations running. Then, back up your data and prep your IT team for a fast reinstallation at the new site. Clearly communicate your moving timeline with your clients and vendors, and pack non-essential items first so you’re not disrupting daily work.

How to Pack Hanging Clothes for Moving?

Clothes are one of the trickiest items to move. They’re easy to crease, wrinkle, or even lose if not packed right. To keep your clothes in excellent condition, it’s crucial to pack your clothes for moving correctly.

The best way to pack hanging clothes is with wardrobe boxes because they’re designed to keep your clothes upright and wrinkle-free. But they are bulky and take up space, plus they can be pricey too. A smarter way to pack your hanging clothes is to combine garment bags and plastic bins. When used together, they protect your clothes from dust and wrinkles while keeping them secure throughout the move.

Our rentable moving bins provide a protective and durable container, for your clothing and other delicate belongings. They’re not only affordable, but also stackable making it easier for you to pack without worry. Schedule your box rental today!
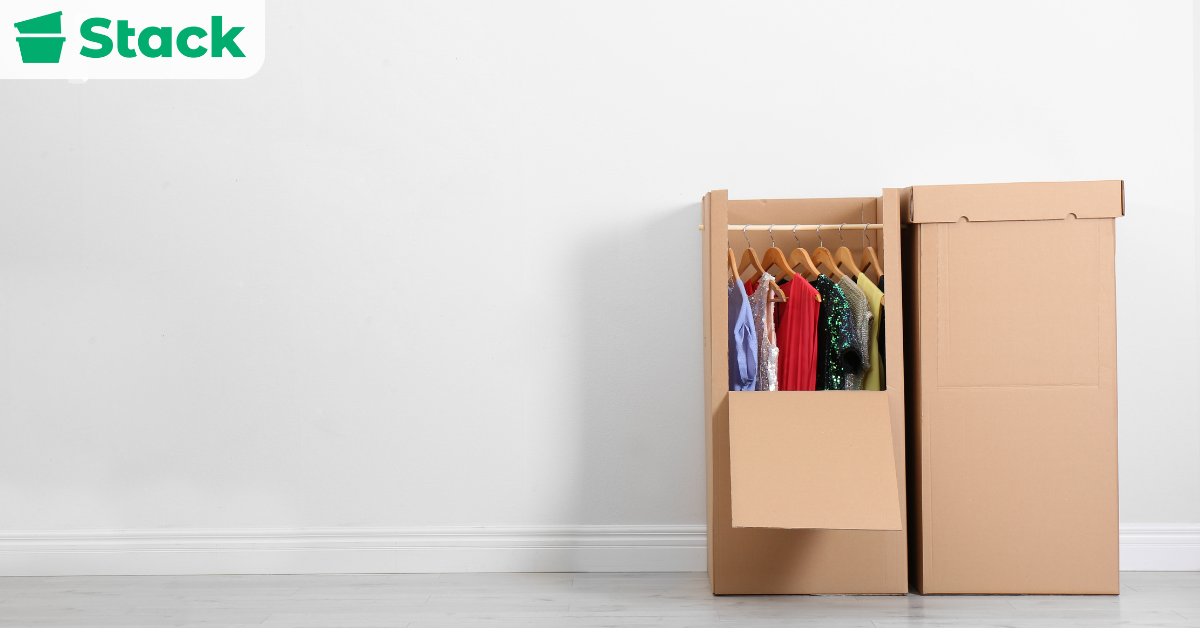
In this blog post, we will provide you with a step-by-step guide on how to pack hanging clothes efficiently. We will also talk about the best way to transport your packed clothes and unpack them safely to avoid damage.

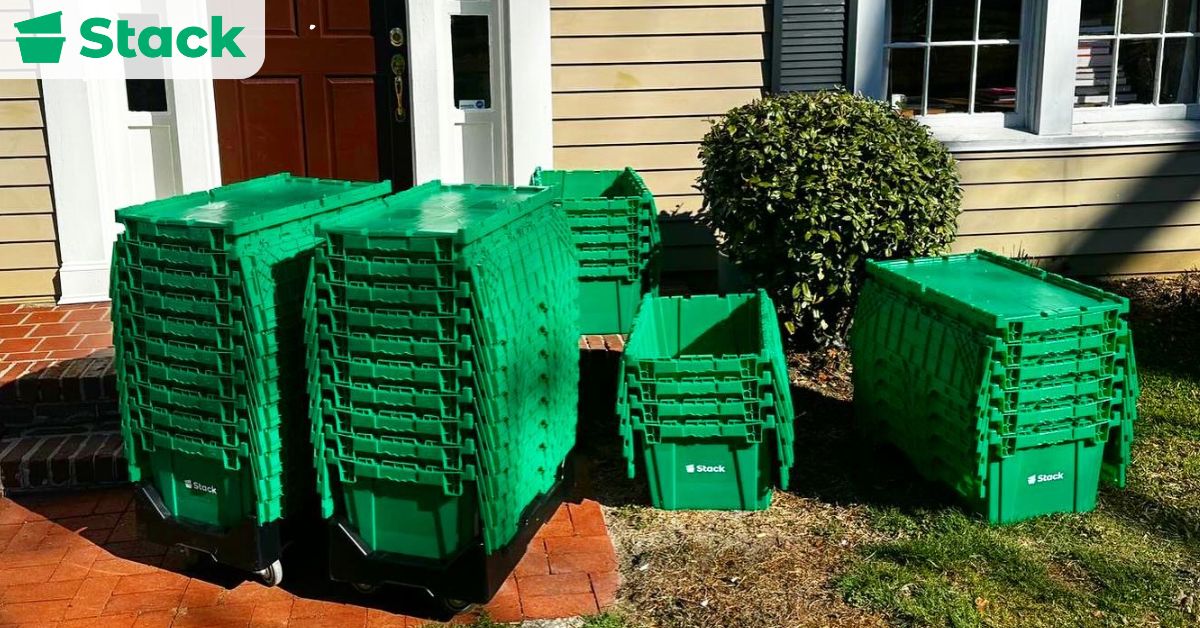
What Boxes to Use When Packing Hanging Clothes?

What Boxes to Use When Packing Hanging Clothes?

The type of box you use depends on what you’re packing and your overall packing needs. For instance, to keep your hanging clothes in pristine condition, you’d need a wardrobe box because of its built-in rod. But wardrobe boxes can be bulky and expensive.

Fortunately, you can still pack your clothes safely without hanging them. One way to do this is to roll or fold clothes into a suitcase or a duffel bag.

For an all-purpose packing solution, you should consider plastic storage containers for their versatility and reliability. At Stack Moves, we provide standard-sized bins that measure 27” by 17” at the top, 24.5” by 14.5” at the bottom, and 13” tall. If you’re not sure how many boxes you need to move, our moving box calculator can help you figure out the right quantity based on your home size.

How to Move Hanging Clothes

When preparing for a move, several factors should guide how you pack your hanging clothes. Two major things to think about are the distance of your move and the type of clothing you’re moving. Delicate items and structured garments require additional protection to prevent damage, while long-distance moves call for sturdier boxes that can withstand the rigors of moving. A final factor to consider is efficiency and convenience. Getting your boxes shouldn’t feel like a treasure hunt. Instead, they should be easy for you to source.

How to Move Hanging Clothes With Wardrobe Boxes

How to Move Hanging Clothes With Wardrobe Boxes

Wardrobe boxes are a fantastic solution for moving hanging clothes. They come with built-in hanging rods or hanger hooks that allow you to transfer your clothes directly from your closet without folding them. Because of this, your clothes remain crease-free and maintain their shape. Wardrobe boxes also protect your clothes from damage caused by dust and dirt, ensuring they arrive in the same condition they left.

To pack clothes in a wardrobe box:

  1. Start by assembling the wardrobe box according to the instructions that came with it. Ensure the box is sturdy and securely taped at the bottom to handle the weight of your clothes.
  2. Take your clothes from your closet and hang them on the rod in the wardrobe box, keeping them organized and ready to wear upon arrival.
  3. Once all your clothes are inside the box, ensure they are evenly distributed to avoid shifting. Close the box flaps and tape it securely.
  4. Finally, label the box with its contents and the room it belongs to in your new home. This will make your unpacking process easier and help movers place the box in the correct location.

Using wardrobe boxes simplifies your packing process, keeps your clothes crease-free, and ensures a smooth transition to your new house.

How to Move Hanging Clothes With Garment Bags

How to Move Hanging Clothes With Garment Bags

Garment bags come in various types, ranging from plastic to canvas to vinyl. Lightweight plastic garment bags provide basic protection from dust and are an affordable packing option. Canvas bags are more durable and breathable, making them a better option for short-term storage and transport. Vinyl bags offer the best protection against moisture and damage, making them ideal for your high-value or delicate garments.

You can pack your clothes inside a garment bag by:

  1. Choosing the appropriate garment bag based on the material of your clothes and the level of protection it needs. Valuable clothes should be stored in vinyl, while everyday wear can be stored in plastic or canvas.
  2. Keep your clothes on their hangers and slide them into the garment bags. Ensure the top of each hanger is securely hooked through the top of the bag to prevent slipping during the move.
  3. Once all your clothes are inside, zip up the bag and secure any additional fastenings, such as tying it with a string to ensure it stays closed and that your clothes remain protected.

If you are using a moving company, garment bags alone are not an ideal choice because they do not offer enough protection against the rough handling that occurs during transport. We recommend using your garment bags with plastic bins to ensure maximum protection for your clothes.

How to Move Hanging Clothes With Portable Garment Racks

How to Move Hanging Clothes With Portable Garment Racks

Portable garment racks provide easy access to your clothes during a move. They are especially great for short trips and temporary storage, allowing you to hang your clothes directly without folding them. This method helps you sort clothes easily and locate specific items quickly.

To use a portable garment rack, start by assembling it according to the manufacturer’s instructions, ensuring it is stable and secure. Then, transfer your clothes inside onto the rack, keeping them organized and accessible. Lastly, use garment bags or large plastic sheets to cover the clothes and protect them during transport.

While portable garment racks offer convenience, they are not as protective as plastic bins or boxes. They can be unstable and may not shield your garments from rough handling, making them less ideal for moves involving a moving company.

How to Move Hanging Clothes With Suitcases

How to Move Hanging Clothes With Suitcases

One of the major reasons people hang their clothes is so they remain crease-free and ready to wear. But if you can’t pack your clothes while they’re still on hangers, neatly folding them is your next best option. When done properly, this method can help you manage space and fit more clothes into your suitcase. This works for duffel bags, too. To pack your clothes inside a suitcase:

  1. Fold Your Clothes Carefully: Fold each piece of clothing neatly by smoothing out creases and ensuring they are compact. Another way to pack clothes for moving in suitcases is to roll them, leaving you with more space for more clothes.
  2. Pack Folded Clothes in a Suitcase: Lay the folded clothes in a suitcase or a large box, making the most of your space and keeping your clothes secure.
  3. Use Packing Paper: Place packing paper or tissue paper between layers to prevent wrinkles and add an extra layer of protection.

On the downside, you may not have enough suitcases to accommodate all your clothes. Fortunately, you can still apply this method using plastic bins. Plastic bins are spacious and durable enough to keep your folded clothes organized and safe during the move.

How to Pack Clothes Using the Bundle Wrapping Method

How to Pack Clothes Using the Bundle Wrapping Method

Bundle wrapping is a simple, DIY method to keep your garments together and transport them more easily. It also makes unpacking at your new place quicker.

To bundle wrap your clothes, start by gathering 5-10 hangers with clothes and grouping them together. Then wrap the grouped clothes with a sheet or towel to protect them from dust and minor damage. Lastly, secure your wrap with tape or rubber bands, ensuring it stays in place during transport. Carry the bundles directly to your car for the move.

Despite this method’s convenience and cost-effectiveness, it is not recommended if you are using a moving company. Wrapped/bundled clothes can’t withstand the rough handling associated with moves.

How to Pack Clothes in Heavy-Duty Trash Bags

How to Pack Clothes in Heavy-Duty Trash Bags

Using heavy-duty trash bags or garbage bags is a cost-effective and straightforward method to pack your hanging clothing. This method provides basic protection against dust and dirt while being easy to implement with everyday materials at home.

  1. Gather a Section of Hanging Clothes: Bundle 10-15 clothes at a time to make handling them easier.
  2. Pull a Trash Bag Up from the Bottom of the Clothes: Slide a heavy-duty trash bag up from the bottom, covering the clothes completely until the hangers are left sticking out at the opening of the bag.
  3. Tie the Bag at the Top, Around the Hangers: Gather the top of the bag around the hangers and fasten it securely. This keeps the clothes together and provides a handle for carrying.
  4. Ensure Clothes are Protected: Check that the clothes are completely covered by the bag to protect them from dust and minor damage during the move.
  5. Pack in a Cardboard Box or Plastic Bin: For added protection, place the bags in either plastic bins or cardboard boxes. This prevents the hangers from shifting during the move. The more durable option is plastic bins, especially if you’re looking for something water-resistant.

How to Pack Clothes for Any Type of Move

How to Pack Clothes for Any Type of Move

Whether you’re moving across town or to another state, packing clothes according to your move can make all the difference. Ideally, how you pack your clothes should depend on how far you’re going, how much space you have, and whether you’re packing hanging or non-hanging clothes.

How to Pack Clothes for Moving Long Distance

For long-distance moves, you can pack your hanging clothing in wardrobe boxes to keep them wrinkle-free. However, they’re very bulky and could eat up space in your vehicle. Instead, you can use plastic boxes to move your hanging clothes without worrying about space, thanks to their stackable design.

How to Transport Hanging Clothes in a Car

Place the clothes in garment bags or large trash bags and secure them with a drawstring. Then lay them flat in your car’s trunk or the passenger area. The downside to this is that your clothes could move around a lot; a plastic bin offers better stability and prevents your clothes from shifting during a drive.

How Do You Fly With Hanging Clothes

You can fly with hanging clothes by packing them in a garment bag, either in your luggage or as a carry-on, as they are sleek enough to fit in the overhead compartment. Most airlines allow garment bags as carry-ons, but check with your airline for specific size and weight restrictions. Alternatively, you can fold your clothes neatly in your luggage to save space and avoid any hassle with carry-on limits.

How to Store Hangers When Moving

Group them together and secure them with a rubber band or string, then place them in a large garment bag so they stay organized. You can also stack them inside plastic bins for easy access.

Need Plastic Bins for Rent to Pack Hanging Clothes?

A smooth and efficient move starts with the right preparation. Properly packing your hanging clothes ensures they arrive in excellent condition, reducing the stress of moving. By investing in quality packing materials, you can streamline the packing process and reduce stress on moving day. Options such as sturdy plastic bins offer a reliable solution to protect your wardrobe during transportation, especially when you need to pack non-hanging clothes.

Stack Moves provides an eco-friendly and durable solution for your moving needs by renting out plastic bins and other packing supplies. These boxes are not only sturdy but also stackable, helping you protect your precious clothes and save space. Contact us today to have your pre-assembled bins delivered to your doorstep for a stress-free move.

Plastic Bins vs. Cardboard Boxes – Which Is Best for Moving?

When preparing for a move, one of the first and most crucial decisions you’ll have to make is choosing which type of containers to pack and transport your belongings in. While cardboard boxes have been the norm for most moves for decades, plastic moving bins are rapidly becoming the better, more efficient option.

In general, plastic bins are better for moving because of their superior durability, security, and ability to protect your items from damage and moisture.

Stack Moves is your go-to rental company for sturdy, eco-friendly moving bins, perfect for residential and corporate moves. We make moving easier and more efficient with our affordable pricing. Plus we cater to over 20 locations across the U.S. Schedule your delivery today!

In this blog post, we will explore the benefits of using plastic storage boxes compared to cardboard boxes. At the end of the blog, you will have a clear understanding of the pros and cons of each in order to make the best choice for your move.

Plastic Moving Boxes

Plastic Moving Bins

Plastic containers are sturdy and versatile containers great for transporting and storing belongings during a move. They can be used for both residential and commercial relocations. Plastic bins come in different sizes, with the most common size being 27” by 17” at the top, 24.5” by 14.5” at the bottom, and 13” tall. Their steep purchase price prevents them from being a moving favorite, as they are far more expensive than cardboard boxes. This is why renting plastic moving boxes is a more economical choice. This way, you can enjoy all the benefits of using plastic boxes for a fraction of the price.

Advantages of Using Plastic Bins

One would typically opt for a plastic bin because of its durability. Compared to cardboard boxes, plastic bins provide superior protection against physical damage. Their rigid structure helps safeguard content from impact and compressive forces.

In addition, plastic bins are also water resistant. Because of this, they are ideal for moving during rainy weather or for long-term storage of items in a damp environment. Also, you can reuse plastic bins multiple times, thus reducing waste and resource consumption.

Disadvantages of Using Plastic Bins

Although plastic bins have advantages, there are also downsides to choosing them, like the initial cost. Although reusable, plastic bins can be more expensive upfront compared to cardboard boxes, which may be available for free or at a lower cost.

Another disadvantage of plastic bins is that they take up more space since they don’t fold flat like cardboard boxes. In addition, there are some environmental concerns surrounding the use of plastic bins as their production involves materials that are less eco-friendly than the recycled content of cardboard boxes.

Cardboard Moving Boxes

Cardboard Moving Boxes for Moves

Because of their versatility and availability, cardboard boxes are just as popular for both residential and commercial moves. They come in various types, from standard boxes to specialized ones like cardboard wardrobe boxes for clothing. You can use cardboard boxes to pack a wide range of items like household goods, furniture, and books.

Advantages of Using Cardboard Moving Boxes

An advantage of using cardboard boxes is that they are cost-effective. Cardboard boxes are typically cheaper than plastic tubs. You can often get cardboard boxes at a low cost or even for free from local stores or via online marketplaces.

Cardboard boxes are readily available in many stores, making them a convenient option for last-minute packingAdditionally, they are easily recyclable, making them an environmentally friendly choice for those concerned with sustainability.

Disadvantages of Using Cardboard Moving Boxes

While these boxes have benefits, their biggest issue is durability. Cardboard boxes are susceptible to tearing and can collapse under too much weight, making them less ideal for long-term storage or for very heavy items. Corrugated cardboard boxes were created to counter these durability issues. They offer added durability and are better suited for moving delicate items.

Furthermore, cardboard boxes absorb moisture. Thus, they are susceptible to water damage and cannot be used during the rainy season or in damp environments. Cardboard boxes also lack security as they must be sealed with tape and can be easy to open. They are less secure when compared to plastic boxes that come with locking lids.

Moving Boxes vs. Plastic Bins – Factors to Consider

Moving Boxes vs Plastic Bins - Factors to Consider

When deciding between moving boxes and plastic bins for your relocation, you will need to consider several factors like the nature of the items being moved, the distance of the move, budget constraints, environmental concerns, and storage requirements post-move.

When moving fragile items, it’s better to use plastic bins because they offer better protection, while large and heavy items should be packed in cardboard boxes. However, very heavy items may need the durability of plastic bins to handle the load without tearing.

Cardboard boxes are ideal for short, local moves, but plastic bins are more secure and durable for long-distance moves. While cardboard boxes are often cheaper and sometimes free, their tendency to get damaged makes them less than ideal for the rigor of moving.

From an environmental perspective, cardboard is recyclable, while plastic bins are reusable, reducing the need for continual production and disposal. Another factor to consider would be your storage needs after moving. Cardboard boxes are suitable for temporary storage as they take up less space when not in use. They are fully collapsible when empty, making them suitable for tight spaces. However, plastic bins are better for long periods. Their durability and stackability make them excellent for maintaining the integrity of stored items over time.

Cost Comparison: Which Is More Budget-Friendly?

Cardboard boxes cost $1-$8 depending on size and quality, but they are prone to damage and they may not offer the best protection for your fragile items. Plastic boxes usually cost $10-$30, and even if you need only 15 to move a studio apartment, that would bring your estimated cost to $450. This is why we always recommend renting them instead. For as low as $1.5-$3.0, you can rent a plastic bin for an entire week from rental companies like Stack Moves. This doesn’t just save you money; it also takes away the headache of dealing with storage or disposal after the move.

Feature Comparison Table | Cardboard vs Plastic Bins

Feature Plastic Bins Cardboard Boxes
Durability Won’t tear or collapse Prone to damage
Waterproof Protects against moisture Susceptible to moisture
Reusability Can be used multiple times Typically one-time use
Stackability Secure stacking, no shifting Prone to shifting and collapsing
Eco-Friendliness Durable, reducing the need to frequently replace it Recyclable but often disposed of after use
Convenience Ready to use, no assembly Requires tape & setup
Best For Hassle-free, secure moves Budget-friendly, short-term use

Tips for Efficient Packing Regardless of Choice

Tips for Efficient Packing Regardless of Choice

The best practice for packing boxes and bins starts with choosing the right size of boxes or bins. Heavier items like books should go in small boxes or durable plastic bins to prevent overloading. Lighter items can be packed in larger boxes without the risk of them becoming too heavy. Items should also be packed tightly to prevent movement. However, they should not be packed too tight to cause damage. It helps to use packing materials such as bubble wrap, packing paper, or towels to fill empty spaces and provide cushioning for fragile items.

Additionally, you should always place heavier items at the bottom of the box or bin and lighter items on top to prevent damage. For fragile items, consider using specialty cardboard boxes such as dish packs or wardrobe boxes, which provide greater protection and are designed for specific needs. It is also important to ensure that cardboard boxes are taped securely at the bottom and top. Plastic totes with lids should be closed and secured to prevent them from opening during the move.

Labeling your containers is also necessary for an easier move. To do this, use a bold marker to label every box and bin. Also, include the content and the room it belongs to. For plastic bins, you might use labels or sticky notes since markers can be less visible on surfaces. Aside from using markers, you can also decide to color code. Assign a color to each room and use colored stickers or tape to label the boxes and bins. This visual guide will help movers know where to place each container in the new house.

Additionally, pack a plastic box or bin with the essentials you’ll need on the first day in your new home. These essentials could be toiletries, medications, chargers, snacks, and basic tools. Make sure this is labeled clearly and loaded last so it can be accessed first.

Need Plastic Boxes for Moving?

How smooth or stressful your move turns out largely depends on the boxes you use for your move. Although cardboard boxes are a nice option because of their availability and affordability, they come with various limitations. Plastic bins are sturdier, weather-resistant, easy to stack, and reusable—making them ideal for both short and long-term storage.

But to avoid the financial strain associated with purchasing them, renting presents itself as the ideal solution. Stack Moves offers affordable rental packages designed to fit different move sizes. You get all the benefits of plastic bins without the hefty price tag or the clutter once you’re done. Reach out to us today! 

Rent Boxes!